
Welcome to another interesting tutorial, I’m going to show you how you can block ads on your iPhone or iPad, irrespective of whether you use Wi-Fi or the data from your network service provider.
Now unlike other methods that are explained on the web, we are not going to install any other app just to block ads on other apps that we install on our iPhone or iPad.
We are not going to install any third-party app. Instead, we are going to configure DNS manually and this is going to block ads on web browsers and also on all the apps that we install on our iPhone or iPad and use them daily.
So let’s get started and let me show you how to do it.
Steps to Block Ads from iPhone and iPad
Follow the below steps to block ads permanently from your iPhone or iPad for free.
Step 1: Visit this URL on your iPhone or iPad directly. Do not use your PC or Mac.
Step 2: Once you are on the page, you will see Method 1: Install Our App. We’re not going to install any app to block ads. Instead, we’ll go to Method 2: Configure Adguard DNS Manually. Tap on method 2.
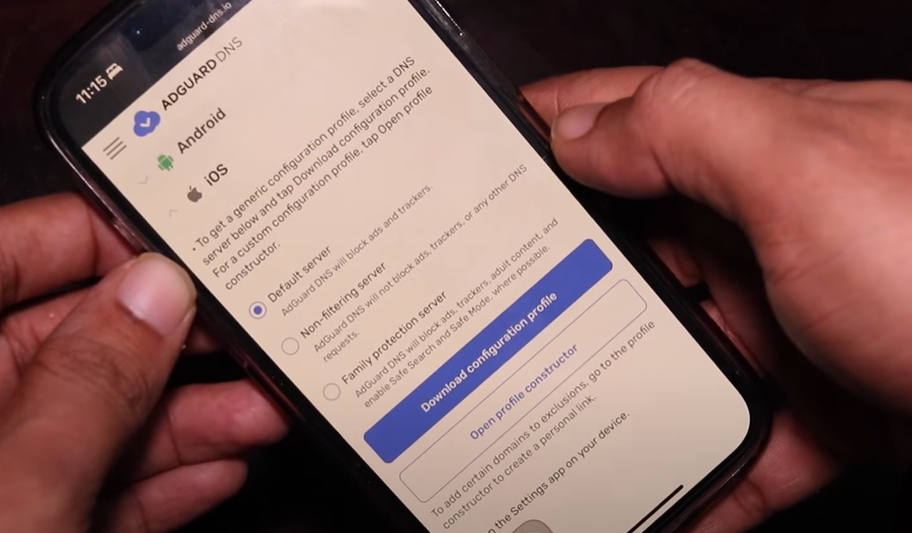
Step 3: Under Method 2, tap on iOS. You will see three different options.
Step 4: Based on your choice, you can choose any of the three. But we would recommend the Default Server option. So just tap on that and then tap on the Download Configuration Profile Now button.
Step 5: You will see a prompt that says Configuration Profile Available ‘This website is trying to download a configuration profile.’ You have to tap on Continue.
Step 6: This will open another page and it will display a popup that says This website is trying to download a configuration profile ‘Do you want to allow this.’ Tap on Allow.

Step 7: The next message you will see is Profile Downloaded Review the Profile in the Settings App. Tap on close and go back to Home Screen.
Step 8: Find and tap on Settings.
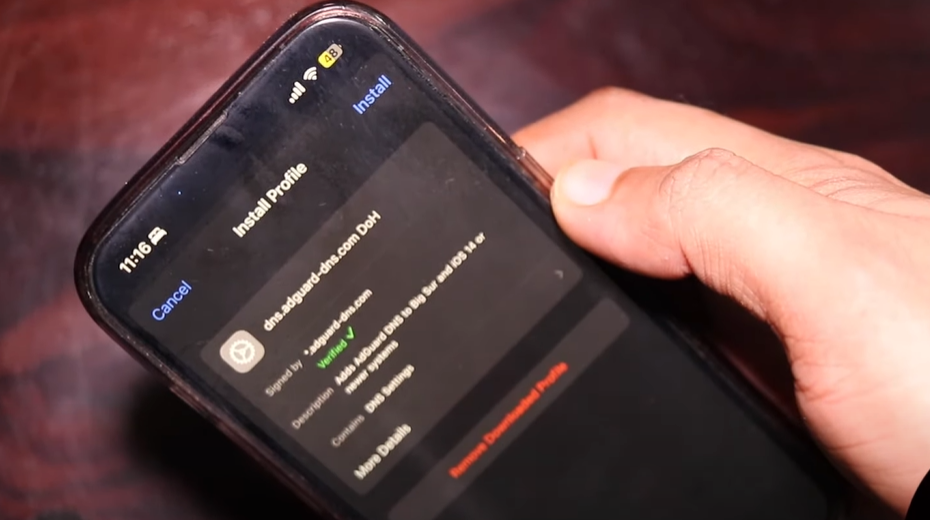
Step 9: You will see a new option that says Profile Downloaded at the top. Tap on it and now you will see the option to install the profile. So tap on Install > enter the security pin and then tap Install > Install. This is going to install this DNS profile on our iOS device.
If you’re using an iPad or iPhone, the steps will remain the same. You will see the same options.
Step 10: Once the profile is installed, tap on Done and that’s it. That’s all you need to do. To make sure that the changes take effect, turn on the Airplane Mode and then disable the Airplane Mode after a few seconds.
Now this is going to reset all our connections now any connection made to the internet will go through this DNS and ads/trackers are effectively blocked from your iPhone or iPad.
Watch the Video Guide to Block Ads on iPhone and iPad (iOS Devices)
Final Words
If you go to any site that displays a popup or too many ads, you will see that the ads are gone. No ads at all, no popups nothing at all. You can try this before installing the profile and after installing this Adguard DNS profile.
So that’s how you block ads on your iPhone or iPad. As you saw, it’s very simple, easy, and convenient. By blocking ads you are not going to save a lot of bandwidth but you are also going to get rid of trackers from tracking you and showing you targeted ads. We hope you found this guide helpful. If you did please visit our YouTube channel and subscribe now for more such quick video guides.