Android x86 has taken a giant leap and organisations like Jide are working to make Android OS for PC’s with desktop-style interface to Android. With the help of Android-x86, Remix and Phoenix OS are being developed for the x86 and x64 PC’s with Intel processors. And i must say they have already achieved a lot in terms of performance and the GUI. You now can use the desktop-styled Android OS on your PC by installing either Phoenix OS or Remix OS and in some cases, both. Jide corporation has also released the Remix OS Player which is a Android emulator and trust me, it’s the best. I have tried many emulator like Bluestacks, Andyroid etc., but none of them stands a chance against Remix OS player. But today in this guide, we will talk about how you can install PC-Styled Android OS with Windows or Linux OS. We will also show you how you may create a portable Android OS USB stick that you can carry around and use it on any PC. So let’s start,

Install Remix OS on x86 or x64 PC with Windows or Linux
It’s really easy to install Remix OS on any PC or Laptop running Linux or Windows 7,8 or 10 OS. The recent release of Remix OS is powered by Android 6.0 Marshmallow. There are few requirements for installing Remix OS on any PC which are a PC running Windows OS with atlease 1GB RAM and 16GB of HDD space for Remix OS installation.
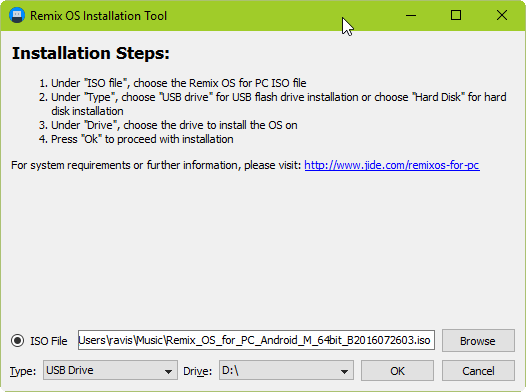
Step 1. First Download the Remix OS from this link and extract the files from the compressed folder. You will get two files: Remix OS ISO and Remix OS installer Tool.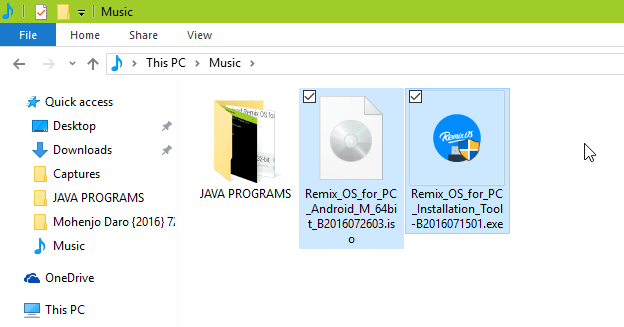
Step 2. Now Run the Remix OS installer program as Administrator.
Step 3. Next, browse and choose the Remix OS ISO file that you extracted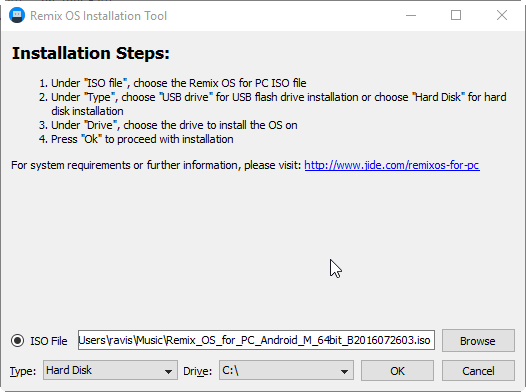
Step 4. Finally, choose the HDD partition where you want to install Remix OS and hit “OK”.
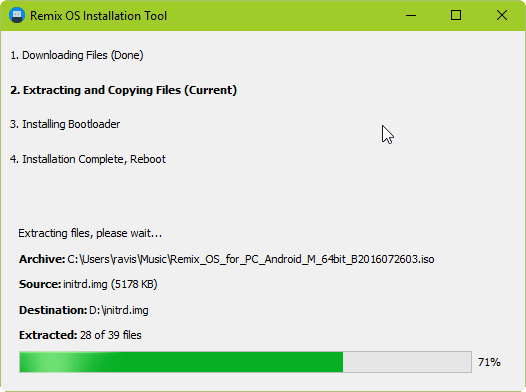
The installer tool will start writing all the files on the HDD partition you chose and once it finished, reboot your PC. When your PC will start, you will see two options to boot from, Windows or Remix OS. You may choose Windows to boot Windows OS or Remix OS to boot Android OS whenever you want.
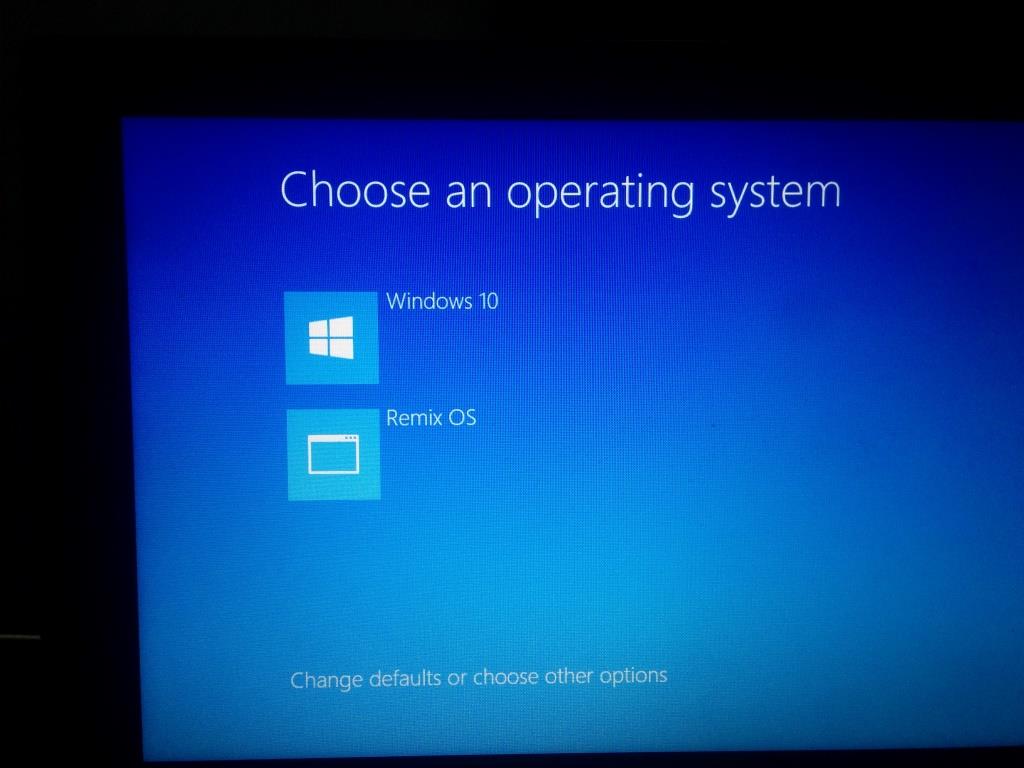
You just created a Dual boot PC which can boot Windows and Android OS. You may also add Phoenix OS to this and then you will have three different OS options to choose from. There is a HACKED/Modded version of Remix OS which is available for installation. We also recommend you to read How to Dual Boot Remix OS Hacked Version with Windows 7, 8 or 10 or Linux.

Remix OS comes with UEFI and Legacy support. Find more details about Legacy and UEFI support on how to Dual Boot Remix OS with Windows OS – UEFI / Legacy Support page.
How to Install Remix OS on a USB 3.0 Pen Drive
Firstly, you will need a USB 3.0 flash drive that supports FAT32 format with a minimum capacity of 8GB (16GB is recommended with writing speed of atleast 20MB/s for a smoother experience). You may buy one from http://amzn.to/2dd15EI and a PC that supports boot from USB.
Step 1. First Download the Remix OS from above given link.
Step 2. Now Run the Remix OS installer program as Administrator.
Step 3. Next, browse and choose the Remix OS ISO file.
Step 4. Format USB 3.0 drive in fat32. Then, choose the USB 3.0 drive letter in which you want to install Remix OS and hit “OK” and “OK” again.
That’s it, now you have a USB pen drive with Android 6.0 Marshmallow based Remix OS that is portable ad can run on any PC, even the old ones. To boot Remix OS from USB drive, you just need to choose USB as a boot drive from your system BIOS or by using boot menu key commonly F8, F10, Del key or you may Google to find “boot menu key for LAPTOP NAME or MOTHERBOARD NAME”. Enter this line in Google search and find the boot menu key. My laptop has F8 key assigned as Boot menu key. And choose USB drive using Arrow keys and hit enter to boot Remix OS from Pen Drive.
Now you will see two options,
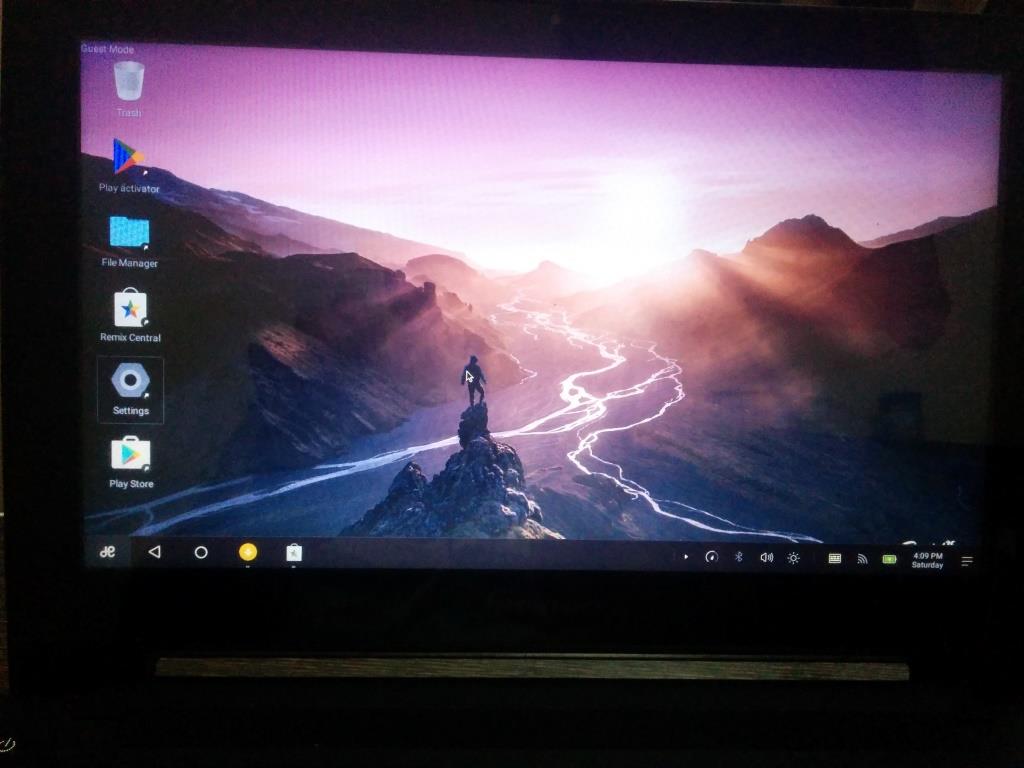
- Guest Mode: Any changes you make will not be saved, it runs as a live CD. Any app installed, will need tobe installed everytime you boot in Guest mode.
- Resident Mode: All data will be saved and any changes you make will be saved.
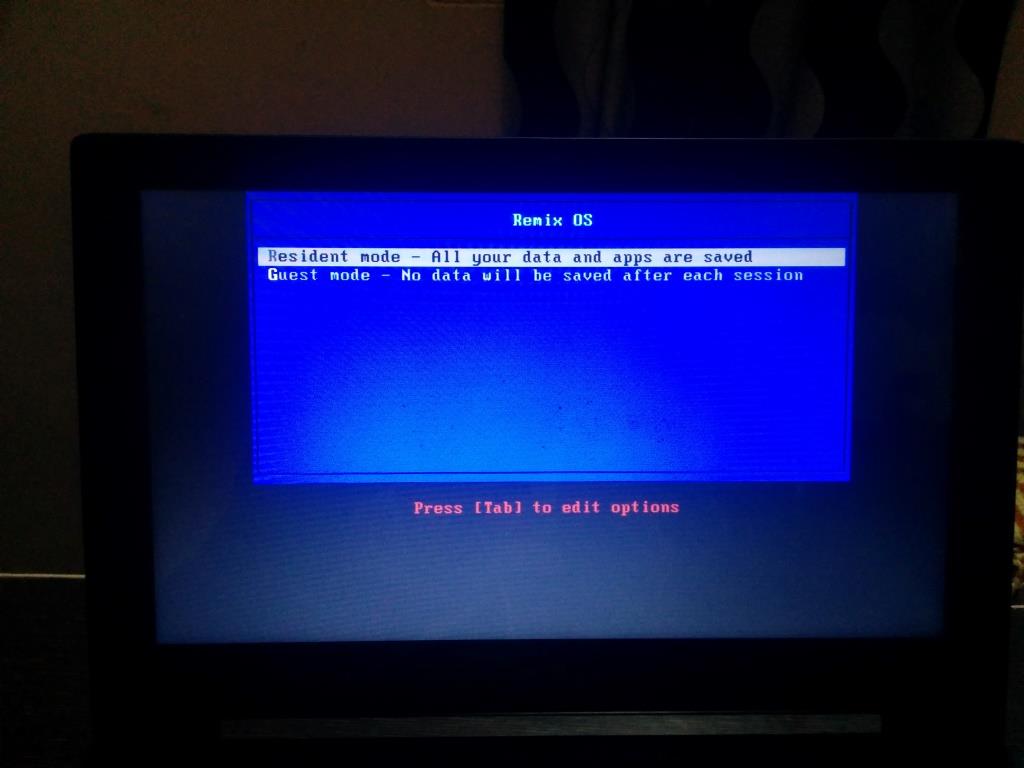
Guest Mode and Resident Mode in Remix OS
Guest mode boots faster while Resident mode takes time to boot but is good as apps and files installed or stored will be saved and you may use and access them next time you boot Remix OS on any PC. Also See Installing Google Play Store on Remix OS based on Android x86
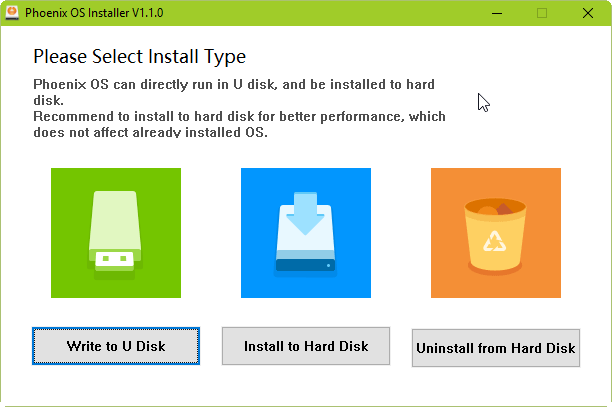
How to Install Phoenix OS with Windows and Remix OS
Phoenix OS has just released the new version v1.1 which comes with loads of new additional features like
- Root permissions support
- Ethernet Settings
- Keyboard Mapping Setting
- Resolution Adjustment function
- Support for Graphic adapter (GTX700/800/900 series) and many more.
Phoenix OS seems to be much more regularly updated than Remix OS, making it more stable and compatible. I have found that there are less issues on my device when using Phoenix OS instead of Remix. But this will vary from PC to PC. It also depends on small changes and the user likes. But still both are still under development stage, there are bugs and do not support every functionality on different systems.
You may download Phoenix OS v1.1.0 from here: Keepshare
To install Phoenix OS on PC with Windows and Remix OS, you first install Remix OS on your PC and then install Phoenix OS. To know more about how to install Phoenix OS on PC, follow this guide How to Dual boot Phoenix OS with Windows.
I hope you enjoyed this guide, for more updates on Androidx86, Remix OS and Phoenix OS, please susbcribe to our newsletter or follow us on Also Like or follow us on Facebook and Twitter for instant Tech Updates. Also Subscribe to Techposts’s new Hindi YouTube Channel dedicated to How to tech guides in Hindi version.
Great post Ravi. I also like Android on pc