Installing Remix OS on HDD using Ubuntu (Linux OS)

Installing Remix OS on HDD using Ubuntu (Linux OS)

by Ravi Singh
17 comments 47 views
Install-Remix-OS-Android-Marhsmallow-on-Linux-or-Windows-PC-1-1

Remix OS is “re-designed” Android with partnership with Android-x86 which works on PC and has loads of features such as better multitasking, Windows shortcuts, etc. The Android-x86 based installation was complicated and was not PC friendly. Whereas Remix OS is completely made for true Android experience on a PC. In our previous post we shown you How to Install Android Remix OS on Windows Laptop or PC. Following the same today we are going to show you how you can install the Remix OS on Ubuntu or Linux PC (Dual-boot). So let’s get started.
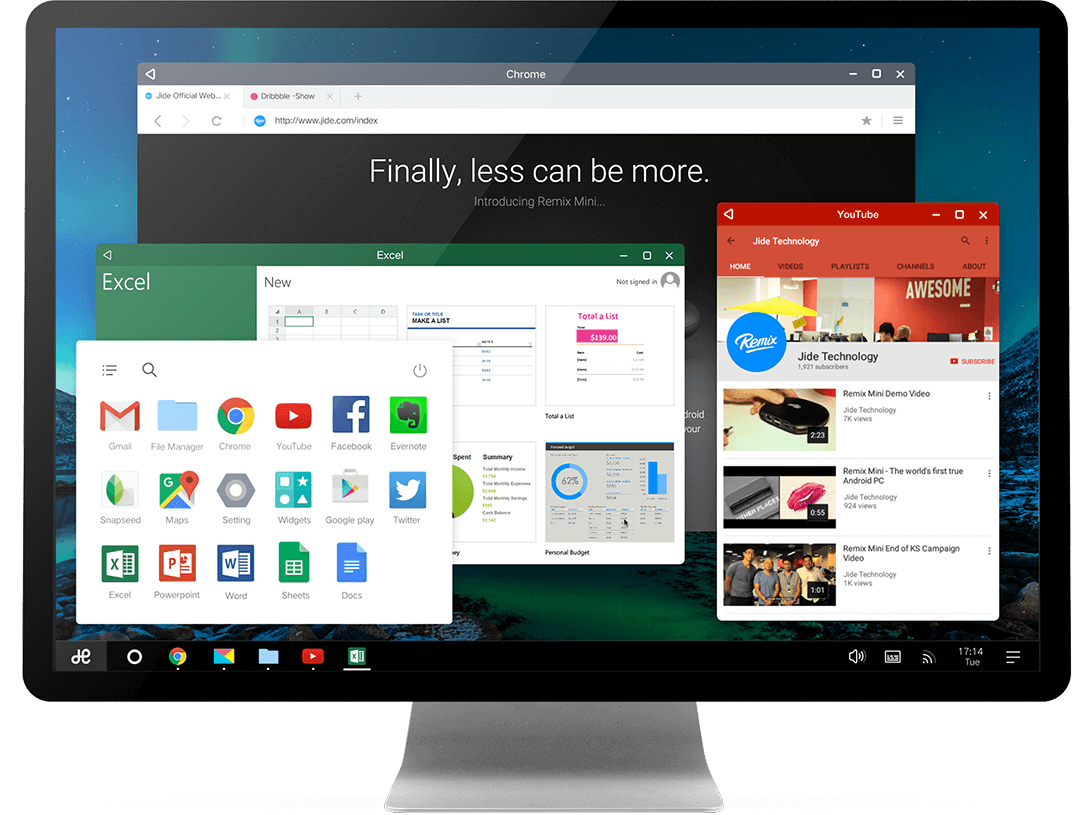
Android Lollipop based Remix OS for Desktop Windows and Ubuntu PC

Android Lollipop based Remix OS for Desktop Windows and Ubuntu PC

Install Remix OS With Ubuntu:

  • To install Remix OS on HDD with Ubuntu, you will need Remix OS iso file and Ubuntu installed on PC.
  • Download the Remix OS image ISO file.
  • First of all, create folder called “remix” (without quotes) in / directory on Ubuntu
  • From the Remix ISO/IMG, put the following files under /remix: initrd.img, kernel, ramdisk.img, system.img
  • Make a directory /remix/data
  • Now that you’ve got Remix OS on HDD, you must add it into GRUB menu to boot. To do this, open terminal in Ubuntu and type following command,
gksudo gedit /etc/grub.d/40_custom
  • Then, you’ll be prompted to enter root password, so just type it in. Then you’ll get a window with some texts in it. Add the following code at the end of the text:
menuentry 'Remix OS' --class android-x86 {
        insmod part_gpt
        search --file --no-floppy --set=root /remix/system.img
        linux /remix/kernel root=/dev/ram0 androidboot.hardware=remix_x86_64 androidboot.selinux=permissive CMDLINE
        initrd /remix/initrd.img
}
  • Then run the following command to update GRUB configuration in terminal:
sudo update-grub

Finally once again type in root password and you have Remix OS installed on HDD. It can be seen in GRUB menu ( a menu in GRUB called Remix) from where you can boot Remix OS and Ubuntu. The way I’ve done it here, Remix will share storage with Ubuntu, but will be unable to see the contents outside of /remix/data. If you prefer, you can pre-allocate space for Remix using an image for /data like so:

dd if=/dev/zero of=/remix/data.img bs=1M count=XXX
mkfs.ext4 /remix/data.img

Here XXX is the size of data.img in megabytes you want it to be. An image is convenient for portability and backup purposes, so it’s up to your preference.

That’s it!! 🙂

Remove Remix OS from HDD and Grub:

To remove Remix, just revert or remove /etc/grub.d/40_custom, run update-grub, and if you wish, delete /remix.

Hope this Guide was helpful. if you have any queries please let us know via comments below. For more such guides and updates, please subscribe to our Newsletter by entering your Email ID below or Like and follow us on Facebook, Twitter and Google+

17 comments

Prabhanshu August 27, 2016 - 2:19 pm

file ‘system.img’ is not there, ‘system.sfs’ is there in the iso file and it does not work….. gives some error when I update grub.

Reply
John September 14, 2016 - 7:52 am

system.img is contained within system.sfs. Double click on system.sfs in Ubuntu then copy system.img from the open archive.

Reply
Darren September 14, 2016 - 9:55 pm

i have the exact same issue as prabhanshu… there is no system.img . I put system.sfs but it didn’t work either

Reply
lordtoran September 14, 2016 - 5:37 pm

The system image is system.sfs, not system.img. If you give system.img as the root in the grub entry, there will be an error message (but strangely, Remix OS will still boot).

Reply
Dean September 29, 2016 - 4:30 pm

I found that I needed to install squashfs-tools before you can open the system.sfs in the archive manager. the system.img file is the only file in the system.sfs and was roughly twice the size. I haven’t tested yet but I’m guessing should run without error and a bit smoother since no longer compressed.

Reply
Torstein Finnbakk October 13, 2016 - 10:18 am

I have tried this method on my 10 year old Lenovo laptop but during startup the box hangs. No error-message. What could be wrong?

Reply
pete January 14, 2017 - 12:25 pm

Execute “unsqashfs system.sfs” to extract system.img

Reply
veronika January 14, 2017 - 8:32 pm

Thanks for the great tutorial!
Here is what helped me for Ubuntu 16.04 LTS and Remix_OS_for_PC_Android_M_64bit_B2016112101 dual boot on Sony Vaio

STEP1: Use kernel and images from extracted “.iso” file and install it to “/remixos” folder on ext4 ubuntu system partition

veronika@vaio:/remixos$ ls -la
-rw-r–r– 1 root root 5189544 Jan 14 12:37 initrd.img
-rw-r–r– 1 root root 33 Jan 14 14:37 isolinux.sys
-rw-r–r– 1 root root 5310416 Jan 14 12:50 kernel
-rw-r–r– 1 root root 1416347 Jan 14 12:50 ramdisk.img
-rw-r–r– 1 root root 2684354560 Jan 14 12:51 system.img (extracted with “unsqashfs system.sfs”)
drwxrwx–x 27 veronika veronika 4096 Jan 14 18:47 data
drwxrwxr-x 3 veronika veronika 4096 Jan 13 23:57 Remix_OS_for_PC_Android_M_64bit_B2016112101
veronika@vaio:/remixos$

STEP2: Create “/remixos/data” folder where all data will be stored

STEP3: Create custom grub configuration “sudo gedit /etc/grub.d/40_custom”

#!/bin/sh
exec tail -n +3 $0
# This file provides an easy way to add custom menu entries. Simply type the
# menu entries you want to add after this comment. Be careful not to change
# the ‘exec tail’ line above.

menuentry ‘Remix OS – GuestMode’ –class remixos –class android-x86 –class gnu-linux –class os {
insmod part_gpt
insmod ext2
savedefault
echo “Searching remixos drive by file”
search –file –no-floppy –set=root /remixos/system.img
echo “Loading kernel”
linux /remixos/kernel root=/dev/ram0 androidboot.selinux=permissive logo.showlogo=1 SERIAL=random SRC=/remixos REMOUNT_RW=0 DATA= DATA_IN_MEM=1
echo “Loading ramdisk”
initrd /remixos/initrd.img
}

menuentry ‘Remix OS – ResidentMode’ –class remixos –class android-x86 –class gnu-linux –class os {
insmod part_gpt
insmod ext2
savedefault
echo “Searching remixos drive by file”
search –file –no-floppy –set=root /remixos/system.img
echo “Loading kernel”
linux /remixos/kernel quiet root=/dev/ram0 androidboot.selinux=permissive quiet logo.showlogo=1 SERIAL=random SRC=/remixos DATA=
echo “Loading ramdisk”
initrd /remixos/initrd.img
}

STEP4: Update the grub configuration with “sudo update-grub”

Done. Just reboot and try your configuration.

The option “androidboot.hardware=remix_x86_64” made my system hang in the boot screen. Removing the option everything worked fine.

Reply
Ravi Singh January 16, 2017 - 7:57 am

Thanks for Sharing Veronika!!

Reply
uranga January 16, 2017 - 7:44 pm

is there ANYWAY to use veronikas instruction without the “partion” part? i have tried EVERYTHING and i either get, “no such device” errors or no remix option at all. If not? how to do i do a partition?

Reply
wcndave March 16, 2017 - 3:52 pm

Where is the article?

Reply
Tuscan March 27, 2017 - 10:20 am

Hey Ravi thanks so much for this! I’m a complete rookie and this made it very clear. 🙂 Any chance you could help me have Remix OS as the only single boot?

Reply
Rafal May 13, 2017 - 9:16 am

hi Ravi
how will look the code in grub for Remix 32bit , will it be the same?

Reply
Ravi Singh May 13, 2017 - 11:07 am

For 32Bit systems, there is a seperate file available. Download it and install. Code in grub is same for both. It’s a simple linux bootloader.

Reply
Ragnar Ironblood July 15, 2017 - 11:45 am

Are instructions for installing Phoenix OS the same?

Reply
William January 12, 2018 - 9:04 am

Would I be able to remove Ubuntu after installing using this method?

Reply
Ravi Singh January 12, 2018 - 11:24 am

Yes, of course!

Reply

Leave a Reply

[script_25]

This site uses Akismet to reduce spam. Learn how your comment data is processed.

You may also like

TechPosts Media, A Technology Media Company – All Right Reserved. Designed and Developed by PenciDesign

DigitalOcean Referral Badge

Adblock Detected

Please support us by disabling your AdBlocker extension from your browsers for our website.