
Proxmox is an open-source virtualization platform that enables users to create and manage virtual machines and containers via an intuitive web interface. By installing Home Assistant on Proxmox, you can achieve a seamless and efficient home automation system on any x86 machine without compromising on any features.
Why Install Home Assistant on Proxmox?
Home Assistant is an open-source home automation platform that focuses on local home automation, control, and data privacy. It allows users to control and automate various smart devices in their homes, such as lights, switches, thermostats, cameras, etc.
With Proxmox, you can run Home Assistant with multiple other services on the same hardware in different isolated environments or virtual machines.
For instance, you can set up a RAID NAS on a different virtual machine in Proxmox and use the redundant storage to store backups, surveillance footage, and other important data safely.
It will also help:
- Save space
- Reduce power consumption
- Streamline the management and maintenance of Home Assistant and other services
- Ensure high availability
- Quick Migration
- Make it easier to monitor and maintain the Home Assistant installation
Step 1: Install and Set Up the Proxmox Environment
Set up and install the Proxmox on your x86 PC or Intel NUC. You can either purchase a new machine, such as a mini-PC or re-purpose an old laptop or PC for this project.
We are using a new Intel NUC10 for the Proxmox installation. Make sure to enable virtualization from the BIOS before you begin the Proxmox installation on your x86 hardware.
Once set up, you can access the Proxmox web interface using a web browser at https://IPAddress:8006.
For instance, https://192.168.0.170:8006/
You can find the IP address of the device by typing ifconfig in the command or via DHCP settings on your router. Additionally, you can use a network scanner app, such as Fing.
You may see an SSL warning. Click Advanced > Proceed to 192.168.xx.xx.
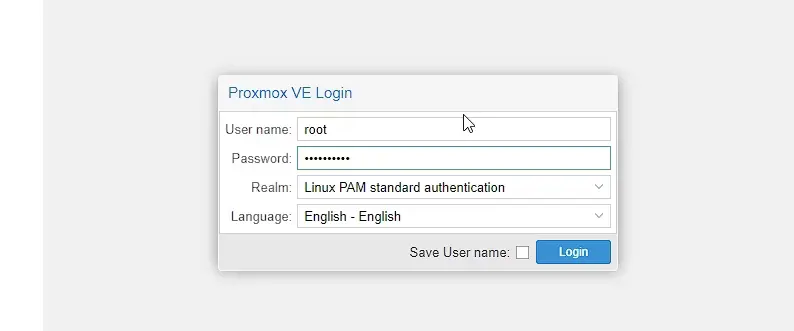
Once the web interface loads, use root as the username and password you set up during Proxmox installation.
Step 2: Create a Virtual Machine for Home Assistant in Proxmox
Once the Proxmox environment is ready, you can follow the below steps to create a virtual machine for Home Assistant installation.
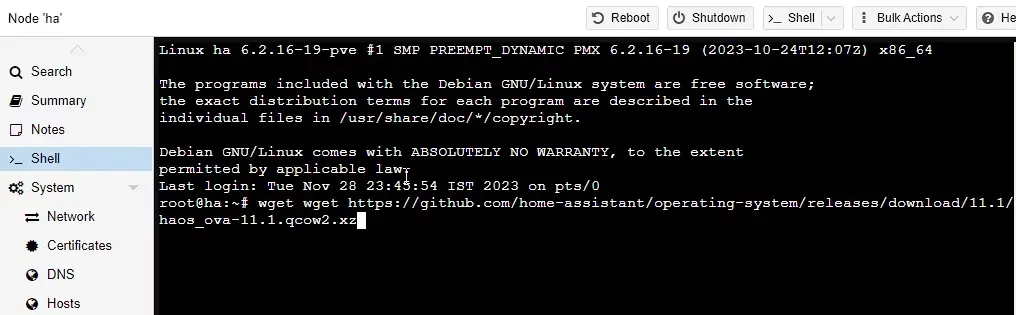
- Login to the Proxmox web interface and then click on Datacenter > Your Proxmox Instance name and then click Shell.
- In the Shell window, type the following commands to download the Home Assistant image.
wget https://github.com/home-assistant/operating-system/releases/download/11.1/haos_ova-11.1.qcow2.xz
- Then extract the Home Assistant image file using the following command.
unxz haos_ova-11.1.qcow2.xz - Once the Home Assistant OS image is extracted, click the Create VM button at the top-right corner.
- Then type the name of the virtual machine in the Name: field under the General tab, such as Home-Assistant, and click Next.
- In the OS, choose Do not use any media and click Next.
- In the System tab, choose q35 in Machine: and select OVMF (UEFI) in the BIOS. In the EFI Storage, choose the local-lvm storage and click Next.
- Under Disks, enter the disk size (default is 32GB) and click Next.
- Choose the Sockets and Cores under the CPU tab and click Next.
- Under the Memory tab, choose the desired memory (minimum 4GB) and click Next.
- Under the Network tab, keep it default and click Next.

- Finally, check the VM hardware settings and click Finish. This will create a new VM named Home-Assistant and listed under Datacenter in the left pane.
- Once created, click on the Home-Assistant VM in the left pane and click Hardware.
- Select the Hard Disk and choose Detach.

Step 3: Installing Home Assistant on Proxmox VM
Once the Home Assistant VM is created successfully, we need to import and attach the disk image to the Home-Assistant VM using the following command in the Proxmox shell.
qm importdisk 104 /root/haos_ova-11.1.qcow2 local-lvmMake sure to replace the vm ID (104 in our case) in the command.
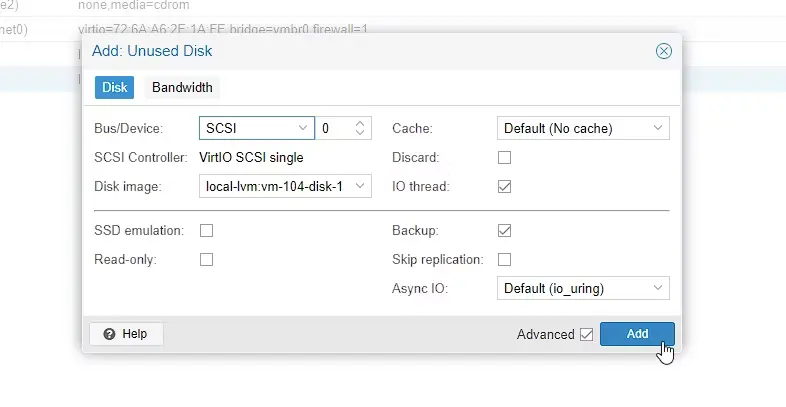
Once the disk is imported, we need to add it to the Home-Assistant VM. To do this, click on Hardware and then double-click on the Unused disk at the bottom. Click Add.
Now you can right-click on the Home-Assistant VM and click the Start button to boot the VM and begin the Home Assistant installation.

Click on Console to view the boot progress. Once the Home-Assistant VM boots completely, you will see an IP address

Visit the IP address on the web browser with port 8123. For instance, http://192.168.xx.xx:8123 or http://homeassistant.local:8123

If you have a Home Assistant backup, click RESTORE FROM BACKUP and then click UPLOAD BACKUP button to select and upload the Home Assistant backup file.
This will restore your Home Assistant server on Proxmox. If you never used Home Assistant, you can click CREATE MY SMART HOME and continue with the setup wizard.
Step 4: Finishing The Home Assistant Installation on Proxmox
Once the Home Assistant server is up and running on the Proxmox, you can enable auto boot for Home Assistant. This will boot Home Assistant automatically after a power failure or when the Proxmox or machine restarts. To enable this, follow these steps:
- Click on the Home Assistant VM in the left pane and then click on the Options option.
- Double-click on Start at boot and then select the Start at the boot checkbox.
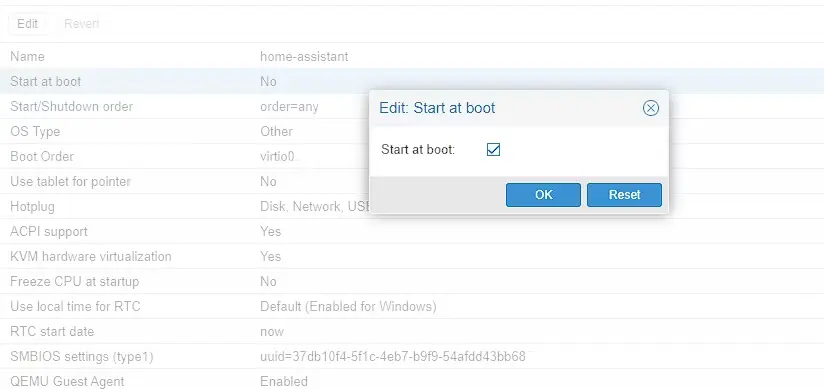
- Click OK.
If you want to connect an external USB device to Home Assistant on Proxmox, such as a Zigbee dongle or Coral TPU for Frigate NVR, you must add the USB port to the Home Assistant VM. The steps are as follows:
- Click on Hardware and then click Add > USB Device.
- Then click the Use USB Vendor/Device ID: and choose the connected USB device.

- Click Add. If there are more USB devices, repeat Step 1 and Step 2 to add those to the Home Assistant VM.
Once added, you can access and use the USB devices with the Home Assistant server to control smart devices or store data, etc.
Cut The Clutter with Home Assistant on Proxmox
Installing Home Assistant on Proxmox allows users to install and set up multiple services and servers in an isolated environment, which can enable them to utilize the full potential of their machine. This is beneficial for those who are just getting started but already running a home server. They can quickly install Proxmox on their machine, move their servers to Proxmox, and set up Home Assistant without having to invest in new hardware.