
Table of Contents
Proxmox, an open-source server management platform, offers a dynamic environment for deploying, overseeing, and controlling virtual machines. Its versatile functionality allows users, whether students, tech enthusiasts, or business owners, to seamlessly operate multiple operating systems or services through an intuitive web interface compatible with any web browser.
Prerequisites to Installing Proxmox
Before initiating the Proxmox installation process on an Intel NUC or an alternative x86 mini-PC, you will need the following prerequisites:
- A minimum of 4 CPU cores
- At least 4GB of RAM (with a recommendation of 8GB or more)
- A minimum of 64GB of free disk space, preferably on an SSD
- A Windows, macOS, or Linux PC to create bootable USB installer media
- A USB media (8GB or larger)
An example configuration, featuring the Intel NUC10I3FNHN, illustrates a barebones mini-PC powered by a 10th-generation Intel i3 processor, accompanied by additional installations of 16GB DDR4 RAM, a 1TB M.2 PCIe4 SSD, and a 1TB SATA3 SSD.
Once you have the mini-PC that meets these hardware requirements and other required things, follow the steps given below to install Proxmox.
1. Preparing a Proxmox USB Installer Media
To create and prepare a Proxmox USB media installer, follow these steps:
- Access the official Proxmox Downloads section and choose the appropriate version for the Intel NUC or x86 PC.
- Click on the Download button. This will download the ISO image on your system.
- Once the download is complete, use tools like Rufus or balenaEtcher to create a bootable USB installer.
- Make sure the USB drive is empty and has no important data in the USB media..
2. Preparing Intel NUC or x86 PC for Proxmox Installation
Power on the Intel NUC and access the BIOS by continuously pressing the Del or F10 key. Once you are in the BIOS, make the following changes:
- In the BIOS, ensure it is up-to-date, disable Secure Boot, enable Legacy Boot, and activate Virtualization Technology (Intel VT-x or AMD-V for other mini x86 PCs).
- Save these changes and shut down the system.
3. Installing Proxmox on Intel NUC or x86 PC
After creating the bootable USB drive, insert it into your Intel NUC or x86 PC and restart the system.
- Insert the bootable USB drive and restart the system.
- Access the boot option/order menu (usually F8) and select the USB drive.
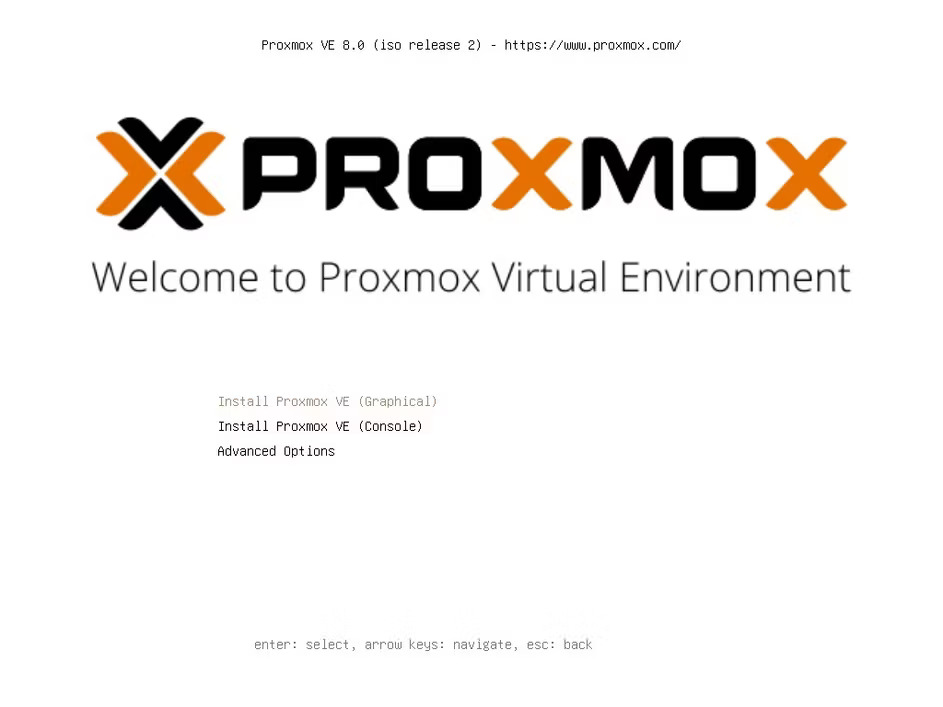
- You will see the Proxmox welcome screen. Here, choose Install Proxmox VE (Graphical) and press Enter.
- Navigate through the Proxmox installation steps, selecting the target disk, time zone, keyboard layout, etc.
- Finally, click Install to complete the setup.
During the installation, when you set up a password, note it down or remember it. This password will be required to login to Proxmox with default username: root.
4: Post-Installation Proxmox Configuration
Access the Proxmox web interface using your preferred browser and the server’s IP address at port 8006 (e.g., https://192.168.0.172:8006).
- Navigate through the SSL warning by clicking Advanced > Proceed, enter ‘root‘ as the username, and provide the password set during installation.
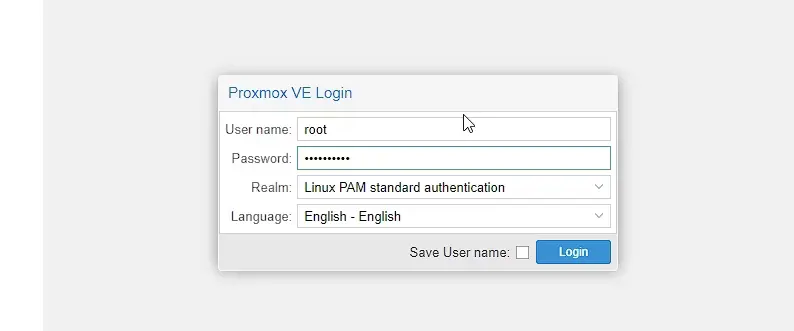
- Click Login.
- Ignore the warning message that you will see after logging in by clicking OK as we don’t have an enterprise license.
- Explore the Proxmox default node to check and perform updates and upgrades.
- Click the Updates button and then click Refresh.
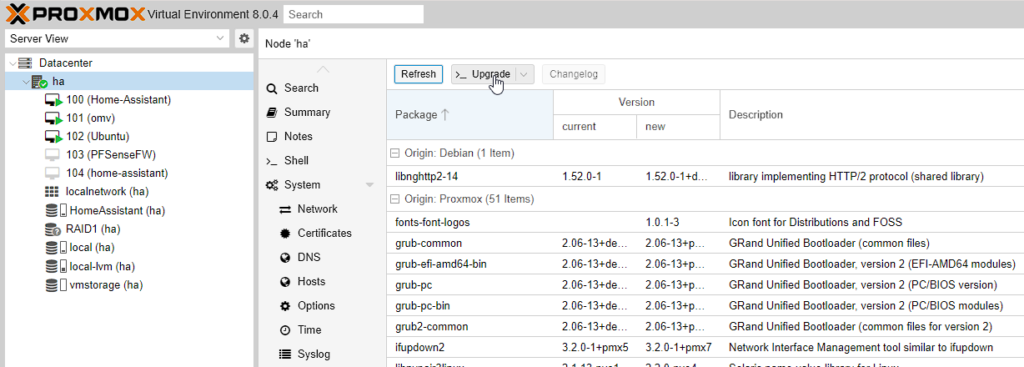
- Then close the window by clicking on the cross icon.
- Then click the Upgrade button and type Y when prompted.
- Finally, hit the Enter key to upgrade the Proxmox, which may take a while to complete.
5. Creating VMs and Installing Operating Systems in Proxmox
With Proxmox, you can create and manage virtual machines from a web browser using the Proxmox web interface. You can install and manage a wide range of operating systems on these virtual machines, including Linux, Windows, and FreeBSD.
To create a VM and install OS using the Proxmox web interface, follow these steps:
- After completing the upgrade, click “Shell.”
- Navigate to the specified location for downloading ISO/IMG files:
cd /var/lib/vz/template/iso/ wget https://releases.ubuntu.com/22.04.3/ubuntu-22.04.3-desktop-amd64.iso.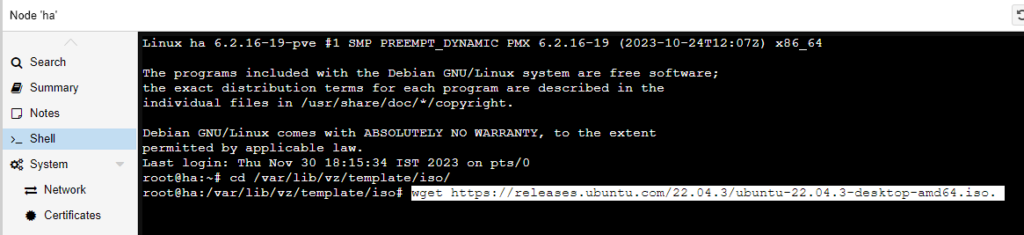
- Click “Create VM” in the top-right corner.
- Under “General,” assign a name to your virtual machine.
- Click “Next,” select the downloaded Ubuntu ISO file, and click Next to proceed.
- Keep the default settings for “System” and adjust disk size under “Disks” based on your needs.
- In the “CPU” section, choose cores.
- Then under Memory, adjust the required memory.
- Choose the network adapter, you can keep the settings to default.
- Then click “Next > Finish.”
- After configuration, right-click on the machine (VM) and click “Start.”

- Access the OS through any device on your network via the web browser using the Proxmox IP address > Console.
Similarly, you can also install supervised Home Assistant OS in Proxmox and set up a smart home.
Now you can enjoy the flexibility to manage your virtual machine efficiently, including starting, stopping, or migrating to another Proxmox host. Proxmox offers live migration capabilities that allow you to move virtual machines between hosts without any downtime. This feature is handy for load balancing or hardware maintenance purposes.
Unleash the Virtualization Potential with Proxmox
The installation process for Proxmox on an Intel NUC or x86 mini PC is straightforward, offering a gateway to a myriad of possibilities in the realms of virtualization and server management.
The synergistic integration of Proxmox and Intel NUC establishes an ideal alliance for unlocking the full potential of virtualization at a cost-effective price. The lightweight design and power-efficient characteristics of a mini x86 PC, such as Intel NUC, make them well-suited for a spectrum of applications. Proxmox facilitates the deployment of servers, accommodating both small-scale and large-scale configurations. What sets this combination apart is the ability to manage these servers seamlessly from a diverse array of devices, ranging from conventional computers to more portable options like tablets or smartphones.