
Have you ever thought of making Android operating system portable and carry it easily in your pocket and run in any computer or laptop anytime, anywhere? But dropped this idea because it is a little complicated or simply you do not know How to create a portable Android OS Version. Then this is the post for you.
Creating Portable Android Operating System Version – Kitkat, lollipop, jellybean and ICS in a USB Pen drive/External HDD
In this tutorial we are going to show how to create a portable Android x86 Jellybean, Kitkat or Lollipop OS easily. This process almost same as installing Android x86 on PC or Laptops Hard Disk with Windows or Linux (dual boot) so you don’t have to be an expert to do this just follow the below mentioned steps.This is common for all versions of Android OS, whether it is Ice Cream Sandwich, Jellybean, Kitkat (4.4, 4.4.2, 4.4.4) or the Latest Android Lollipop (5.0, 5.0.2, 5.1).
Tools Required:
1. Rufus App for Windows or Universal USB Installer to create Android-x86 bootable drive.
Rufus App

Universal USB Installer
2. Two Pendrive (Minimum 4GB) (USB2.0 or USB3.0) or an External HDD
3. Android-x86 ISO file. Download Icecream Sandwich, Jellybean and Kitkat ISO from here. For Lollipop 5.0.2 Click here
How To Create A Portable Android OS Version:
We are going to see how to make portable Android OS using two different USB Drives
- Method 1. Two Pen Drives
- Method 2. One Pen Drive and other External Hard disk drive.
Follow these simple step by step instruction to create a Portable Android x86 OS Version – Kitkat or Lollipop
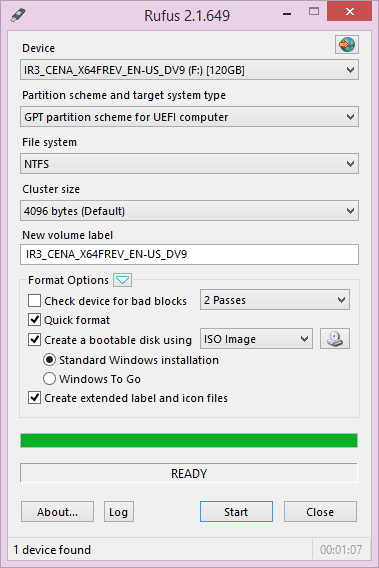
Step 1: By using Universal USB Installer Tool, Make a bootable USB flash drive using the ISO image file that you downloaded. You can also use Rufus to create Androidx86 bootable USB Drive.
Important Tip : Please make sure the Bootable USB drive is formatted in Fat32 not NTFS.
Select Android from the Drop Down menu, Then Browse the Android x86 ISO file and then select the USB Thumb Drive and Hit Create Button.
Step 2: After that, Restart your PC or Laptop via USB flash drive as the source. (Make USB to boot first and before CD/DVD ROM under your system’s BIOS settings)
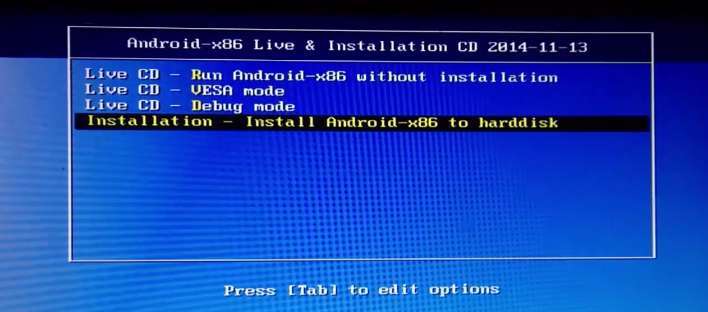
You can run it as Live CD where changes made will not be saved, But if you install it on Hard disk or Pen drive then changes made will be saved evreytime when you use it.
Step 3: Now, When the menu appears, just select Install Android x86 to External hard disk or Pen Drive/Sd Card. You can also Run it As a Live Cd which means that if any changes made, they will not be saved. But if you install it on USB Drive or internal hard drive, then any changes that you make will be saved next time you boot android.
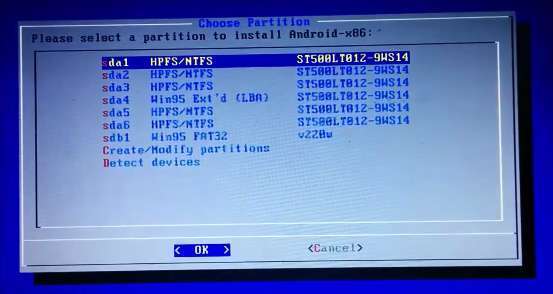
Select 2nd USB Drive or External Hard Disk to create portable Android OS
Step 4: Select your appropriate external hard disk partition to install Android x86 i.e. you can see in the image below: “sdb1 win95 FAT32 v220w” is the external USB Drive partition other than the installation media or you can install on any new partition.You can format the USB drive to ext3 or ext2 partition to get more internal storage.

Install Grub Bootloader to create Dual/Triple Boot machine – Android, with Linux or Winodws or both
Step 5: Now, You will get a few prompts messages pertaining to installation of GRUB Bootloader. Make sure to allow it.
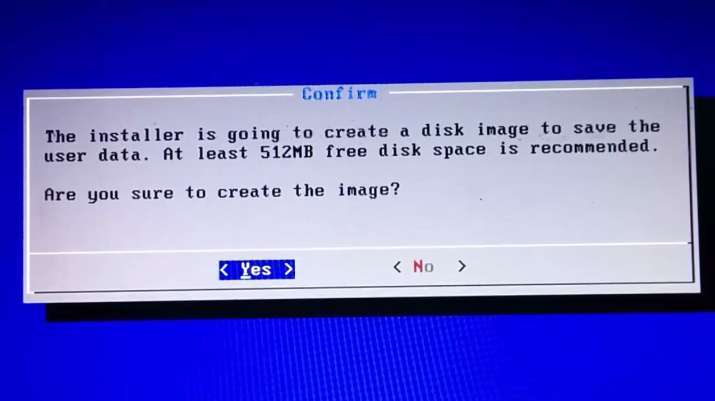
Creating Internal Storage/SD Card where files and data will be saved
Step 6: Now, another prompt message will ask you to make system /r/w. Hit Yes on this as well, especially if you’d like to modify your Android x86 installation later.

Enter Internal Storage or SD Card Space. (Max. 2GB or 2048MB is allowed)
Step 8: After that, you will get another prompt to install virtual SD card. Use 2048 MB for space, as that’s the maximum supported.
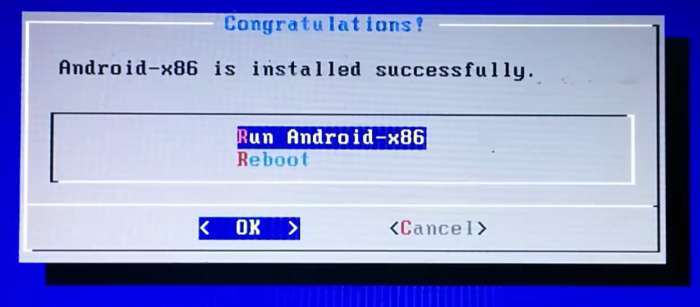
Finally Reboot System and Boot using USB drive here we’ve install Android OS
Step 7: Now, You can Restart your Windows PC / Laptops. After Reboot, You can select to either boot to Android by inserting USB Drive and boot from it or Windows.
Voilah! You’re done. Congratulations!! You have successfully installed Android 5.0 Lollipop on USb drive. Enjoy this latest update.
You can now use it anytime and anywhere on any PC or laptop with BIOS capable of booting from USB Drive. The first time boot will take some time as it has to install necessary files for start-up and after that there will be no problem. But If in case you have any doubt or any problem in Creating Portable Android x86 OS Version with the method mentioned above or in any of the step just comment below and we’ll answer your query ASAP.
Meanhile Subscribe us for more such How to Guides on Android, iOS, Windows, Mac and Linux below or Connect with us to stay updated for more on Facebook, Google+and Twitter.