
Table of Contents
The Raspberry Pi is a versatile device capable of assuming various roles, one of which is functioning as a wireless hotspot. Whether you want to share your internet connection via an Ethernet cable or create a secure, encrypted Wi-Fi hotspot, the Raspberry Pi has you covered. This guide will take you through the steps to create a Raspberry Pi wireless hotspot secured with WPA encryption.
Reasons to Use a Raspberry Pi as a Wireless Hotspot
There are several compelling reasons to configure your Raspberry Pi as a wireless hotspot:
- Internet Sharing: Share your internet connection through an Ethernet cable with multiple devices like smartphones, tablets, and laptops when a traditional Wi-Fi router isn’t available.
- Secure Hotspot: Create a secure and encrypted wireless hotspot using WPA (Wi-Fi Protected Access) in environments like hotel rooms or college dorms.
- Temporary Access: Establish a temporary Wi-Fi access point without the need to invest in a dedicated router.
What You’ll Need
- Any Raspberry Pi model (preferably Raspberry Pi 3, 4, Zero W, or Zero 2W with internal Wi-Fi)
- Micro-SD card (8GB or larger)
- Power supply (micro-USB)
- An active Ethernet connection and cable
- A Raspberry Pi-compatible USB Wi-Fi adapter
1. Set Up Raspberry Pi
Begin by installing the Raspbian OS on your Raspberry Pi’s SD card. Follow these steps:
- Connect the microSD card to your PC using a card reader.
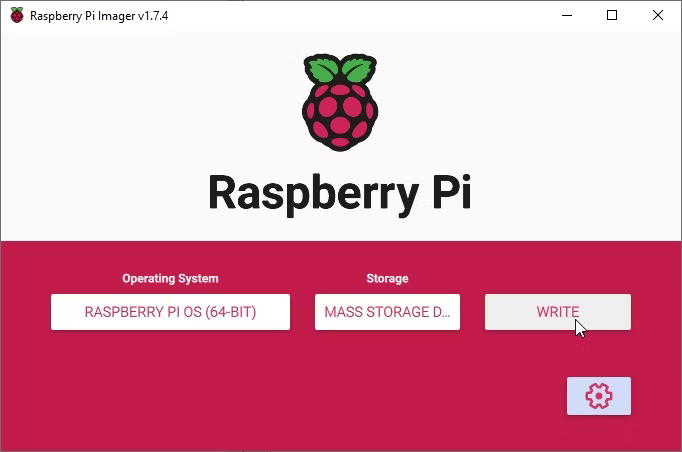
- Install and launch the Raspberry Pi Imager tool.
- Select the Raspberry Pi OS (Other) > Raspberry Pi OS Full option.
- Choose your connected microSD card as the target storage.
- Click “Write” and wait for the process to complete.
- Insert the microSD card into the Raspberry Pi and power it on.
- Complete the initial setup and open the Terminal window.
- Run the following commands
sudo apt update && sudo apt upgrade -y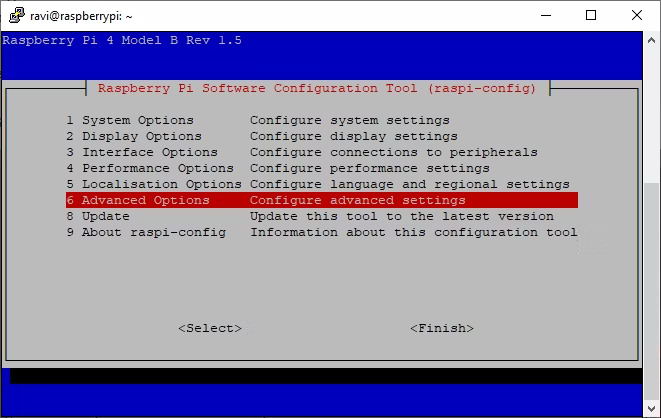
- Enable Network Manager
sudo raspi-config- Navigate to “Advanced Options” and select “Network Config.”
- Choose “NetworkManager” and confirm it’s active.
- Finish the configuration and reboot the Raspberry Pi.
2. Configuring the Wireless Hotspot
After the reboot, configure the wireless access point:
- Left-click on the Network Icon at the top right corner and select “Advanced Options.”
- Choose “Create Wireless Hotspot.”
- Enter the details for the hotspot, including the SSID, security, and password. Choose WPA for security.

- Click “Create.”
- Reboot the Raspberry Pi.
- After the reboot, the wireless hotspot will be visible in the Network menu.
3. Enable Raspberry Pi to Start Wireless Hotspot Automatically
To enable automatic hotspot activation on boot, follow these steps:
- Click on the Network icon and select “Advanced Options.”
- In “Advanced Options,” choose “Edit Connections.”

- Select the hotspot name and click the settings (gear) icon.
- Set “Connect automatically with priority” to 0.
- Ensure “Select All users may connect to this network” is enabled.
- Click “Save.”
4. Connecting to the Raspberry Pi Wireless Hotspot Network
To connect to the Raspberry Pi’s wireless hotspot network:
- Open the Wi-Fi settings on your smartphone or PC.
- Select the Raspberry Pi network name from the available networks.
- Enter the password and click “Connect.”
If you forget the Wi-Fi details, you can retrieve them by following these steps:
- On your Raspberry Pi, click the Network icon and select “Advanced Options.”
- Choose “Connection Information” to view the hotspot details and a QR code for easy smartphone connection.
Conclusion
By following these steps, you can transform your Raspberry Pi into a portable, secure wireless hotspot. Ensure the safety of your wireless network by enabling WPA encryption and keeping your Raspberry Pi’s software up to date. Get started on your WPA-encrypted wireless hotspot project today!