
Table of Contents
In our previous guides we shown you how to install Stable Android OS x86 4.4.4 R3 Update on PC and Laptops which is pretty amazing as you can install android OS on any old PC or laptop and make it useful. If you’re interested in running Mac OS X, then a Hackintosh might be for you if you don’t want to pay for overpriced Mac computer. This guide will give a complete step by step on how to install OS 10.10 Yosemite on any PC that has a Intel base processor.

OS X Yosemite on Windows PC -Techposts
Installing Mac OS on Windows or Linux PC:
Things You’ll Need:
- Built PC With Intel CPU
- Any Computer Running Mac OSX Snow Leopard 10.6.6 or later.
- USB Stick 8Gb or Larger
What you need to Download:
- Yosemite
- UniBeast
- Multibeast
- DSDT (if needed)
In order to download Unibeast, Multibeast and DSDT files you need to have an account on tonymacx86. If you don’t have an account then you can create an here.http://www.tonymacx86.com/register.php. Make sure you have Unibeast and Multibeast downloaded and unziped on to your desktop.
STEP 1: Download OSX 10.10 Yosemite
The cool thing is that the whole OS is free for anyone who has a Apple ID and acess to a machine running 10.6.8 Snow Leopard or later.
- Open Mac App Store
- Log into your Apple ID
- Download OS X Yosemite (its a big file >5GB so relax)
STEP 2: Making a Bootable USB Drive
- Insert your USB drive the is 8GB or Larger
- Open /Applications/Utilities/Disk Utility
- Select your USB drive
- Go to the Partition Tab
- Click Current and choose 1 Partition
- Click Options and Choose Master Boot Record
- Under Name: type USB
- Under Format: choose Mac OS Extended (Journaled)
- Click Apply then Partition
- Open UniBeast from your desktop
- Click Continue, Continue, Continue, Agree
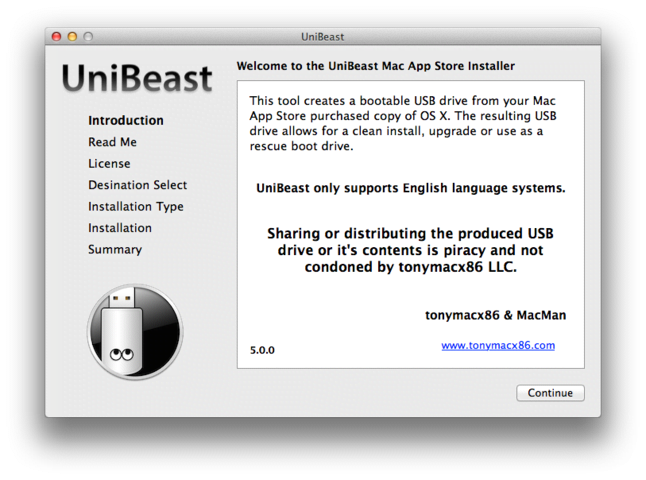
Unibeast for installing Yosemite OS X
12. At Destination Select, choose USB and click Continue

Select USB as Destination -Techposts
13. Choose Yosemite on the Select OS Installation screen
14. Click Continue
Select OS Version you want to install
15. If using a 5 or 6 Series system with AWARD BIOS choose Legacy USB Support
16. If using a laptop, choose Laptop Support
17. Click Continue
Unibeast – Support Options
18. Enter your password and click Install

Unibeast – Mountning Volumes
UniBeast will now create the bootable USB drive. Once completed put your the Multibeast folder in the USB drive.
STEP 3: Boot into USB Drive
- Turn on the computer
- Press the hotkey to choose boot device (usually F12 or F8)
- Choose USB-HDD
- At the Chimera Boot Screen, choose USB and hit Enter
If you can’t get to the OSX installer, try typing in -x at the Chimera Boot screen. You can also type some other boot flags such as: GraphicsEnabler=Yes, PCIRootUID=1,maxmem=4096, maxmem=8192, and npci=0x2000 individually or in combination in order to solve boot issues.
STEP 4: Install OSX Yosemite 10.10
Once you get to the installer:
3. Click Partition tab
4. Click Current and choose 1 Partition
5. Click Options…
6. Choose GUID Partition Method
7. Under Name: type Yosemite (You can rename it later)
8. Under Format select Mac OS Extended (Journaled)
9. Click Apply then Partition
10. Close out of the Disk Utility
12. When complete system will reset automatically.
STEP 5: Finalization With MultiBeast
3. Choose your audio drivers, enable trim if you are using an SSD, select your networking driver, etc. here are my settings based upon my motherboard (Gigabyte GA-Z77-D3H)
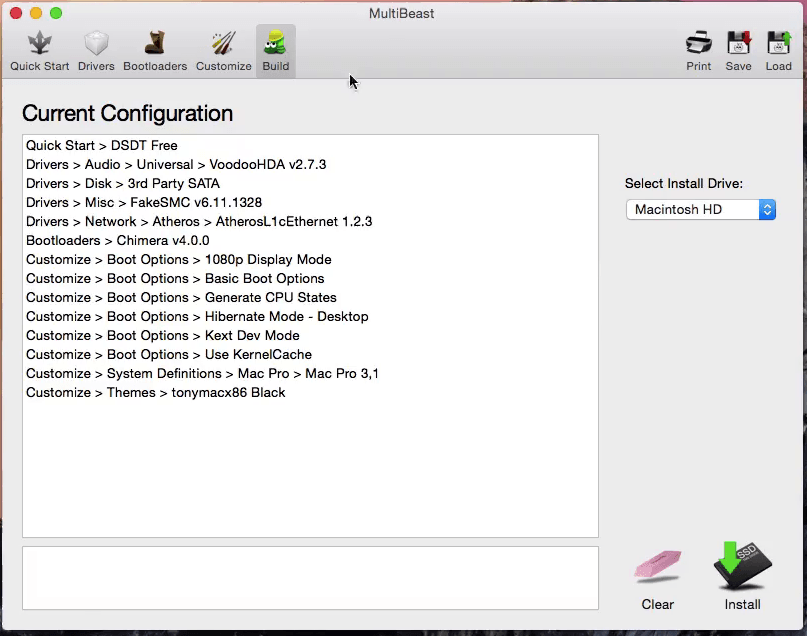
Multibeast