
Data loss is inevitable and may happen due to various logical (software-related) and physical (hardware-related) errors. While modern hard drives and flash storage media are much robust than their predecessors, they still are vulnerable to corruption and logical errors caused by human errors, virus or malware infections, improper disk use, abrupt system shutdown, etc.
Did you know: Human errors, such as accidental deletion, formatting, etc., are the second most common reason for data loss.
A few months ago, I mistakenly formatted my external 2TB storage media and lost all my pictures, videos, and several important document files. It happened because I had named my USB flash drive (MPG_PD) and external hard drive (MPG_HD) with almost the same name and both drives were connected at the same time, I accidentally formatted the external hard drive instead of my USB pen drive. It was a single 2TB partition.
How I Recovered My Data from My 2TB Accidentally Formatted External Drive
To recover data, I first downloaded Recuva, a free data recovery tool for Windows and ran a Deep Scan. However, every time after the scan, when I tried to save my files, the software crashed due to some reason.
I researched more and came across a few open-source Linux data recovery options, but they were too complex and I didn’t want to risk my data any further. So, I chose to go with the EasUS Data Recovery Wizard I downloaded the free version and ran a scan on my 2TB drive. Here’s how it went,
Steps Performed to Recover Data from My Formatted Hard Drive
Step 1: Downloaded & installed “EaseUS Data Recovery Wizard” on my Windows 10 PC. Entered its license key to complete the installation process. A shortcut icon was created on my Desktop.

Step 2: Connected my formatted hard drive to the computer. Then, double-clicked the software’s icon to launch it
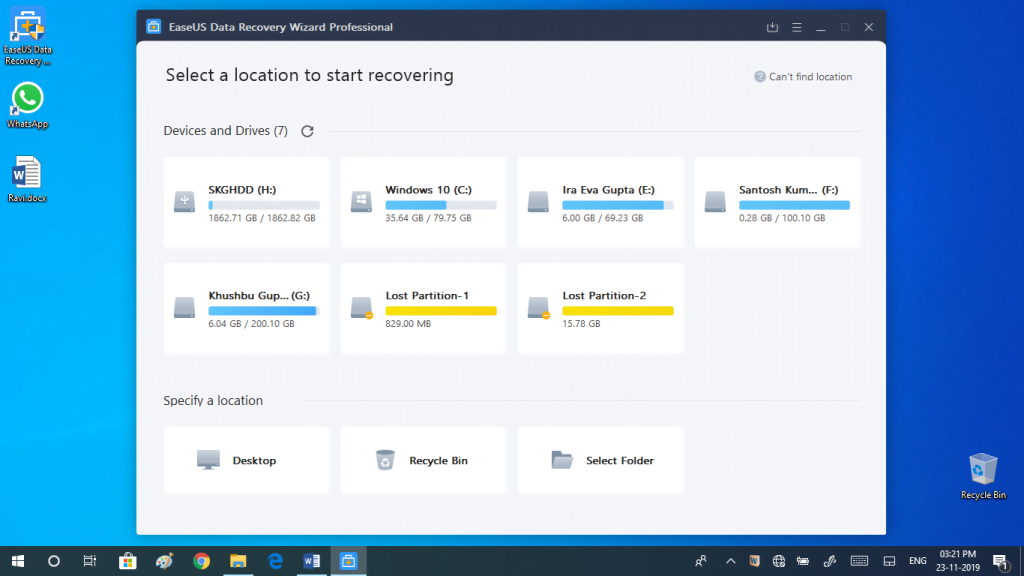
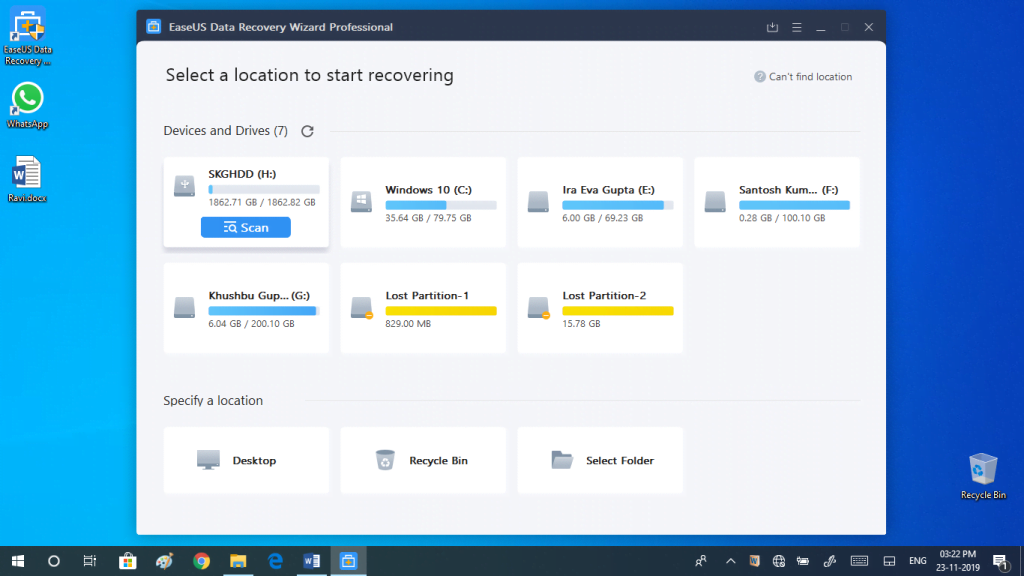
Step 3: From “Select a location to start recovering” screen, I selected the formatted hard drive and then clicked the Scan button that was displayed just beneath the drive.
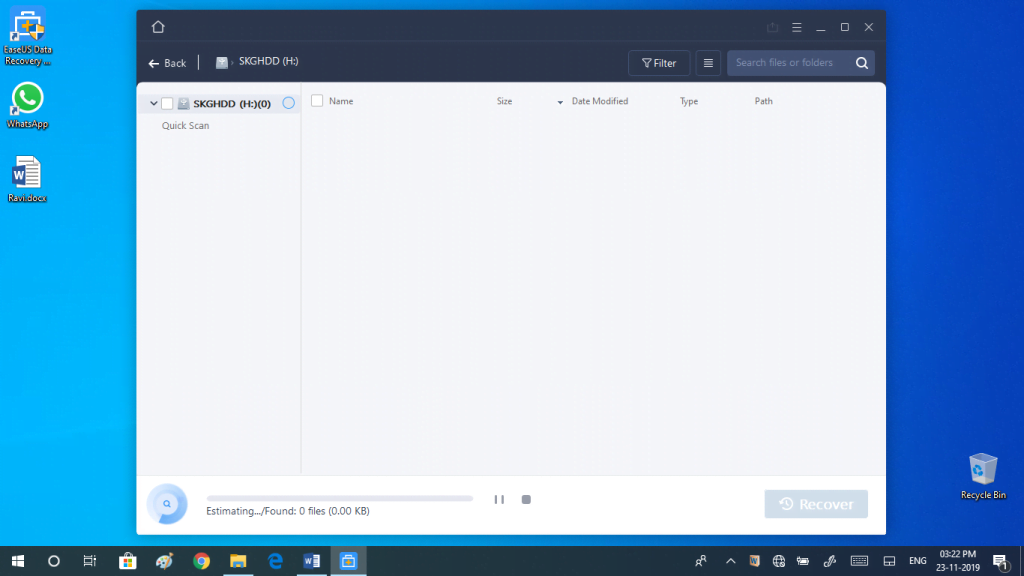
Step 4: The software analyzed the drive and estimated the time required to complete the scan process. Waited till this quick scan was over.
Step 5: The software then automatically switched to Advanced Scan mode. The time required to perform the advanced scan for my 2 TB external hard drive was over 5 hours. Waited patiently.
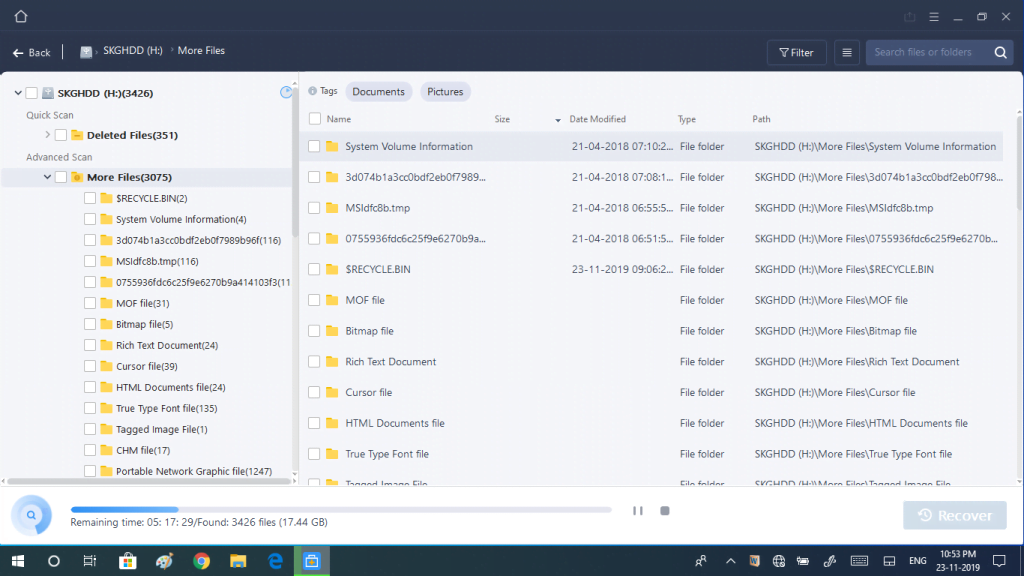
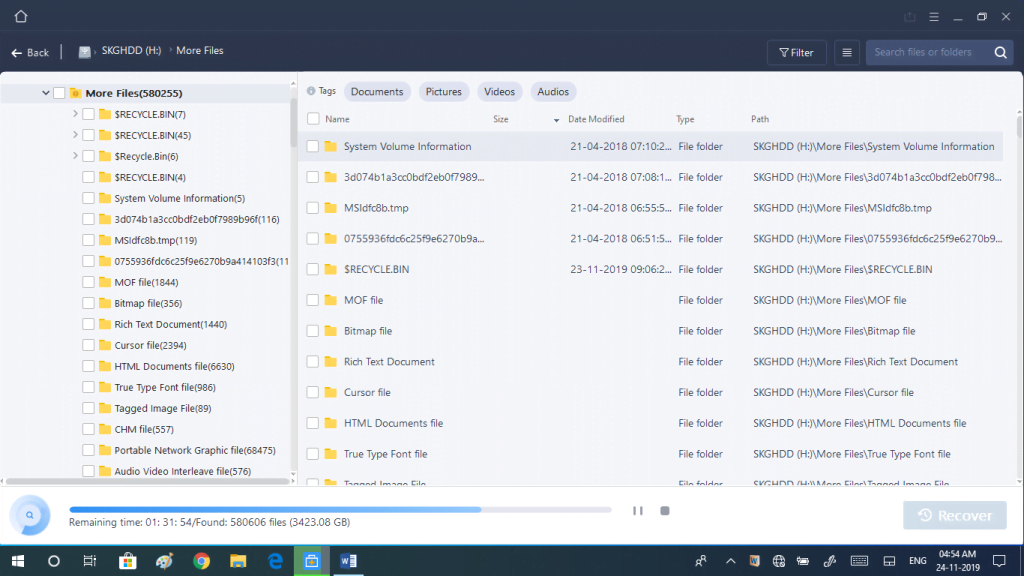
Step 6: The software was creating scanned items dynamically on the left pane as well on the right. Waited tolerantly. The interface also provided buttons to pause or stop the scan. However, I didn’t touch anything, fingers crossed!
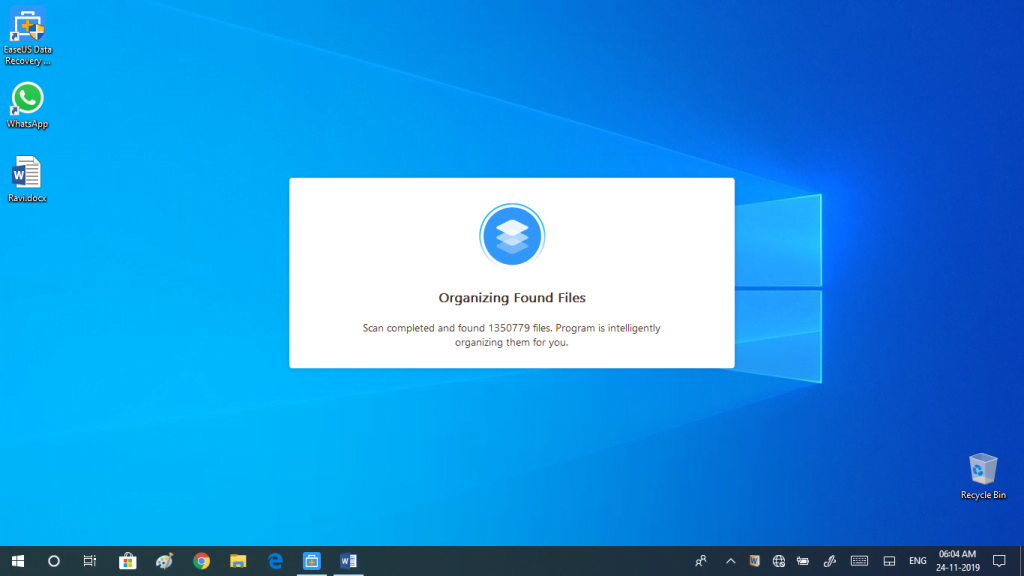
Step 7: Once the scan was over, the tool displayed “Organizing Found File’’
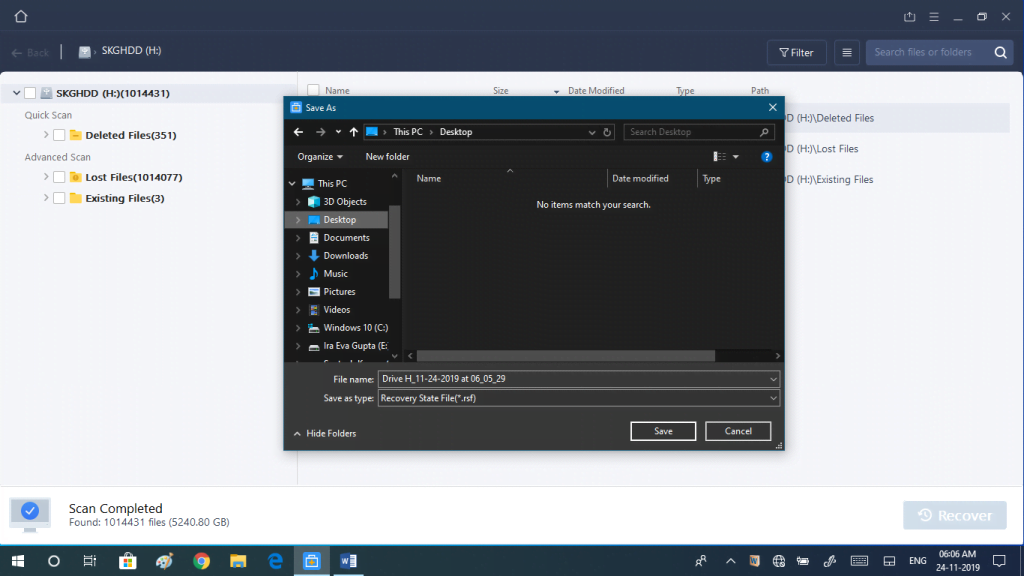
Step 8: On the “Scan Completed” screen, clicked the “Save Scan Session” icon on the top right corner to save scanned data. On the “Save As” window, specified Desktop as the save location then clicked Save.
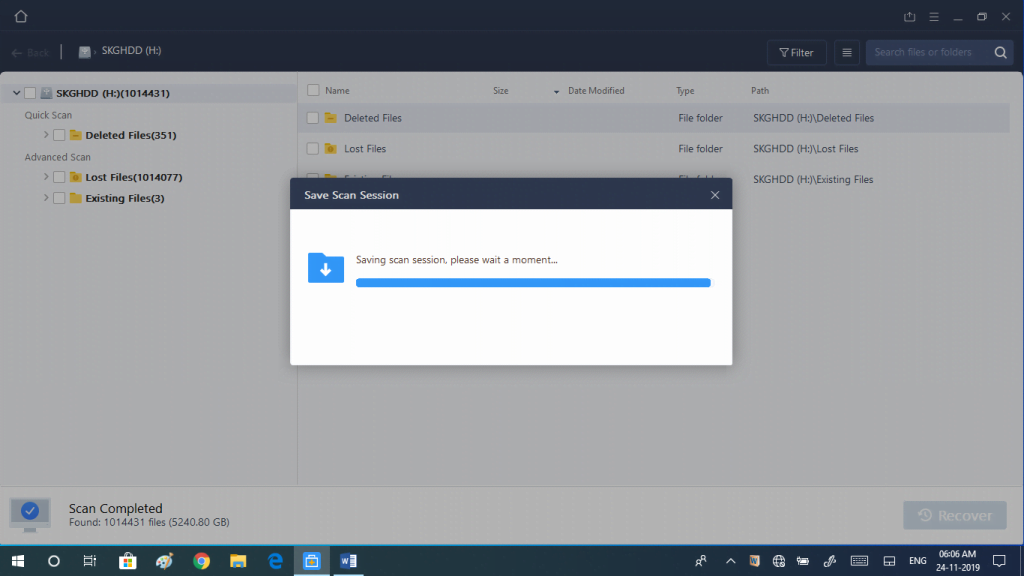
Step 9: The software displayed “Saving Scan Session”.
Step 10: Clicked OK on the “Save Successful” message box.
Step 11: The scanned file was saved on to the Desktop. Closed the data recovery software.
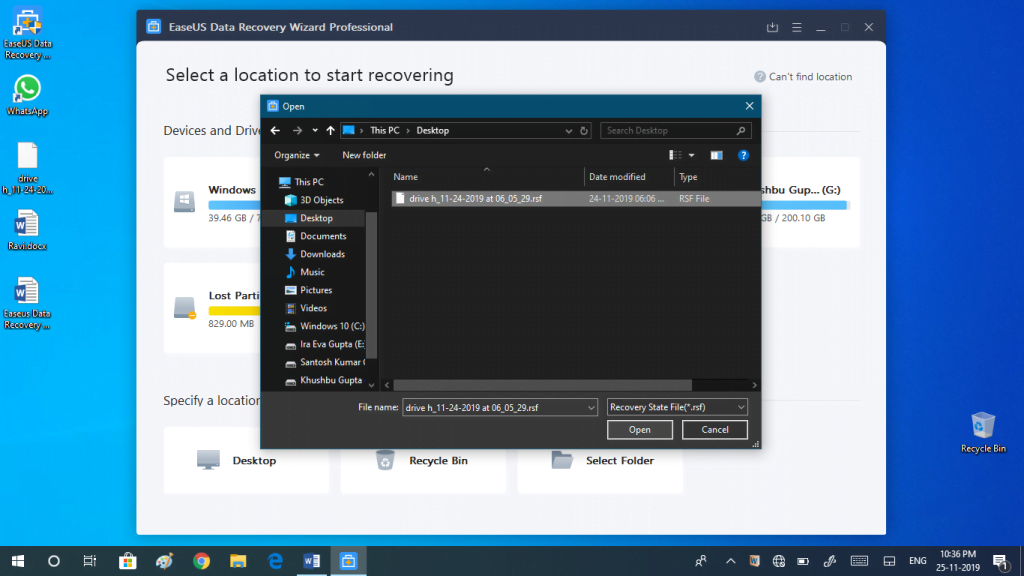
Step 12: Opened the software again at my convenient time. Clicked the “Load Scan Session” icon from the top right corner. On the open window, selected the scanned .rsf file and clicked Open.
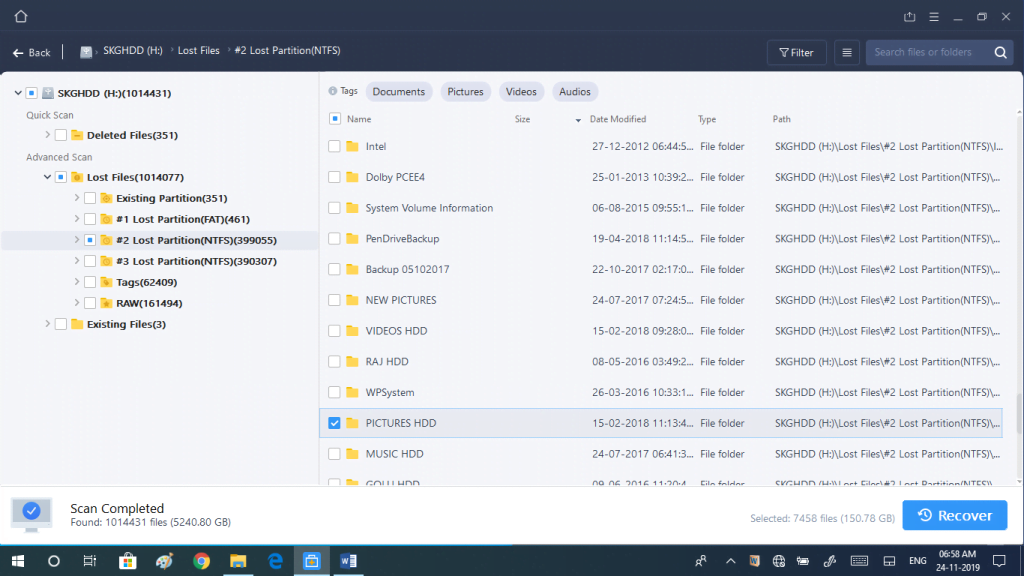
Step 13: On the opened scanned list on the left pane, expanded the “Lost Files” node then navigated to the folder wherein my lost pictures were present.

Steps 14: Double clicked a file from the right pane to preview. On the Preview window, I clicked the “Select All” checkbox then the Recover button.

Step 15: Specified another external storage drive location to save the recovered files.
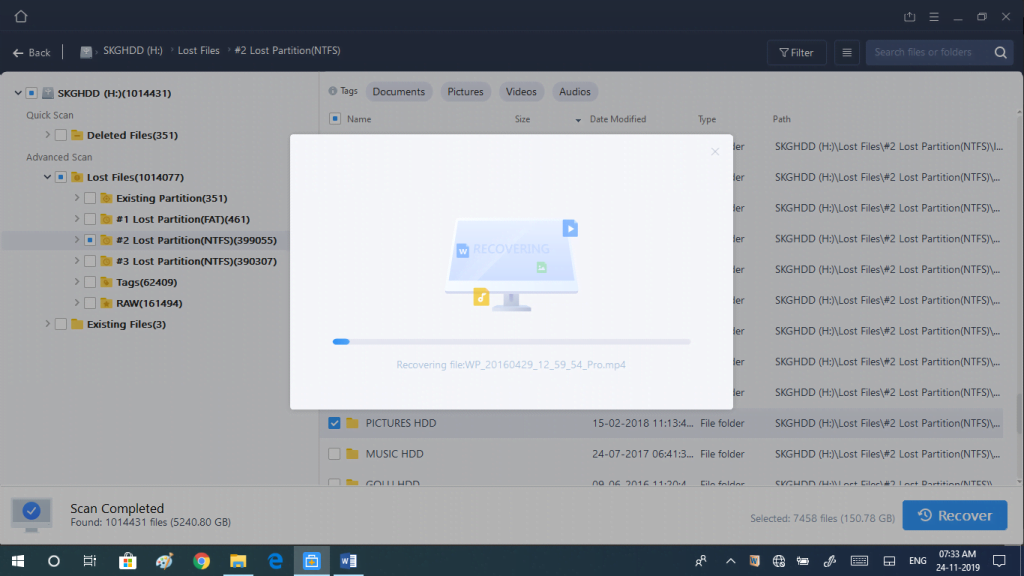
Step 16: The software initiated the recovery process. Waited for the recovery to complete.
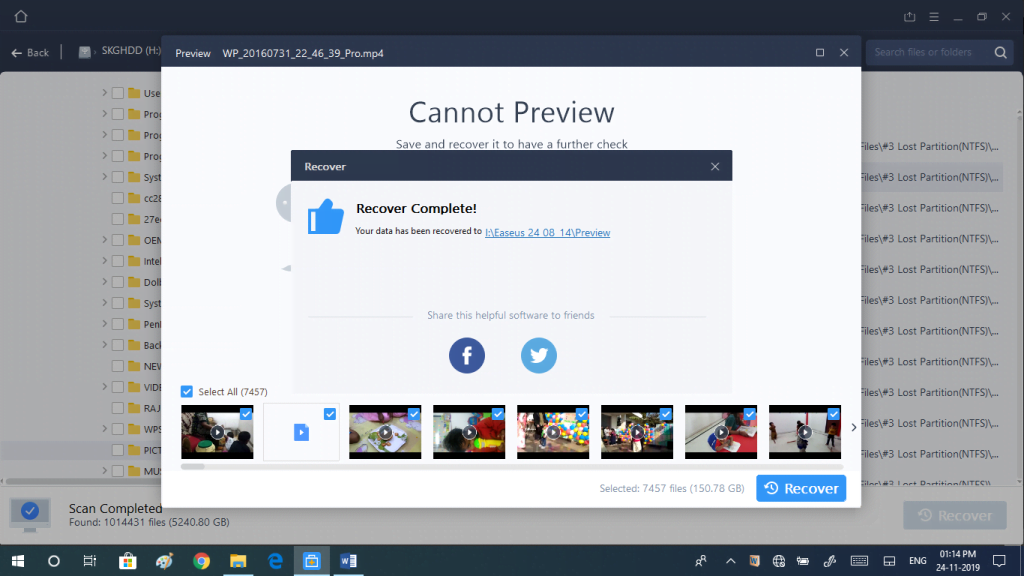
Step 17: When the recovery was over, the software displayed the “Recover Complete” message box with a link to the location where data was saved. Clicked the link.

Step 18: Verified the recovered files for integrity.
Conclusion
As you can see I was able to get most data back. While the scan results displayed over 5.2TB data, more than the actual storage, I chose to recover only the most important files first. The recovery is still pending but after recovering some of my files, almost 200GB, I am confident that I will get back most of my data.
But here are a few tips to follow, that I learned, after data loss for safe data recovery,
- Stop using the drive immediately to avoid overwriting. Continue use of the affected drive or PC can lead to data overwriting which destroys the recoverable files beyond recovery, making it impossible to recover data
- Before running a data recovery scan, it’s always good to check the disk health and SMART status. In required, image or clone the drive to avoid imminent disk failure during data recovery scan
- Always use a reliable data recovery tool. Do not use a cracked version
- If the drive or system contains business-critical data, get in touch with a data recovery expert before doing anything for professional help
- Always save scan information after scanning your drive or PC. This will help you avoid repeated scan. You can load the saved scan information anytime and resume saving recovered files as per your convenience.