Table of Contents
When you have had a smartphone for a while, it can start to feel slow and RAM or Random Access Memory can be the issue. Now RAM is the crucial memory where your device stores temporary files and resources.
Whenever the running program needs something, rather than pulling it all from the secondary storage (internal memory), it quickly pulls out those files from the RAM giving you a smoother and seamless user experience. As a result devices with more RAM can store more data and hence are smoother even while running demanding apps or games and heavy multitasking.
Whereas devices with low RAM even struggle while doing rudimentary things like browsing the internet or while watching a video.
But unlike computers where you can physically add as much RAM as you need, in a smartphone, the RAM is proprietary and cannot be physically added or removed without blowing the whole thing out.
But since your device memory which is used to store the data is quite similar to your RAM. You can turn a small portion of your SD card or internal memory into RAM. We call it virtually creating RAM for your device or VRAM. So let’s go ahead and add some RAM to your device.
Steps to Increase RAM on Android Phone Without Root (Upto 8 GB)
Follow the below steps to increase the RAM in your Android phone, tablet, or smart TV without root.
Step 1: Optimize Android Phone Settings
First, optimize your Android device settings to conserve and increase free RAM size on the Android phone or TV. If you use features, such as live wallpapers or animated lock screens, etc., they eat up a lot of RAM as they need to continuously run in the background leaving little RAM for other processes. This also drains your phone’s battery quickly.
To ensure your device has sufficient available RAM and increase free RAM size for other tasks and apps, you can:
- Disable or uninstall live wallpapers
- Uninstall any other customization app, such as apps for beautifying the notification bar, lock screen, etc.
Step 2: Disable Animations
You can also disable the built-in animations that appear when you switch between the apps, access the notification bar, unlock the phone, or open and close any app. You can either reduce the animation or completely disable them to save more RAM and boost the Android phone or TV performance. The steps are as follows:
- On your Android phone, go to Settings.
- Click About Phone. Find and tap on Build Number 7-8 times continuously to enable Developer Options.
- Go back to Settings and then tap on ‘Developer Options.’

- In the Developer Options, find and disable or reduce the Animation duration scale, Window animation scale, and Transition duration scale.
Step 3: Manually Close or Uninstall Apps
If there are apps that you don’t use often or use only once in a while, it is recommended to force close or uninstall them to save on storage and increase available RAM size. The steps are as follows:
- Open the Settings on your Android phone or TV and then go to Apps.
- Tap on the apps you don’t use often or once in a long while. This will show you the app details and options, such as Open, Force Stop, and Uninstall.
- Tap on Force Stop to close all the background activities run by the app. This will increase the free RAM and make it available for other apps.
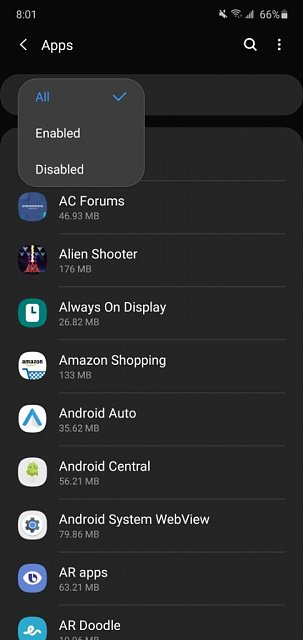
- You can also tap on Uninstall and then confirm the uninstallation to remove the app from your Android device. You can later install and use the app if required and then uninstall it again to save and increase RAM.
Recommended for You: You can also watch this video to learn how to expand the RAM on your Android device without root.
Step 4: Enable Virtual RAM (VRAM) Option
Some devices, such s Xioami, Oppo, OnePlus, etc., come with an option under the About Phone section to enable virtual RAM on Android devices. This can help increase the RAM size on Android phones or TVs. The steps are as follows:
- Open Settings on your smartphone or TV and then tap on About Phone.
- Find the RAM option and tap on it.
- Then enable the RAM Expansion option.
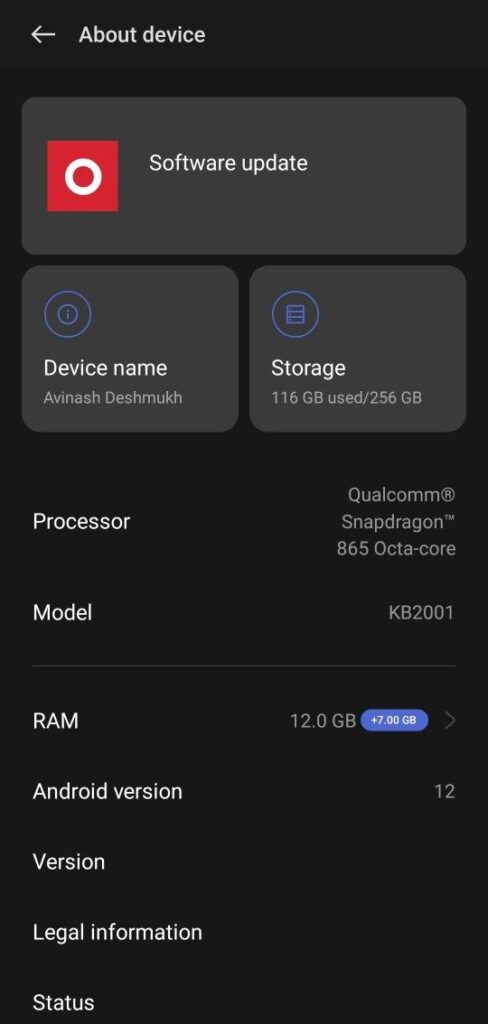
- From the Expand By section, choose by how much you want to increase the RAM on your Andriod device without root using the slider.

In some devices, there may not be an option to choose the size by which you can increase the RAM on your Android device without root. Instead, they increase the RAM size by the pre-defined size.
If this setting is not available on your Android phone, no worries, follow the next step to learn how to increase RAM in your particular device.
Step 5: Boost RAM on Android Devices to Expand RAM Size
Follow the below steps based on the Android phone you have to increase the RAM on your Android phone without root.
To increase RAM in OnePlus Android phones and devices, follow these steps:
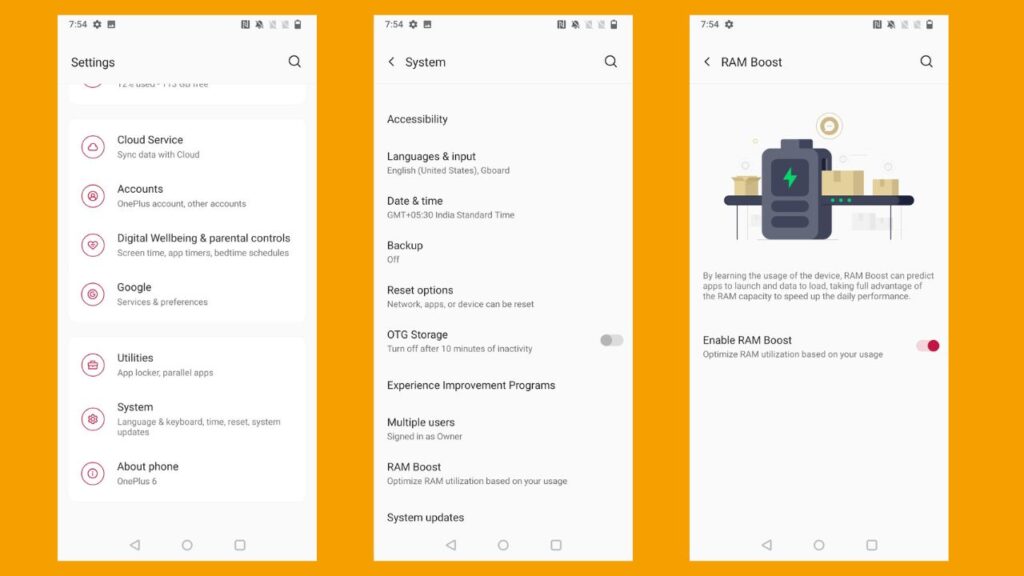
- Open the Settings in OnePlus and tap on System or Additional Settings (whichever setting is available on your device).
- Tap on the RAM Boost option and then enable the RAM Boost slider. You can choose between 3 GB, 5 GB, and 7 GB. This swaps your internal storage as virtual RAM to increase the available RAM size in Android devices.
To increase RAM in Samsung Android phones and devices, follow these steps:
- Go to Settings > Battery and device care and then tap on Memory.
- Tap on Clean now to free up RAM and increase the RAM size.
- You can then tap on RAM Plus and then choose the desired size by which you want to increase the RAM size.
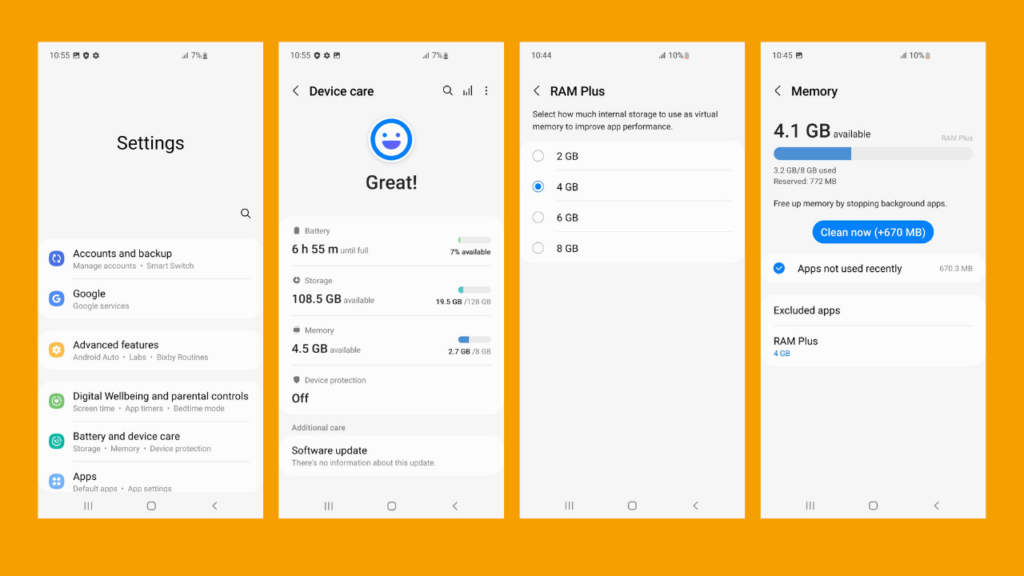
- You can choose between 2 GB, 4 GB, 6 GB, and 8 GB.
To increase RAM in Motorola Android phones and devices, follow these steps:
- On Motorola devices, go to Settings.
- Tap on System > Performance > RAM boost.
- Then choose the desired amount of VRAM (virtual RAM) that you want to increase.
- Based on the Motorola model you have, you can increase the RAM from 2 GB to 8 GB.
- Once done, you need to restart the smartphone for the changes to take effect.
To increase RAM in Xiaomi Android phones and devices, follow these steps:
- On Xiaomi devices, open Settings > Additional Settings.
- Tap on the Memory extension option.

- Then enable the Memory Extension option. This will increase and expand the RAM in your Android phone by 3 GB.
Steps to Increase RAM on Android Phone With Root (Up to 4GB)
To expand or increase your Android phone RAM, you’ll need the following things,
- A Class 4 or higher SD Card – I strongly recommend using a Class 6 or Class 10 Sd card because the faster the SD card better the performance.
- A Rooted Android Device – If your device is not rooted or if you don’t know what root is or how to root your Android device, then do check this guide on The easiest way to Root any Android Device without a PC
- An app from Google Play Store – Rheosoft RAM Expander (Swap): This is a paid app on PlayStore and for the money, it’s worth it. This will make the process much easier.
Update: You may also use Link2SD or RAM Manager Pro to boost and increase your RAM and improve your Android phone performance.
But before you proceed, please install this free MemoryInfo & Swapfile check from Play Store. This will let you check whether your device is compatible with RAM Expansion or not. This is how you check,
- Install the MemoryInfor SwapCheck app and open it
- Tap on Rheosoft RAM expander Test tab at the bottom.
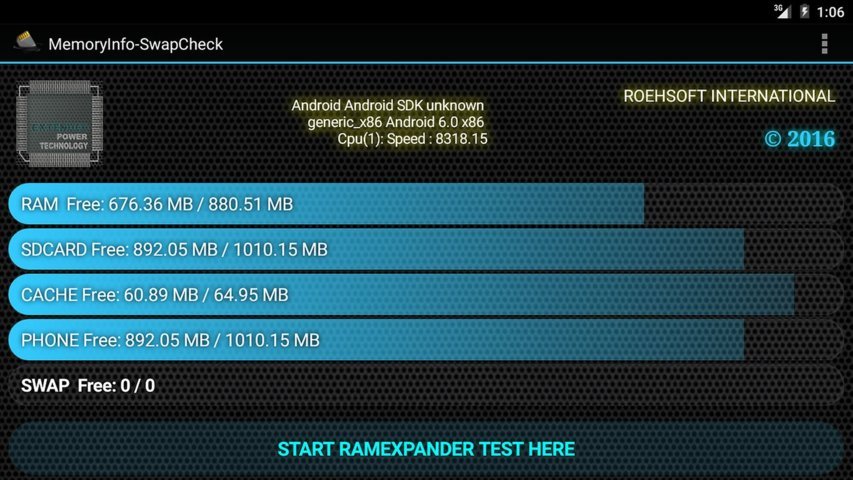
- Now select the Sd card location. After the testing is completed, result will be displayed. If your device is compatible, a window saying “Congratulations” will be displayed

If you don’t get the Congratulation message popup then your device kernel probably doesn’t support RAM expansion and hence your money is saved :). You may still give it a shot, if it fails then you can always ask for an app refund within 2 hours of purchasing this app and get your money back from the Play Store.
- Now open the Rheosoft RAM expander App and make sure that your device is connected to the internet.
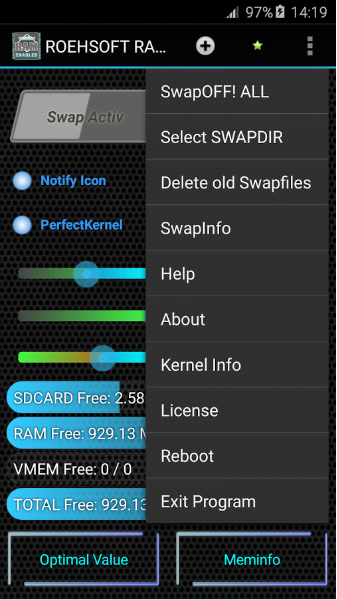
When prompted, please grant the root permission to this app and then you’ll see a bunch of options and numbers. You can either manually configure each one of these settings individually or you can simply tap on the “Optimum Value” button. This will automatically configure all the values based on your device.
Now the only next thing to do is to configure the Swap file slider. Using this slider you can select the amount of RAM that you want to create. The app will automatically set it to a maximum RAM value that your device can stably support. Here you can set it to a minimum of 400MB or a maximum of as high as 4GB. But it’s recommended that you must not go above the optimum value.
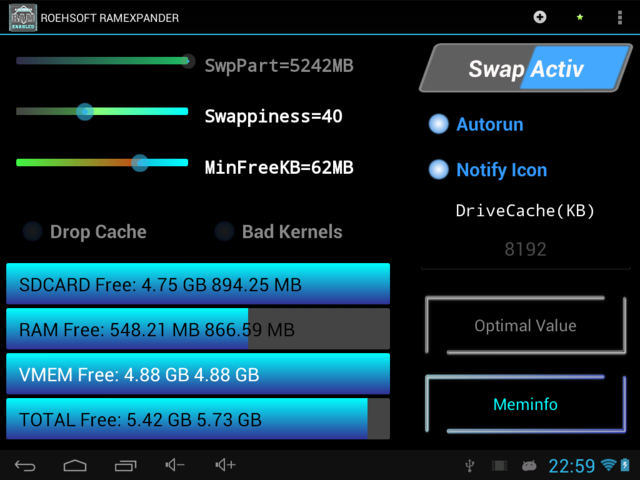
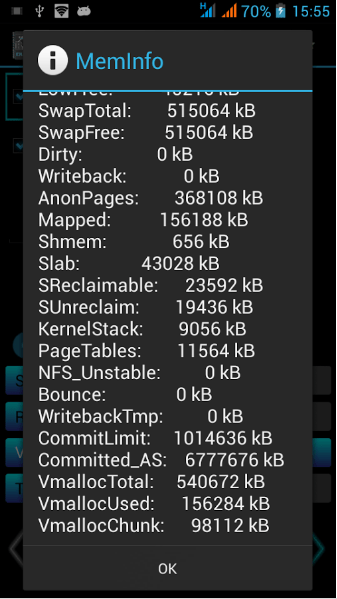
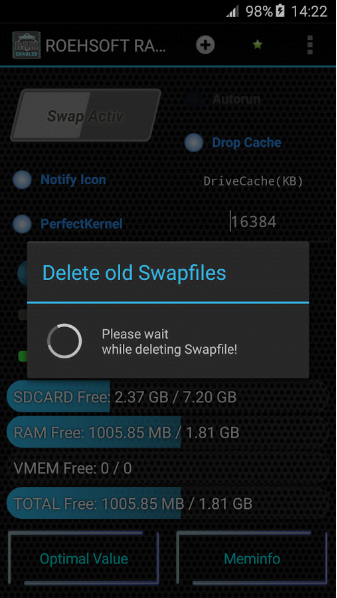
- According to me, 1 GB of virtual RAM over the existing RAM is more than enough for any activity on your device.
- Now finally tap on the Swap Active slide button at the top. It will ask you to select the external SD card location and then again tap on the Swap Active button after locating the SD card.
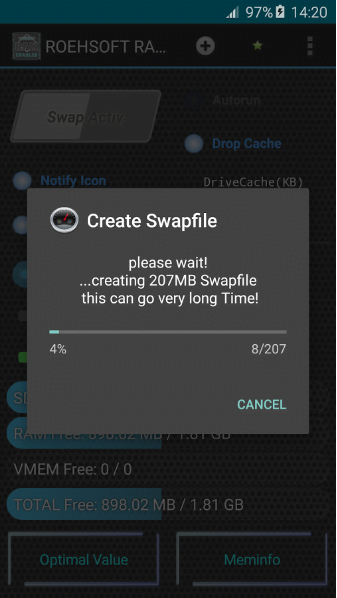
- The swapping process will start as soon as you tap the button which will take around 2-15 minutes depending upon the amount of RAM you are creating. Here you can also try selecting the internal memory and if it works then please let me know via the comments below.
Now upon sliding down the notification bar you’ll see a new info bar showing the amount of expanded RAM that you just had created. So if your device has 1GB of RAM and if you have created 1GB virtual RAM then now your device is running on 2GB of RAM.
Please Note: The amount of RAM that you have just created will not be shown in your device’s application manager as it’s virtual RAM and not hardware-based. But it will function similarly to your internal RAM.
FAQs on Using Virtual RAM (VRAM) on Android Devices
The use of virtual RAM on Android devices introduces several risks and downsides. Implementing VRAM, particularly through unofficial methods, can lead to system instability, such as crashes or lag, due to the reliance on slower internal storage or SD cards. There’s also a risk of security vulnerabilities through third-party apps or modifications. Such modifications might void the manufacturer’s warranty and, if done incorrectly, could result in data corruption or loss.
Leveraging internal storage or an SD card as VRAM can adversely affect both the longevity and performance of these storage mediums. Since flash storage has a finite number of write cycles, using it for VRAM accelerates wear, potentially reducing its lifespan. Over time, the continuous read/write operations may also degrade performance, leading to slower device functionality.
For optimizing VRAM performance, it’s advisable to choose high-endurance and high-speed SD cards. Cards classified as Class 10, UHS-I, or UHS-III are preferred for their faster data transfer rates. Brands like SanDisk Extreme, Samsung Evo Plus, or Lexar Professional are recommended due to their focus on durability and high performance.
Increasing RAM through VRAM affects battery life by leading to increased power consumption. The additional read/write operations to the storage consume more energy, and managing VRAM also places extra load on the processor, further draining the battery.
Reversing the process of adding VRAM is possible.
For methods that don’t require root access, it typically involves undoing the steps taken to activate it, like uninstalling specific apps or returning to default settings. For root-based methods, it’s crucial to carefully remove any modifications and restore the original system files.
It’s recommended to have a backup before making changes, allowing for a straightforward restoration to the device’s original state if needed. Consulting specific guides or forums tailored to your device model can provide detailed instructions and help avoid issues during the process.
Conclusion
So if earlier your device or a certain app needed more RAM and there was simply not enough RAM due to which your phone or game slowed down or lagged a lot then this VRAM will come to rescue your device and will help your device run much faster and perform better than it was earlier. Now one really basic thing that you should understand is that there are several other factors like CPU frequency, no. of cores, Cache memory, app optimization in your device, background activities, and RAM that affect the speed and the performance of your device. this means the RAM alone cannot speed up your device but it will help apps that require more RAM to run faster in your device.
However, you won’t see huge boost in performance in day-to-day activities and apps that you just ran. As your hardware RAM will pretty much do the job. So while playing low-end games or high-end devices with sufficient RAM, you won’t see any boost in performance. However, you’ll definetely notice a significant improvement in speeds and performance especially while playing high-end games on low-end devices or devices worth low amount of RAM.

