
Table of Contents
MX Player comes with tons of features and is a must-have app on any Android device. It lets you play any video file whether it is an HD, FHD, or 4K with high-quality sound. Additional gesture support makes using this player for video a treat. It is one of the features that was unique about the MX Player.
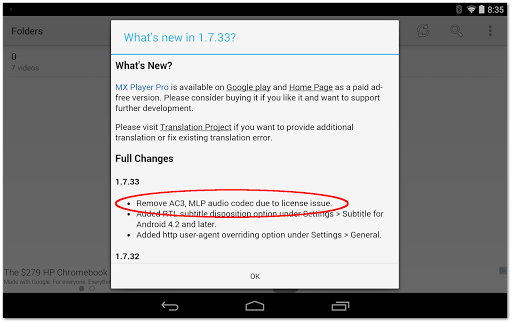
However, the MX player does have some limitations and one of the biggest issue with MX Player, both free and paid, is that the player does not support ac3, eac3, mlp, and dts audio natively.
In the recent versions of MX Player, the company officially removed DTS & Dolby audio codec support from their much-praised video player for Android. Therefore, if your video has dts, dtshd, ac3, eac3, or mlp audio tracks, the MX Player will not play any audio. Instead, you will get a popup message saying that only the video is playable.
Thanks to ktsamy, a renowned developer from XDA, you can now get the digital audio support back to MX Player very easily. Right now, there are no ac3 codec for MX Player that you can download from the Play Store and therefore, you need to install the MX Player codec for ac3 audio manually.
Detect Which MX Player ac3 & dts Custom Codec supported by your Device
Before you move ahead, it’s important to know which custom codec pack your device will support. Follow the below-given steps to find out the custom codec name.
- Open the latest version of MX Player and go to ‘Settings;
- Then navigate to the Decoder
- Scroll to the bottom of the page and you will find an option that says Custom Codec
- You will find the type of codec pack your device support. In my case, it’s ARMv7 Neon type custom codec pack

Accordingly, download one of the following MX Player codecs files for your device as mentioned in the player. If you are not sure then download the all in one pack (AIO) that will work on all devices and will help you fix MX Player codec for ac3 audio.:
Install MX Player codec for ac3 Audio:
Method 1: Automatic Installation
- Keep the downloaded MX Player AC3 & DTS codec zip file in the root of your Internal memory or in the downloads folder
- Open MX Player
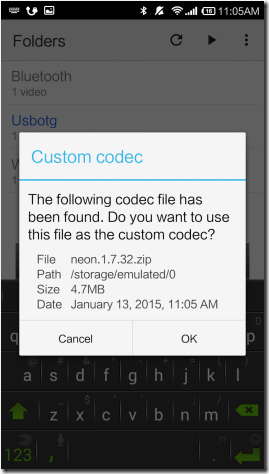
- If compatible AC3 and DTS codec file is found, MX Player will automatically ask for the confirmation to use it as custom codec
- If you press OK, MX Player will restart & Load the custom Codec
- Once it restarts, from Options Go to Help>About. Check whether the codecs are loaded or not.
- If Custom Codec is loaded, it will show the platform & custom codec version below the version of MX Player
Method II: Manual Custom Codecs Installation to fix MX Player codec for ac3 audio
- Open MX Player on your Android device
- Click three dots at the top right and go to MX Player Settings
- Tap ‘Decoder’ and then scroll to the bottom
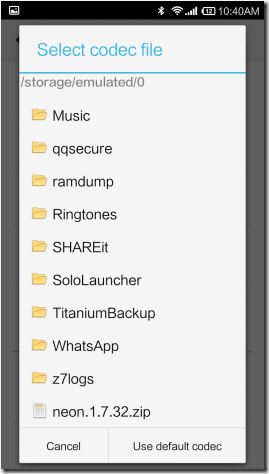
- Tap on ‘Custom Codec’
- Navigate to the downloaded AC3 & DTS codec zip folder
- Tap on the codec zip file. If you have selected the right zip file MX Player will automatically restart. Otherwise, it will revert with error (“Can’t find custom codec for this version“).
In case you choose AIO codec pack, MX Player will automatically load the supported AC3 and DTS codec for your device from the list.
- Once MX Player restarts, click three dots at top-right and tap Help>About. Check whether the codecs are loaded or not.
If Custom Codec is loaded, it will show the platform & custom codec version below the MX Player version info. It means MX Player codec for ac3 audio is installed and fixed successfully.
Usage of Custom AC3 and DTS Codec in H/W decoder:
If you want to play a video with DTS or AC3 audio track while using H/W decoder,
- Open MX Player and tap on three dots at top-right
- Go to Settings>Decoder
- Scroll down and enable SW audio and SW audio (local)
After enabling the S/W audio, the H/W decoder will render the Video and the S/W decoder will render audio (ac3, dts, dtshd, mlp, and eac3 audio).
If you want to use software audio decoding temporarily,
- Play the video and press on audio selection button;
- Enable S/W audio. S/W audio is used temporarily for that file.
At this stage, you have successfully fixed the MX Player codec for ac3 audio.
Usage in H/W+ & S/W Decoders:
No special change in setting. Works without additional tweaks.
That is how you install the custom codec in MX Player for AC3 and DTS audio support. From now on, you will be able to play all kinds of video without worrying about any extra settings for ac3, eac3, dts dolby, mlp trueHD, and dtsHD audio. The audio quality with these codecs is superb and now you can play any video with any soundtrack as MX Player now supports almost all of the modern audio codecs (after adding custom codecs).
In case you find instructions tricky to follow, here’s the video tutorial to help you understand better on how to fix the ac3 codec for MX Player.
In case you face any issue while installing and fixing the MX Player ac3 and DTS custom codec pack, let us know via comments and we will get back to you with the right solution and will definitely assist you in fixing the MX Player codec for ac3 audio.
Before You Go…
Just wanted to let you know that We’ve launched YouTube Channel where we upload awesome video content. Make sure you hit the subscribe button to stay up to date with the new videos we upload every week. Also, subscribe us for more h