
Table of Contents
Do you have one of those old “All-in-One” or “3-in-1” wired printer cum scanner cum photocopying machines from brands like Canon, HP, etc.? If yes, you can follow this guide to turn your USB or LAN wired all-in-one printers into wireless scanning and printing machines.
In this guide, I am going to show you steps to convert your old 3-in-1 Inkjet printer of any brand into a completely Wireless Printing and Scanning machine. You can then use your PC or smartphone to print and scan using your printer wirelessly.
Steps to Turn Your Old Wired Printer to Wireless Scanning and Printing Device
One common way to turn a USB wired printer into wireless is by using a WiFi router with USB support. However, in this guide, we will convert our printer into wireless printing and scanning device using Raspberry Pi, which is a low-cost, credit-card-sized computer.
To get started, you need the following,
- A Raspberry Pi Zero or Raspberry Pi 2, 3, or 4 for this project. They all are going to work fine.
- An HDMI Cable to connect Raspberry Pi to monitor or TV display
- WiFi or LAN Cable
- Power Supply for Raspberry Pi
- A Class 10 MicroSD card
- A Keyboard
- A Mouse
- A card reader if you are going to use a PC or Mac and your laptop doesn’t have a SD card slot
Once you have the stuff you need, follow these steps,
Step 1: Prepare the SD Card
To prepare your SD card, follow these steps,
- Connect your MicrosSD card to your PC or laptop using SD card reader.
- Then download Raspberry Pi Imager program and install it.
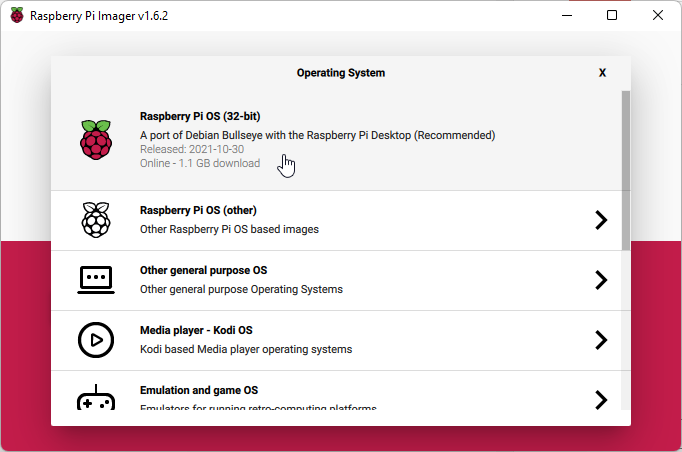
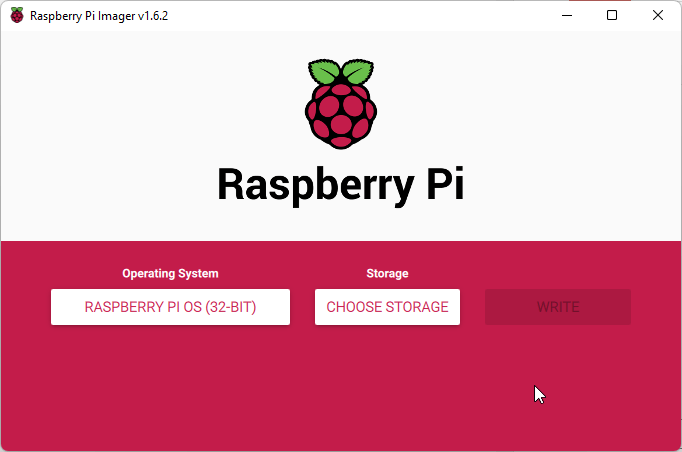
- After the installation, run Raspberry Pi Imager and click Choose OS> Raspberry Pi OS (32-bit)
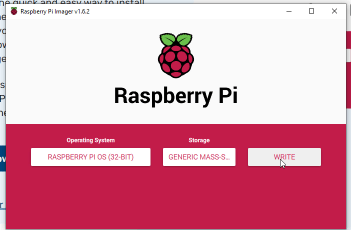
- Click Choose Storage and select the SD card
- Then click Write and wait for it to finish.
Step 2: Setup Raspberry Pi
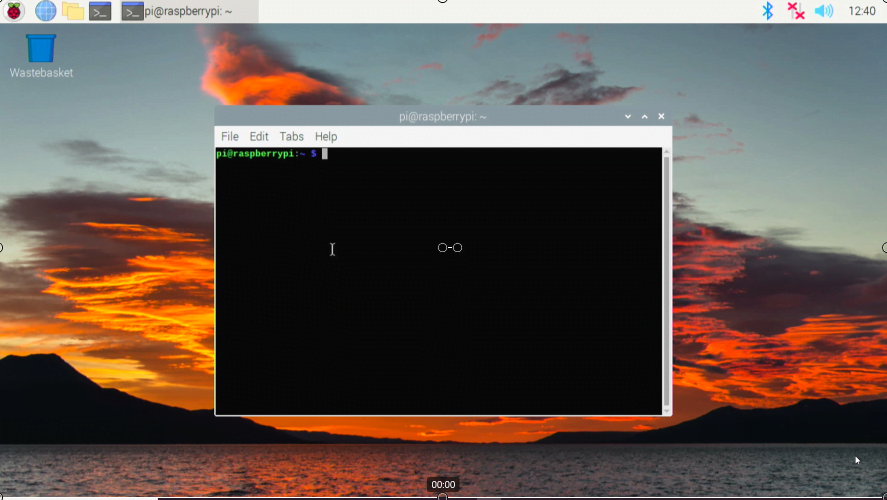
Connect your SD card to your Raspberry Pi and then turn it ON. Wait for it to boot completely and then connect your keyboard and mouse to the Raspberry Pi.
Close all the open windows and then open a new Terminal window.
TIP: You may also enable SSH for remote management and controlling the Raspberry Pi.
Step 3: Install and Setup CUPS
We have already created a detailed tutorial on this with a video guide. Refer to our guide on How to Turn A USB Wired Printer into Wireless WiFi Printer?
After setting up CUPS, you can print from your Android smartphone, Mac, or PC wirelessly. For iOS devices, you need to set up the AirPrint service.
Step 4: Setup AirPrint on raspberry Pi for iOS Devices
To print wirelessly from your iPhone or iPad, you need to set up the AirPrint service on your Raspberry Pi. The steps are as follow,
In Raspberry Pi, open the Terminal window and execute the following commands. You may also use SSH to install the AirPrint service.
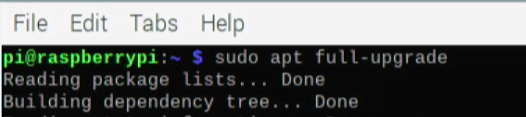
sudo apt update
sudo apt full-upgrade
After the update/upgrade, install the “Avahi daemon” for AirPrint by running the following command.
sudo apt install avahi-daemon
The Avahi-daemon package will implement Apple’s Zeroconf architecture, also known as Bonjour, which is AirPrint uses to connect your printer (Raspberry Pi) to iOS devices, such as an iPhone or iPad.
Finally, restart the Raspberry Pi using the following command,
sudo reboot
After the restart, you can send print requests from your AirPrint devices, such as iPhone, to your Raspberry Pi-connected printer.
Step 5: Install and Setup SANE (Scanner Access Now Easy)
SANE will enable you to use your USB wired scanner for wireless scanning. For this, unlike AirPrint and CUPS, there is no built-in utility. Thus, we need to use third-party open-source client apps that support the SANE protocol.
The steps to set up and use SANE for wireless scanning are as follow,
- Open SSH or Terminal window and run the following command to update the package list and upgrade out-of-date packages.
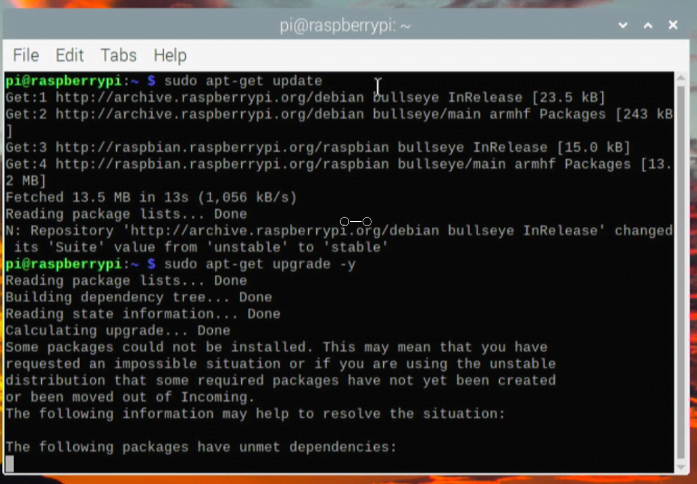
Sudo apt update
Sudo apt upgrade -y
- After the update/upgrade process, run the following command to install SANE.
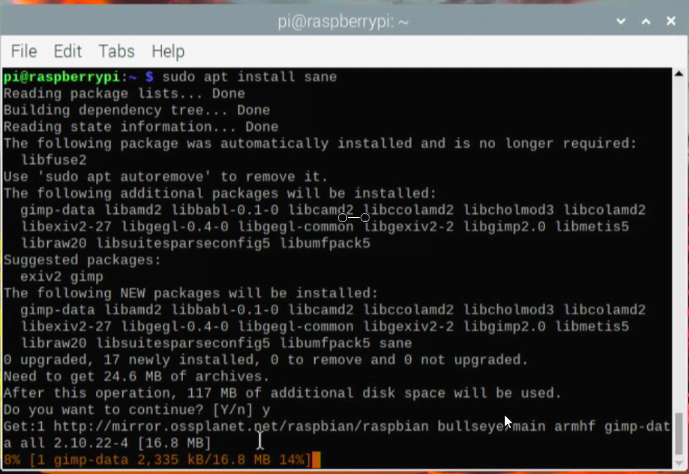
sudo apt install sane
The good thing about SANE is that most scanners work out of the box and do not require any additional setup. However, some may require you to install additional drivers, such as HP.
- You can install the required drivers by installing a package using the following command.
sudo apt install hplip
After installing the SANE software on your Raspberry Pi, check if your scanner will work wirelessly with the software. The steps are as follow,
- Turn On your scanner and connect it to the Raspberry Pi. Then check if the scanner is detected and working using the following command in the terminal window.
sudo sane-find-scanner -q

- If SANE finds your scanner, it will display a message such as,
found USB scanner (vendor=0x04a9 [Canon], product=0x176d [MG2500 series]) at libusb:001:007
- If SANE couldn’t find your printer, no message is displayed. Try restarting and reconnecting the printer and Raspberry Pi via USB 2.0.
- To test if it’s working, run the following commands,
scanimage -L
- If the printer is supported by SANE, it will display a message, such as below.
device `pixma:04A91827' is a CANON Canon PIXMA TS3100 Series multi-function peripheral
- If no message is displayed, your scanner is not supported by SANE. Check the SANE official compatibility documentation for more details.
- You can now start scanning documents or images on your printer wirelessly using the following command.
scanimage > techposts.jpg --format jpeg --resolution=300 -p

- The command parameters denote,
- techposts.jpg is image name
- –format parameter to specify the format, such as “jpeg”
- –resolution parameter is used to a resolution of 300 DPI
- -p denotes progress of the scan in the command line.
- To check the scanned file info, use File command,
file techposts.jpg
To use your Smartphone or PC for wireless scanning, you must configure the Raspberry Pi as a scanner server. For this, you need to modify a few files. The steps are as follow,
Create a group. You can name it anything, such as “scanner.”
sudo addgroup scanner
Then add the default Pi user to the group using the following command.
sudo adduser pi scanner
Restarting the Raspberry Pi for changes to take effect.
sudo reboot

To get started, we need to create a service that will run the SANE daemon on the Raspberry Pi as soon as it starts. Otherwise, you would have to manually start the SANE service after every reboot.
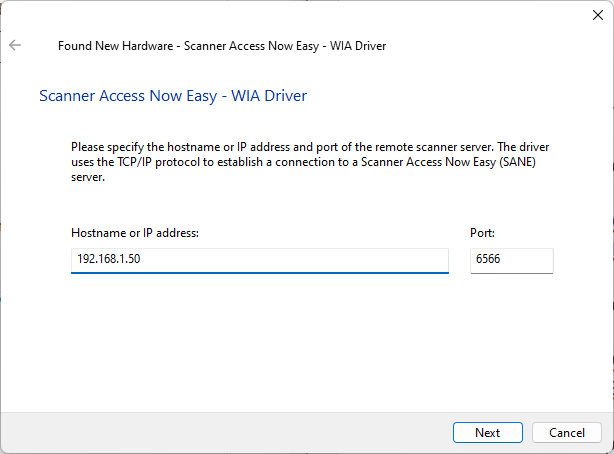
For this, create a Systemd socket file for SANE at port 6566 using the following command.
sudo nano /etc/systemd/system/saned.socket

Then copy and paste the following lines,
[Unit]
Description=saned incoming socket

[Socket]
ListenStream=6566
Accept=yes
MaxConnections=1

[Install]
WantedBy=sockets.target
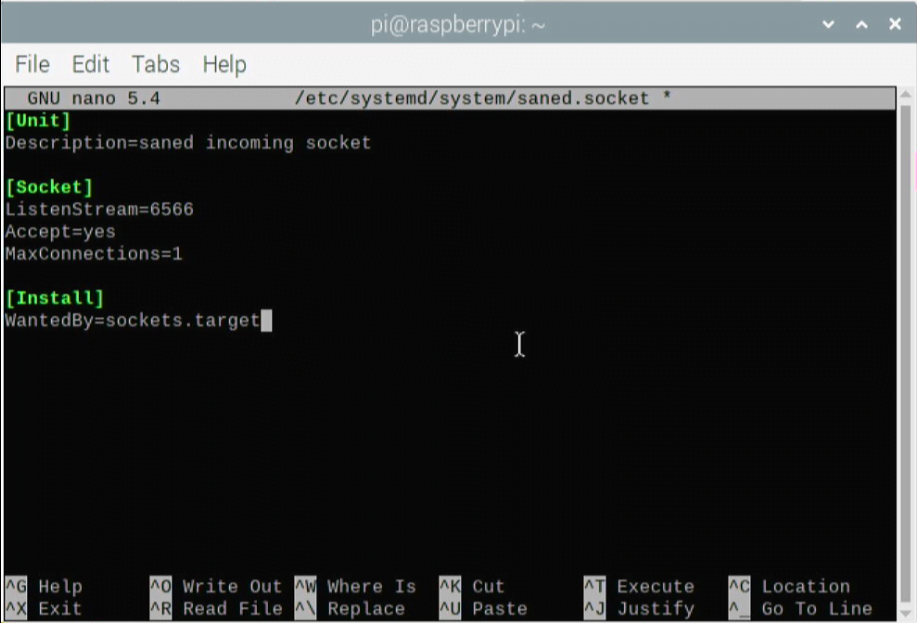
The Port will now be listed for the service and decide the maximum number of connections and whether to accept the incoming connections or not.
After this, press CTRL+X then Y, and then hit the Enter key to save the changes.
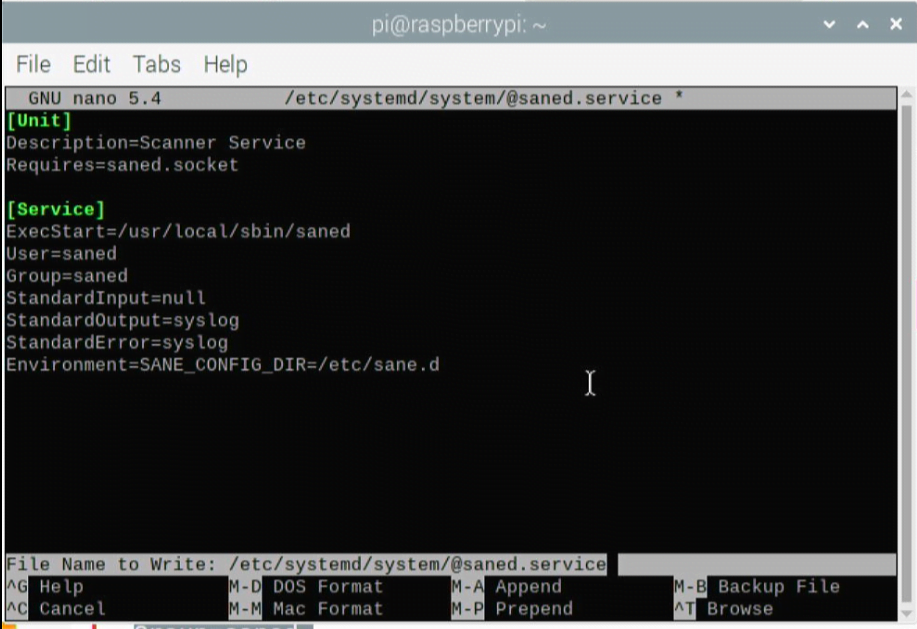
Now add and edit a SANED Service file that will tell the system how to handle and run SANE on Raspberry Pi. The command is as follow,
sudo nano /etc/systemd/system/@saned.service

Now copy and paste following the lines into the @saned.service file and press CRTL+X then Y and Enter key to save the changes.
[Unit]
Description=Scanner Service
Requires=saned.socket

[Service]
ExecStart=/usr/local/sbin/saned
User=saned
Group=saned
StandardInput=null
StandardOutput=syslog
StandardError=syslog
Environment=SANE_CONFIG_DIR=/etc/sane.d
Now we need to enable remote access so it knows who can access the SANE server on your Raspberry Pi and scan images or documents wirelessly.
For this, you need to edit the saned.conf file using the following command,
sudo nano /etc/sane.d/saned.conf
Locate the following section in the file
## Access list
And add the IP or IP range below this heading via which you want to access the SANE scanner server. You may assign a reserved IP to your Raspberry Pi before this in your router so that the IP remains the same even after reboot.
My local network uses the “192.168.1.1” subnet and my Raspberry Pi IP is 192.168.1.50/24
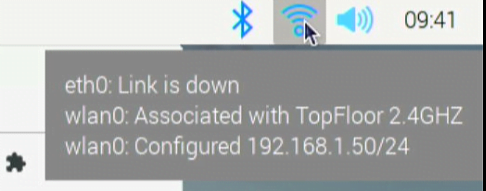
So I will add that
192.168.1.50/24
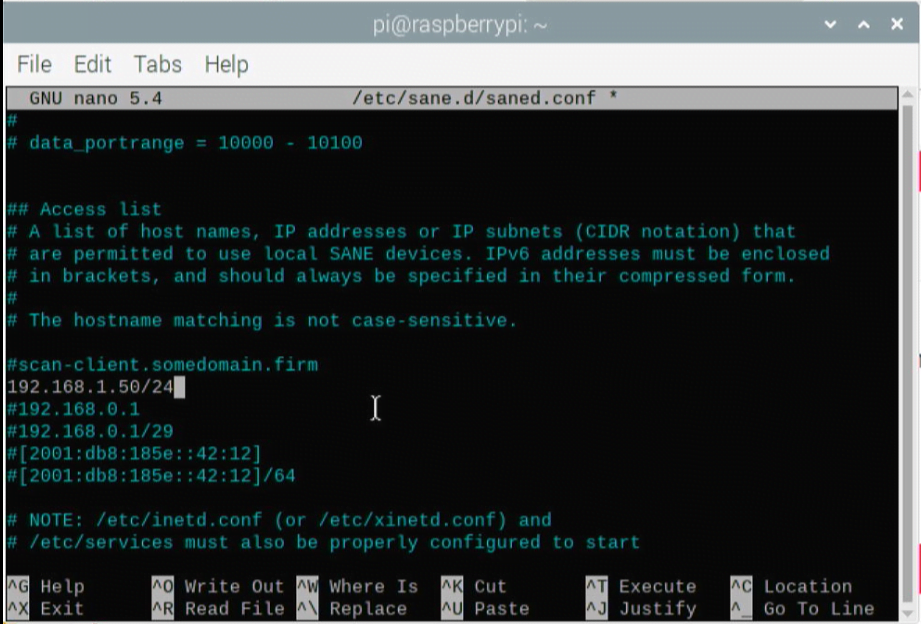
And save by pressing CTRL+X then Y followed by the Enter keypress.
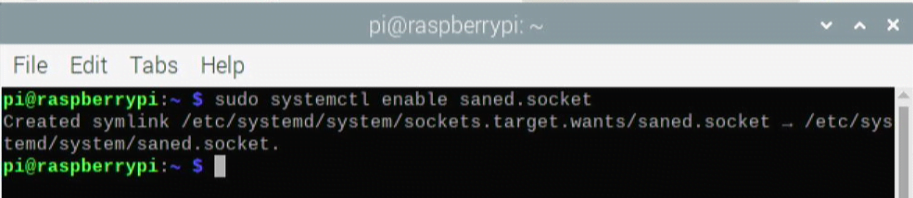
Now that you have configured everything, you can start up the SANE service and enable the SANE service using systemctl, which will allow SANE to start at Raspberry Pi boots automatically.
The command is as follow,
sudo systemctl enable saned.socket
Now, you can start up the SANE scanner service using the following command in the terminal,
sudo systemctl start saned.socket

To verify if the SANE daemon is running on your Pi, use the following command,
systemctl status saned.socket
If everything is working as it should, the following message will be displayed,
“Active: active (listening)“.
Now, you can access and start scanning from your printer remotely.
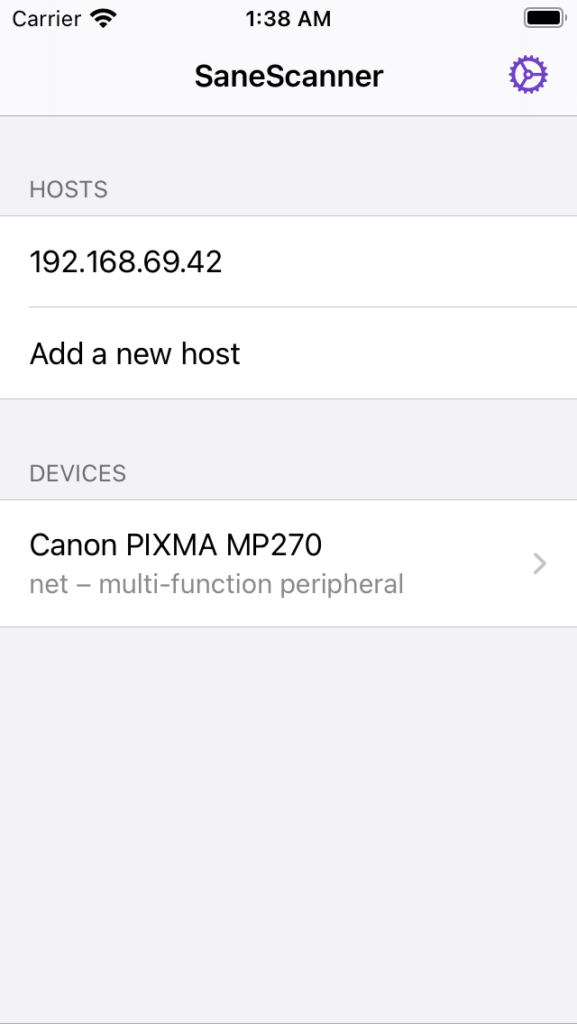
You can install the SANE client on your PC or Android Smartphone, enter the Raspberry Pi server IP address and use the app to scan images or documents wirelessly.
To view the IP address of your Raspberry Pi, execute,
hostname -I

Download the third-party SANE apps for your devices to start scanning remotely.
SANE Client App for Windows PC

SANE Client App for macOS
SANE Client App for Android Smartphone
SANE Client App for iOS Devices
In case you need help in settings up and converting your printer into a wireless printer and scanner, leave a comment below. If you find this helpful, please share this and subscribe to our YouTube channel or more such guides.