
Table of Contents
macOS Big Sur is the current major release of macOS, Apple’s operating system for Macintosh computers. It was announced on the 22nd of June, the last year 2020, and was released on the 12th of November, the same year. However, you can also install macOS Big Sur on a Windows PC. You can use the OpenCore or Clover bootloader to install the macOS Catalina with Windows OS and dual boot or you can install macOS Big Sur on Windows 10 PC using VMWare.
Steps To Install macOS Big Sur on Windows
- Download and Install the prerequisite files.
- Unlock VMware.
- Create a new Virtual Machine.
- Edit macOS Big Sur VMX file.
- Launch macOS Big Sur Virtual Machine
- Install VMware tools (optional).
Step 1: Download and install the prerequisite files
The following is a list of files that are required to successfully run macOS Big Sur on a Windows PC. Kindly download and install each one of them.
- VMware Workstation 15 Pro OR VMware Player 15.
- macOS Unlocker V3 for VMware
- Github Link
- Direct Download Link
- macOS Big Sur Beta ISO
- VMware Tool – Mediafire (Optional).
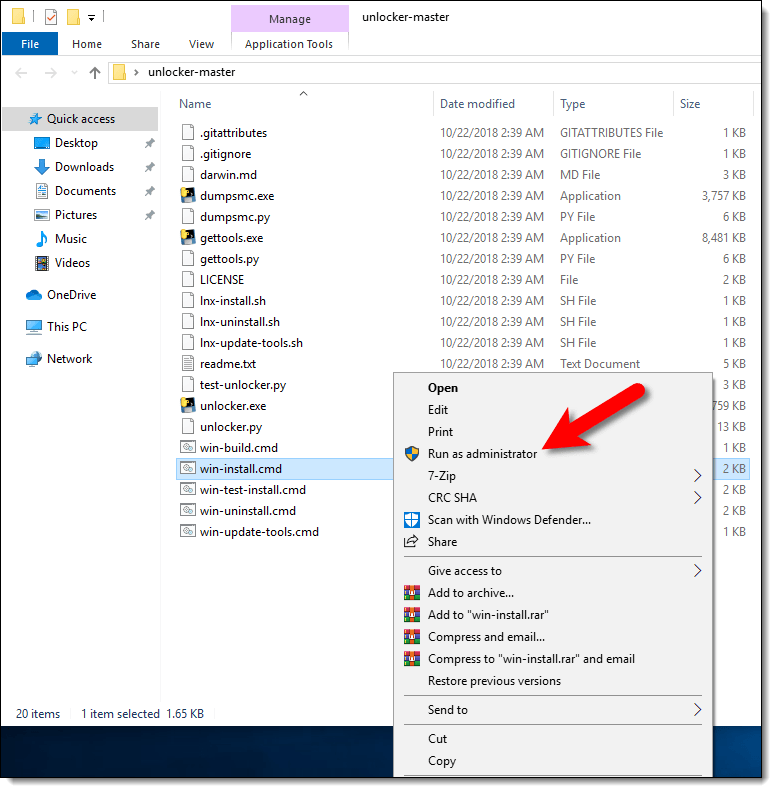
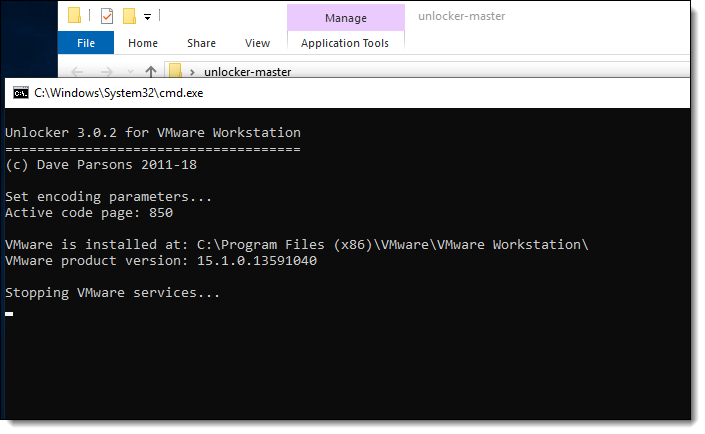
Step 2: Unlock VMware
In the previous step, you must have downloaded macOS Unlocker V3 for VMware from either one of the links provided. After extracting the zip/rar file that you downloaded, run win-install.cmd as administrator.
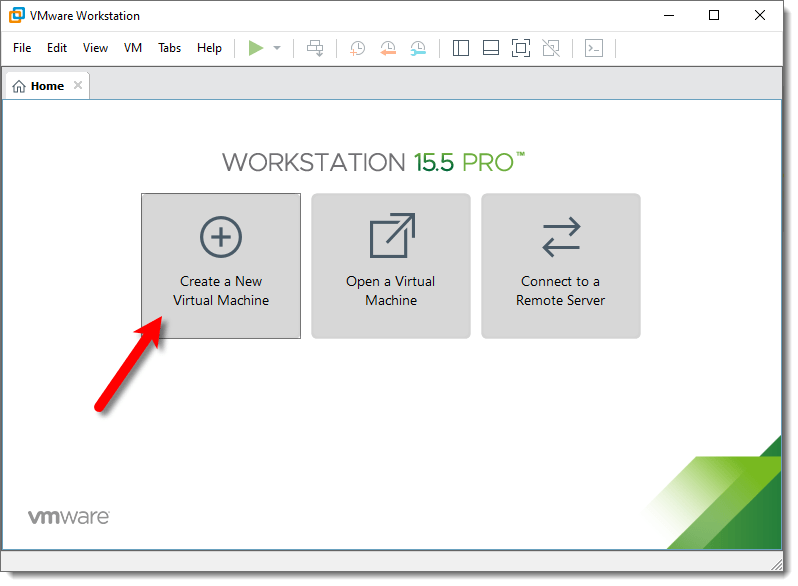
Step 3: Create a new Virtual Machine
To create a new virtual machine on your computer, follow these instructions:
- Launch VMware.
- Click on Create a New Virtual Machine.
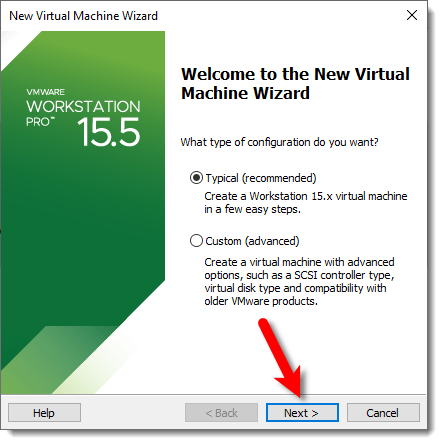
- Select ‘Typical’ and then click on the Next button.
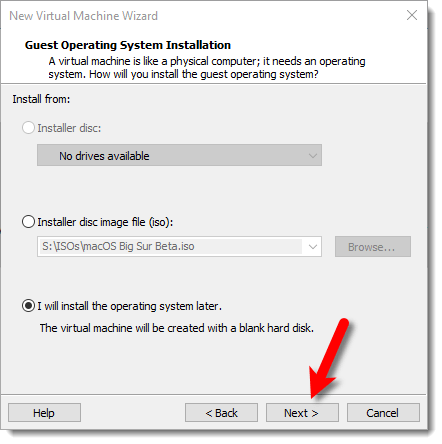
- Select “I will install the operating system later” and click Next.
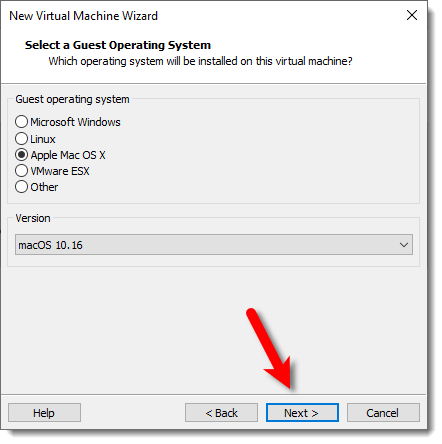
- From the list that you see, choose Apple Mac OS X and then click on the Next button.
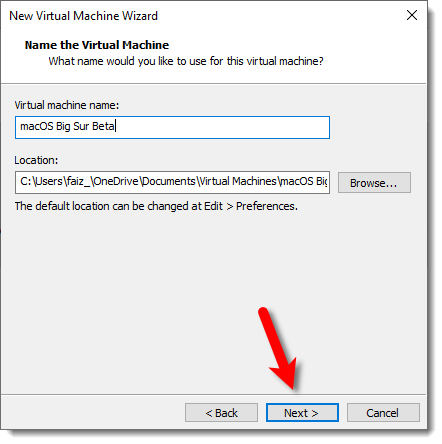
- You will now have to give a name to the Virtual Machine. Then, click on the Browse button and select a location to save the virtual machine files. Once done, click on Next.
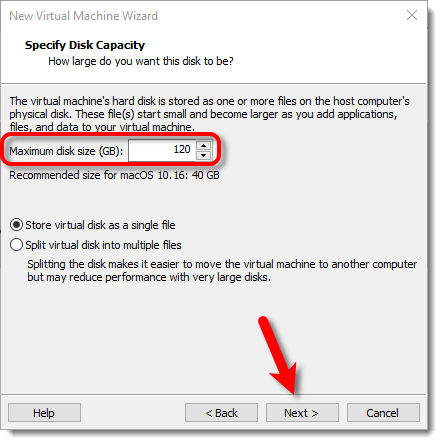
- Make sure you set the values in the following screen like the screenshot given below.
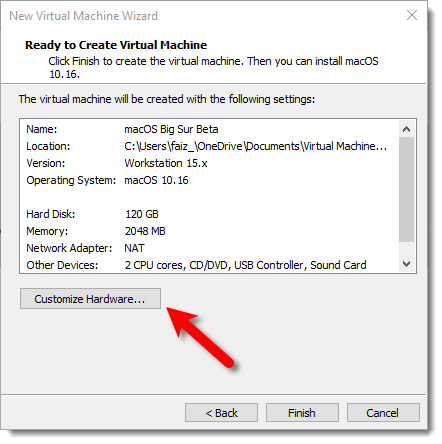
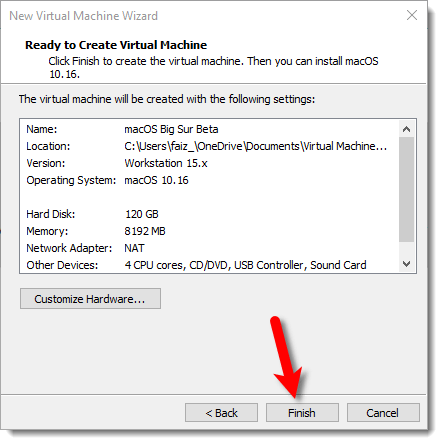
- On the next screen, which would be Ready To Create virtual Machine, Click on the Customize Hardware button.
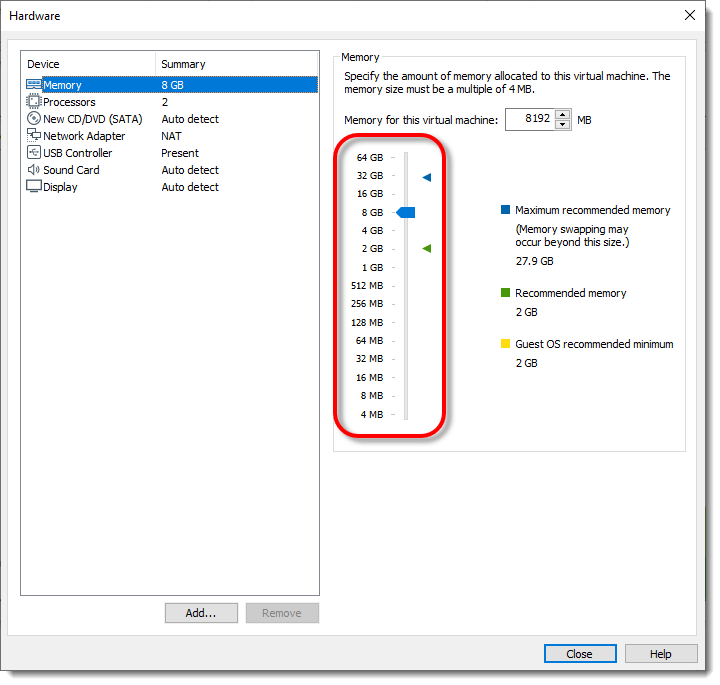
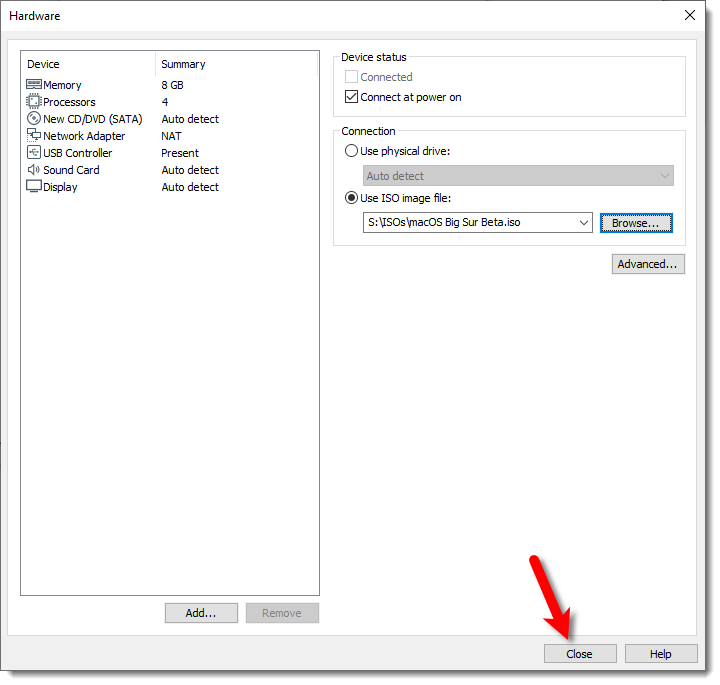
- Increase the memory to at least 8GB for better performance.
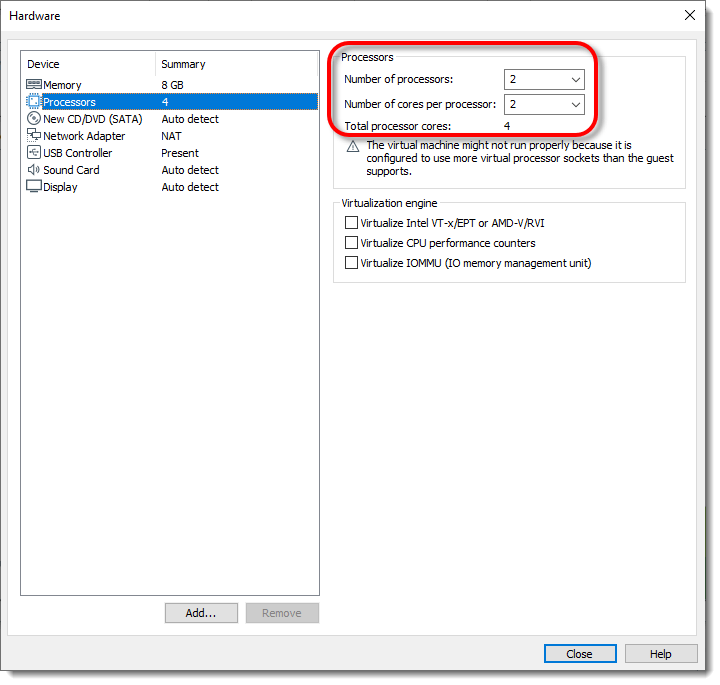
- From the options given on the left-hand side of the screen, choose Processors. After that, increase the number of cores to 4 cores for higher performance. If you do not have that many specifications, the minimum requirement is 4GB Memory and 2 Cores of Processor.
- On the left-hand side, select New CD/DVD (SATA) from the menu. Then, select Use ISO image file and hit the Browse button.
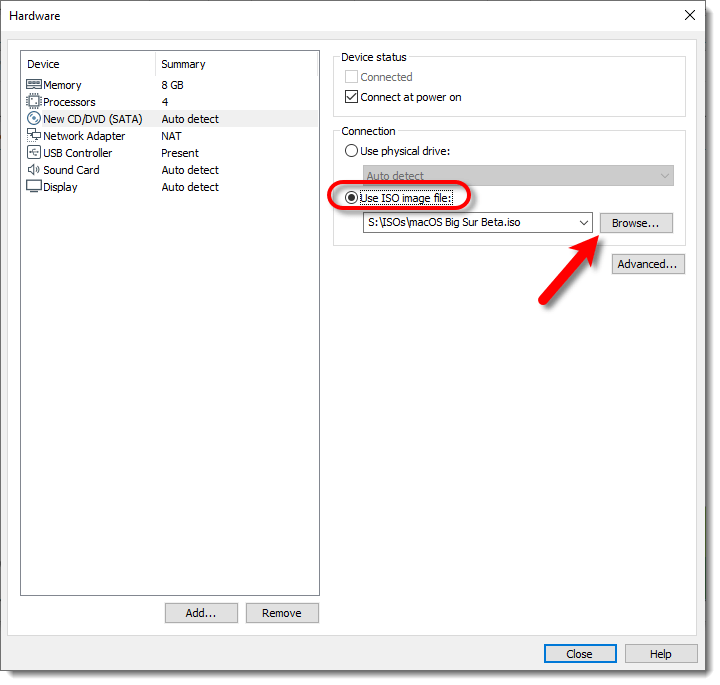
- Locate the iso file that you downloaded and click on Open.
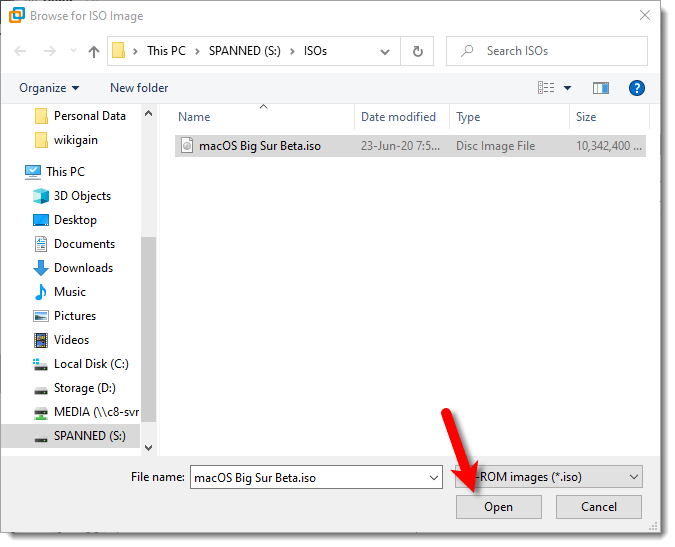
- Once the ISO file has been selected, click on the Close button.
- Select Finish.
Step 4: Edit MacOS Big Sur VMX File
- Open the Virtual Machine folder that you selected in Step 3.6. If you didn’t specify this manually, the default location is Documents > Virtual Machine.
- Open macOS Big Sur Beta.vmx file via Notepad.
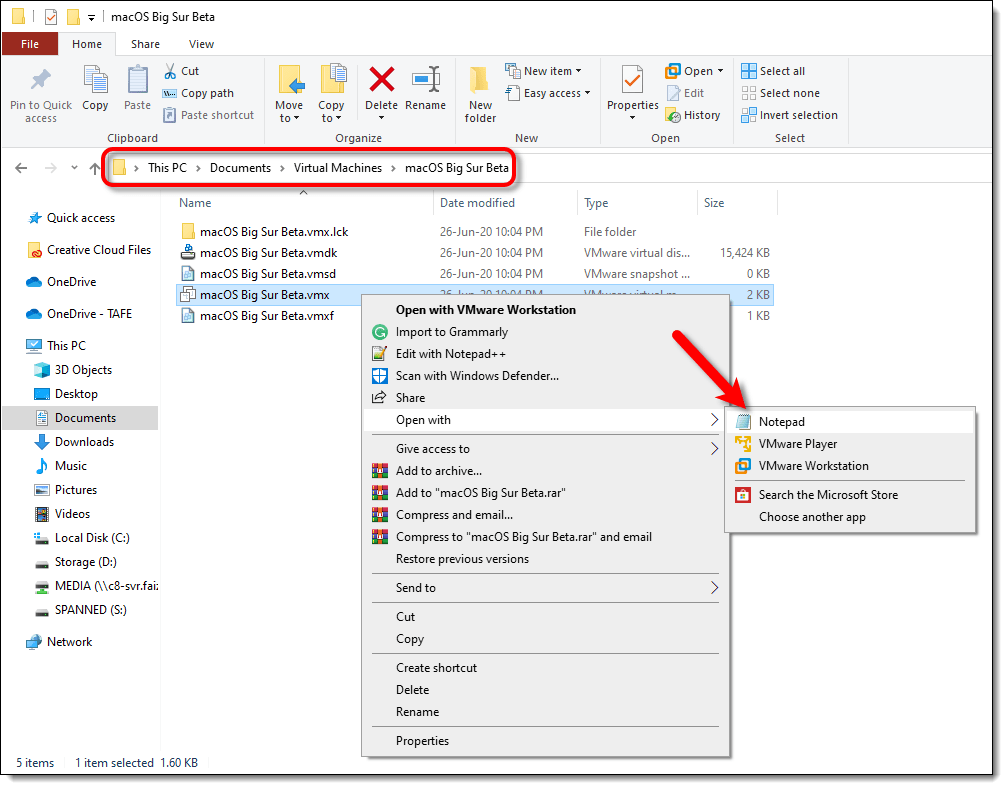
- At the end of the file, paste the following code and save the file.
smbios.reflectHost = "TRUE"
hw.model = "MacBookPro14,3"
board-id = "Mac-551B86E5744E2388"
smc.version = "0"
Step 5: Launch macOS Big Sur Virtual Machine
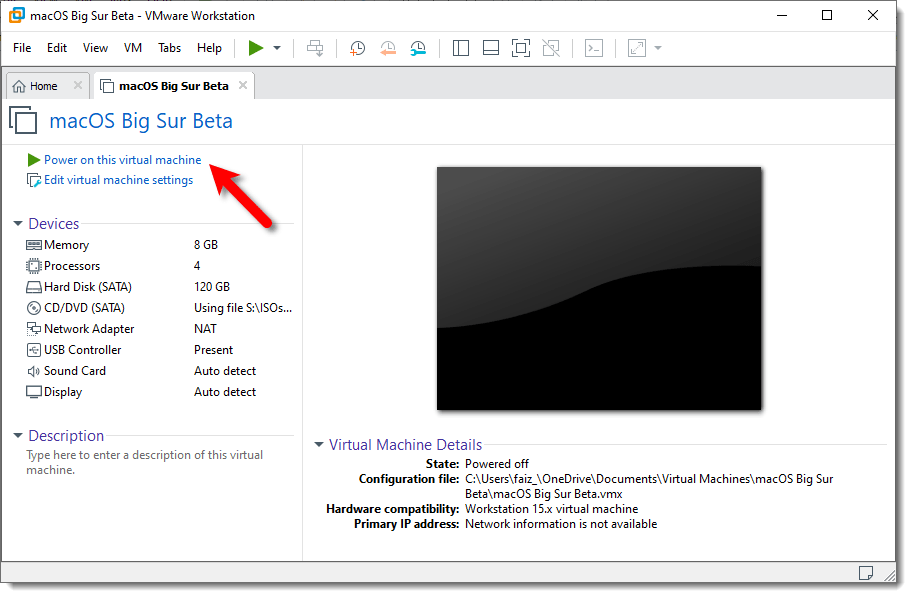
- Open VMware.
- On the macOS Big Sur VM window, click on Power On this Virtual Machine.
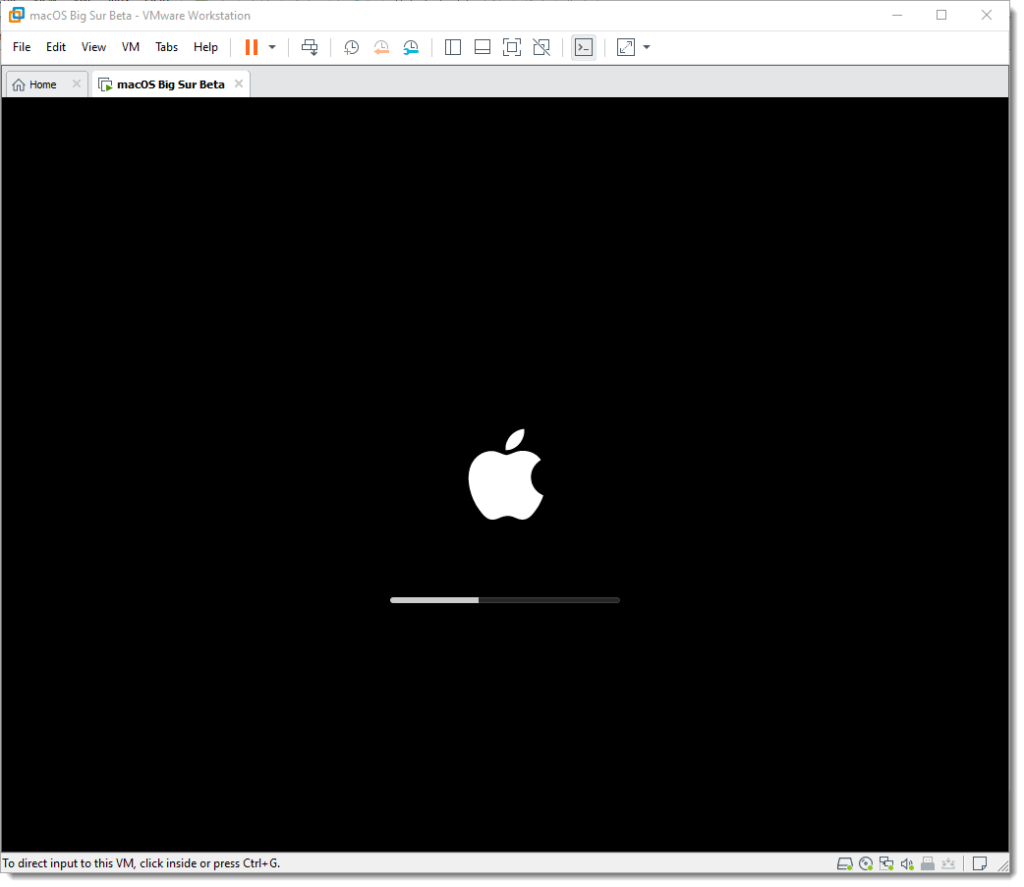
- You will now have to wait while the app boots up.
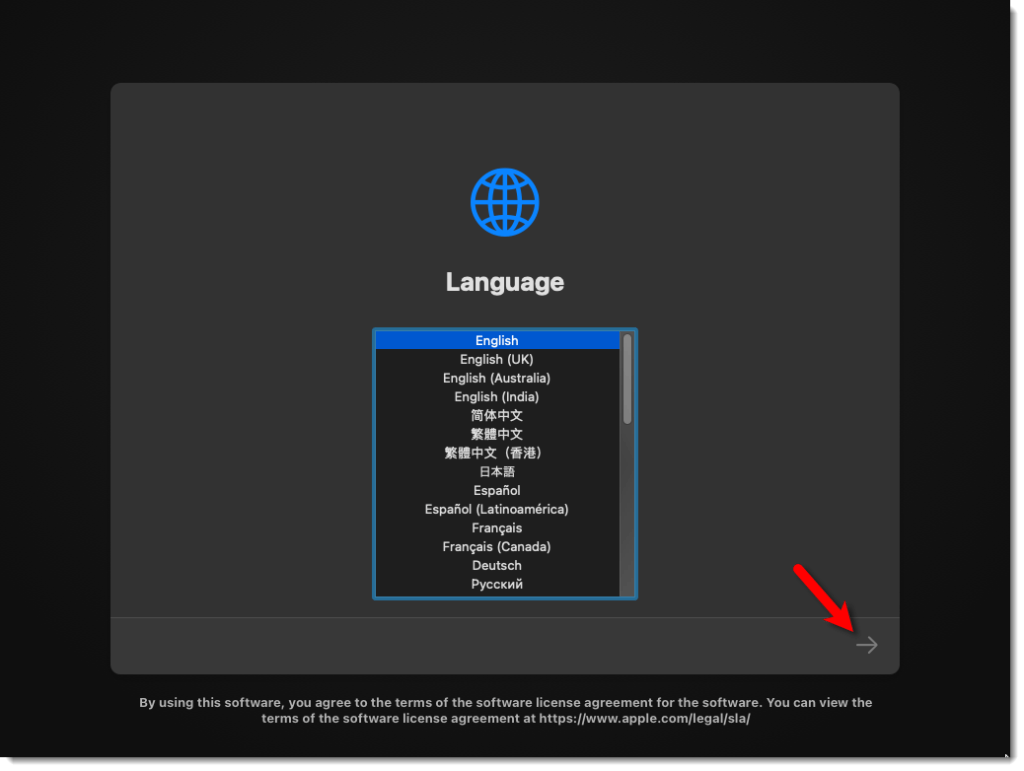
- Choose your language and click on Next.
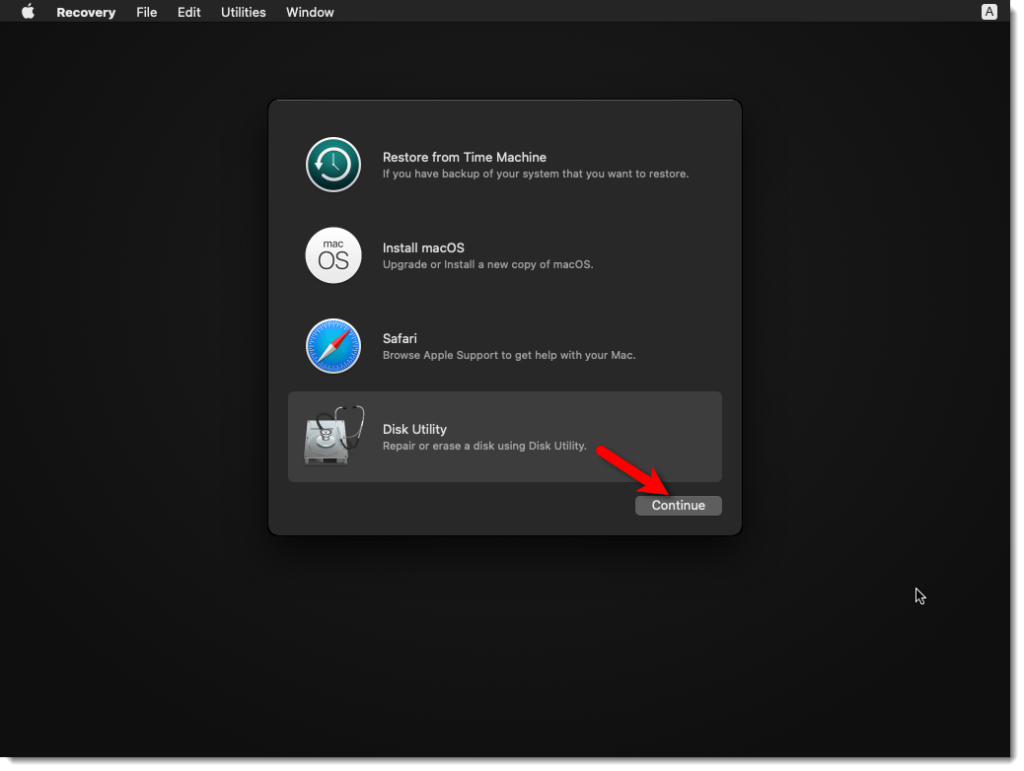
- Choose Disk Utility and hit on the Continue button.
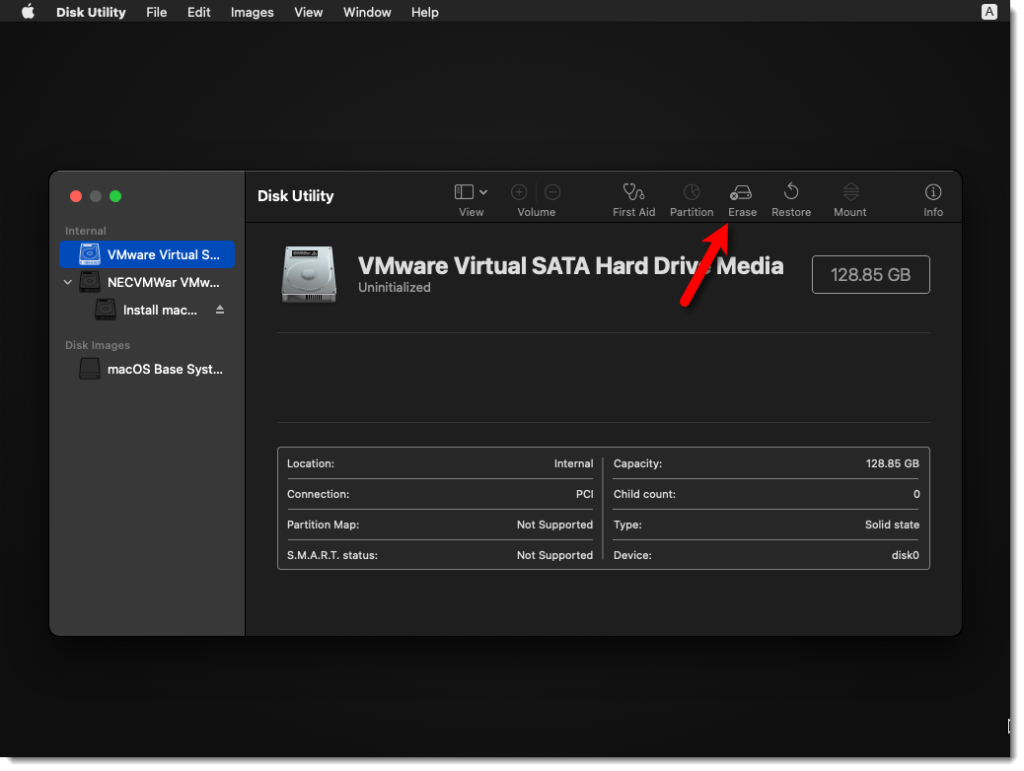
- Erase the VMware Virtual SATA Hard Drive Media.
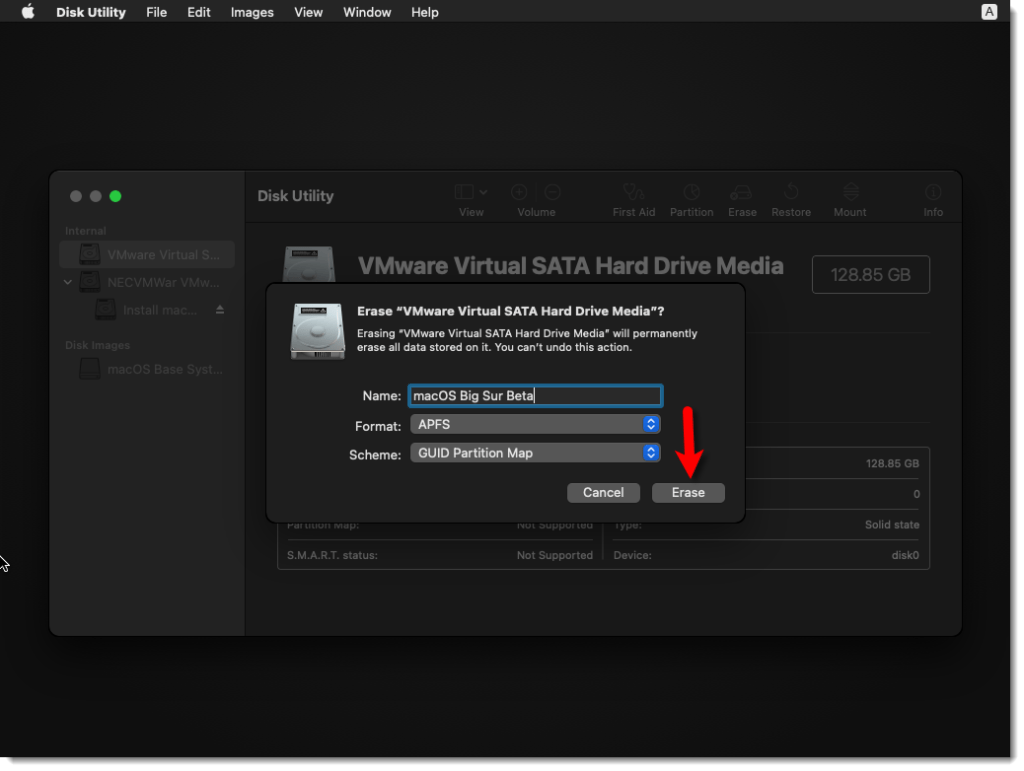
- From the Format options, choose APFS and then click on Erase.
- Click on Done.
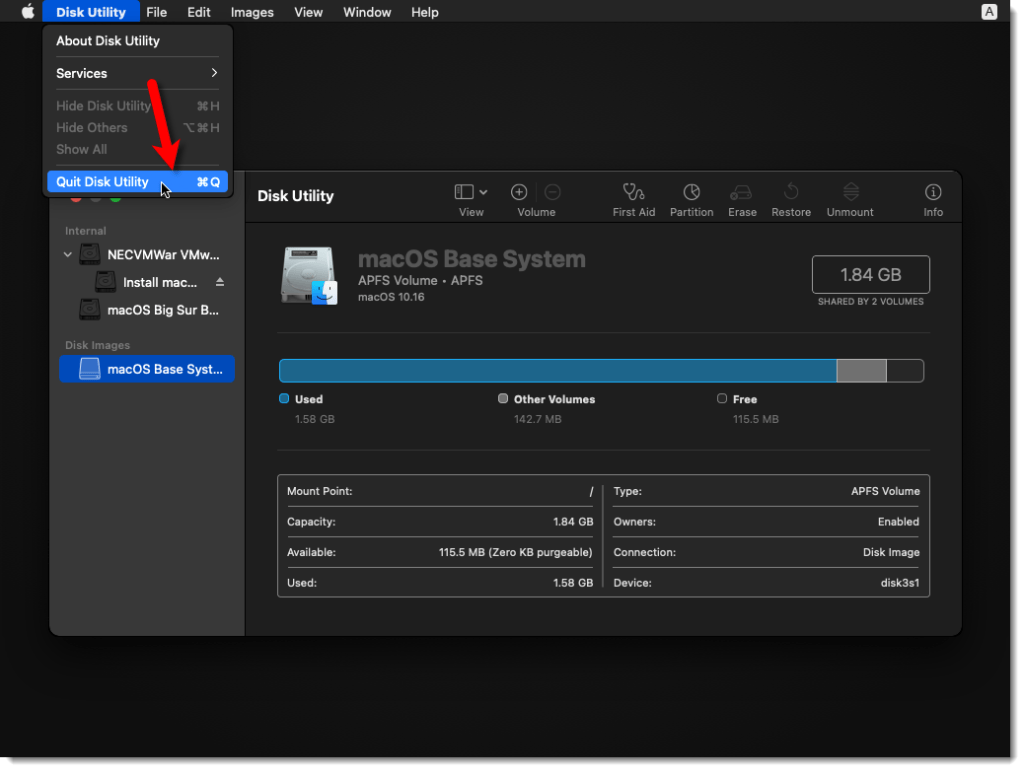
- From the Disk Utility tab on the left-hand side, click on Quit Disk Utility.
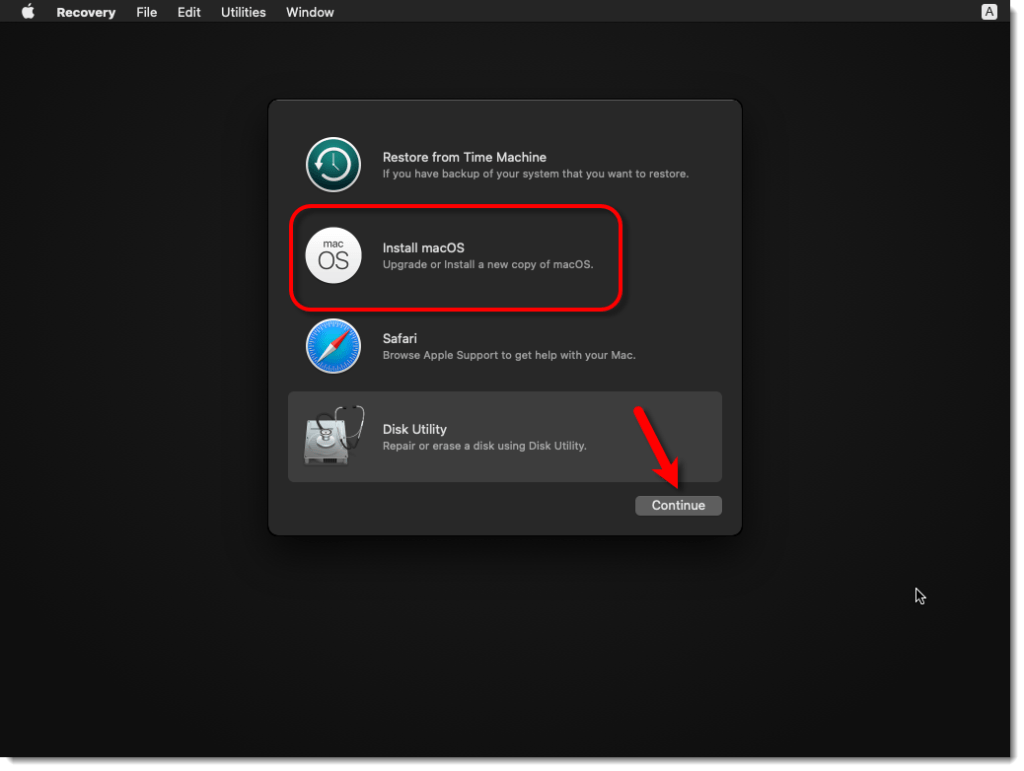
- You know what to do here. Select Install macOS and hit Continue.
Now, the installation process will start. During the process, macOS will restart multiple times. You are expected to keep calm as this process takes up to 45 minutes to finish.
Step 6: Install VMware Tools (Optional)
If you have followed the above steps, you would have noticed by now that that the macOS Big Sur resolution is not according to that of your screen resolution. Moreover, there is no built-in option to change that. To resolve this issue, an external application has to be installed called VMware Tools. The steps to install it and change the resolution of macOS are very easy to understand. Therefore, we will not discuss the steps here.
The guide to install macOS Big Sur on Windows PC ends here. If you have followed the steps correctly, macOS would run smoothly on your Windows PC without any trouble. If you want to install macOS beside Windows and not on VMware, follow our guide How to Install macOS Catalina 10.15 on Windows PC and Laptops.