
Table of Contents
I started blogging back in 2013. It was all new for me back then. The first-ever Content Management System (CMS) I used was Joomla. However, I was later introduced to and influenced by the WordPress CMS. I quickly shifted towards it as it’s way easier and convenient platform for blogging. Plus, there are thousands of themes and plugins readily available that you can use to improve your site appearance and add more features.
Not to mention a huge WordPress community out there to support you. And Wordpress is regularly updated.
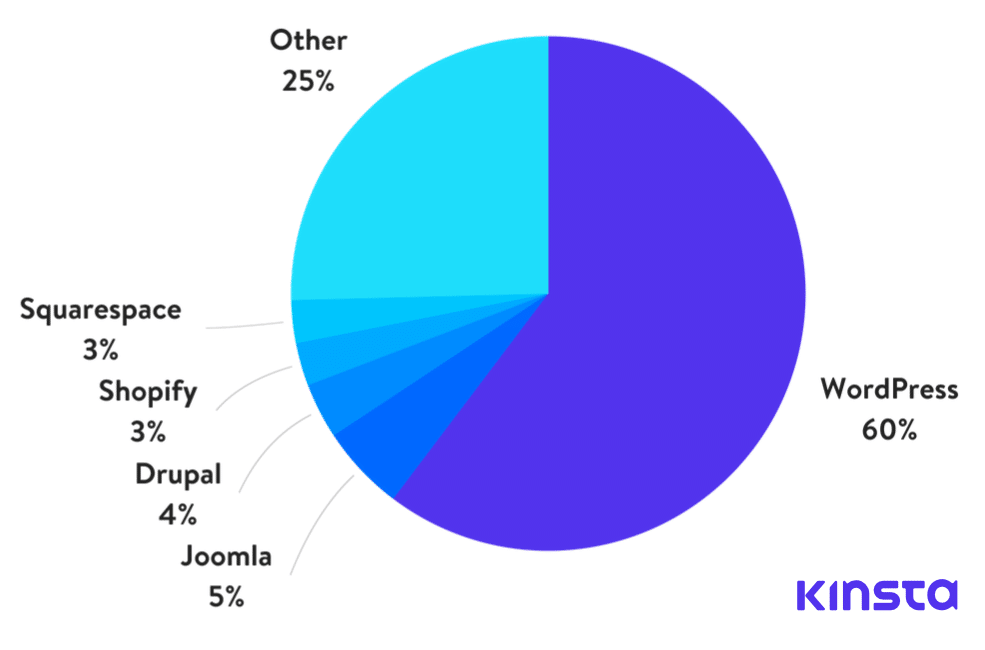
Source: Kinsta
You can use WordPress CMS to build all kinds of websites such as a blog, forum, or a social media website like Twitter, Facebook, or Reddit. You can also launch an eCommerce website to sell your products worldwide or build a community to share thoughts and ideas. Whatever may be the case, in this guide, I will take you through the easiest way to build a WordPress powered website for free and that too under 10-minutes.
This site is based on the Bimber Wordpress theme from BringThePixel available on Themeforest.
Recommended Post: How-To Start an Online Business with No Money 2018
Things You Need to Create a Free Wordpress Site
- A working PC with an active internet connection
- An Account with Digital Ocean: Use this link to sign up at Digital Ocean and get $100 free credits for 60 days that you can use to host a server on superfast SSD enabled virtual cloud servers for 2-months absolutely free.
NOTE: You need to add your credit card at DigitalOcean to get $100 free. CARD WILL NOT BE CHARGED. You can remove your card anytime before the end of 60 days if you don’t want to continue hosting
- A free domain name. Get it here. Just sign up, search for the domain and buy it FREE
- You may also buy a premium .com or .org domain from Godaddy or similar site
Steps to Build A Wordpress Site From Scratch for Free
Step 1: Get Free or Premium Domain
- Go to Freenom.com and search for a free domain name.
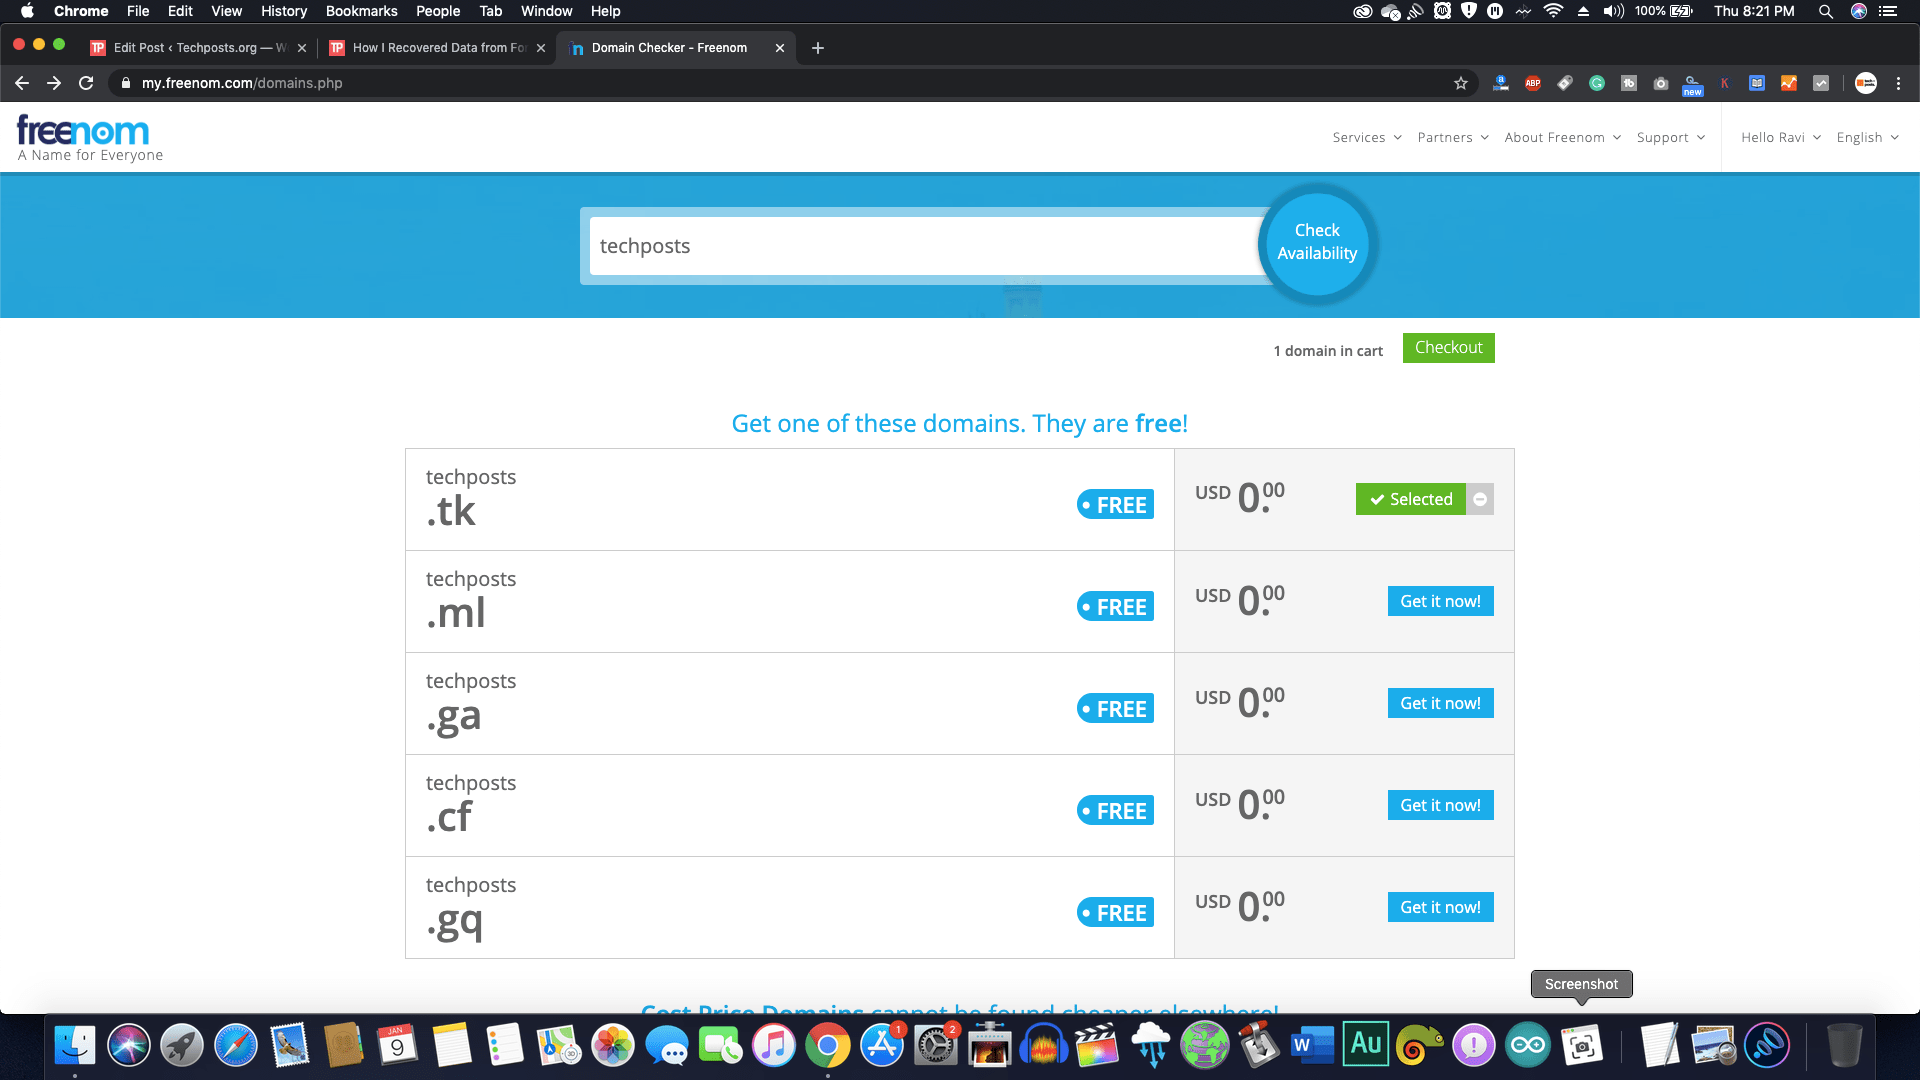
- Click ‘Get it now’ to select the domain and click ‘Checkout’
- Under the ‘Period’ section, choose duration which is free for up to 12 months
- Click ‘Use DNS’ and then click ‘Enter your own DNS’ tab
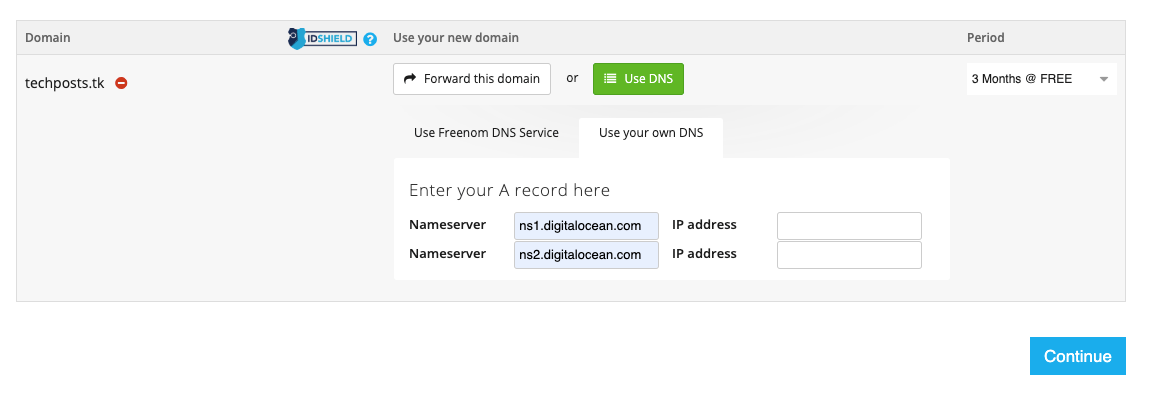
- Enter ns1.digitalocean.com and ns2.digitalocean.com in nameserver fields. Keep IP fields empty
- Click ‘Continue‘
- Click the checkbox to agree and ‘Complete Order’

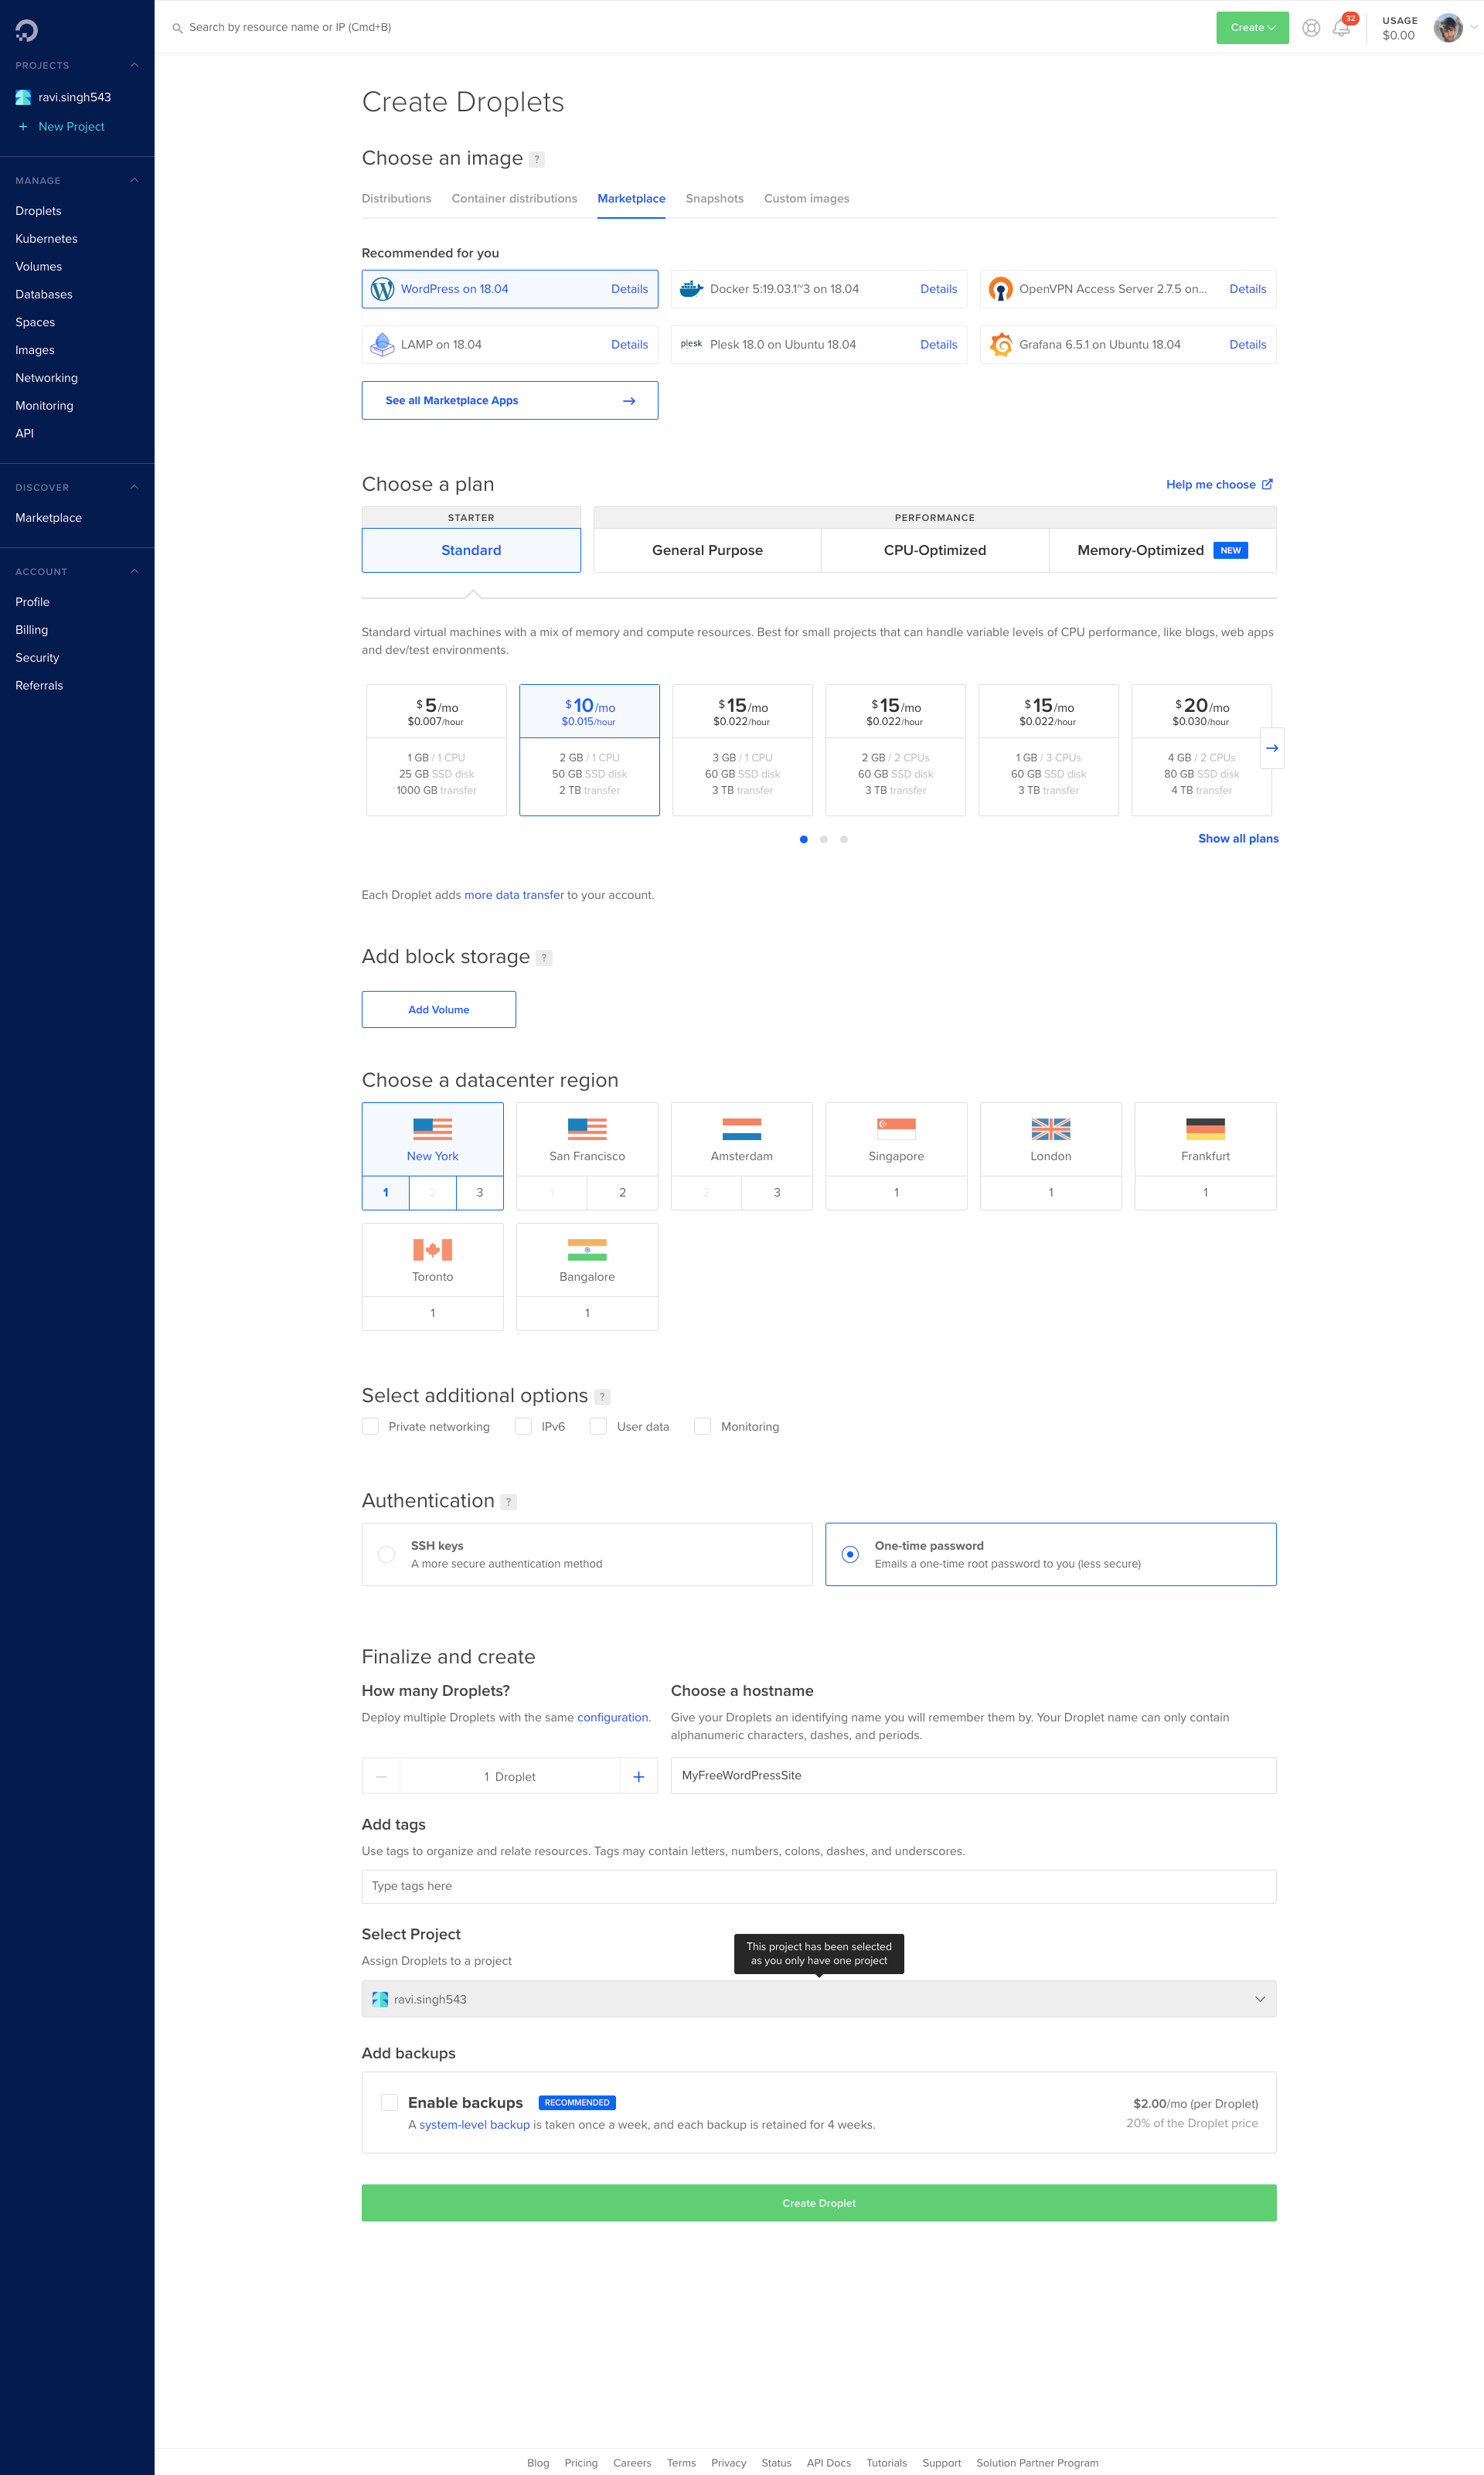
Step 2: Create a Web Server
- After signing up at DigitalOcean, sign in to your Digitalocean account and click ‘Create‘
- Click ‘Marketplace’ and choose ‘Wordpress’
- Select $10 Server and enter a name for the server
- Click ‘Create’
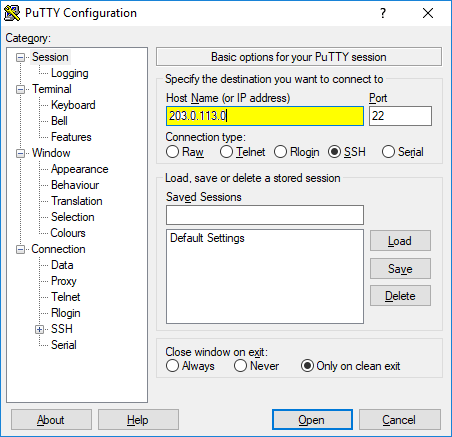
- Meanwhile, install and open Putty on Windows or open Terminal in Mac
- Then check your email for server IP and password

- In the Putty app, enter the server IP and click Open. Type root and press Enter
- In Mac Terminal, type ssh root@YourServerIP
- Now copy the root password you received on your email and right-click on the Putty Terminal or Mac Terminal to paste it. Make sure you click only once
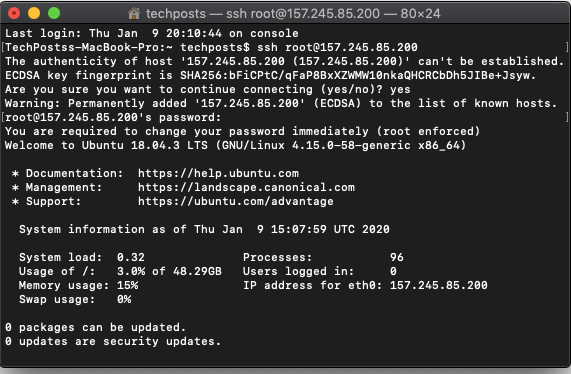
- Press ‘Enter’ key
- Right-click once again to paste the current password
- Then type a new password.

NOTE: Typed password won’t be visible in the Terminal but it’s been typed hidden. Keep the password strong
- Press Enter and then retype the new password one more time followed by Enter keypress
- Enter the domain name you registered for free or bought via Godaddy and press ‘Enter’
- Enter valid email ID and press ‘Enter’
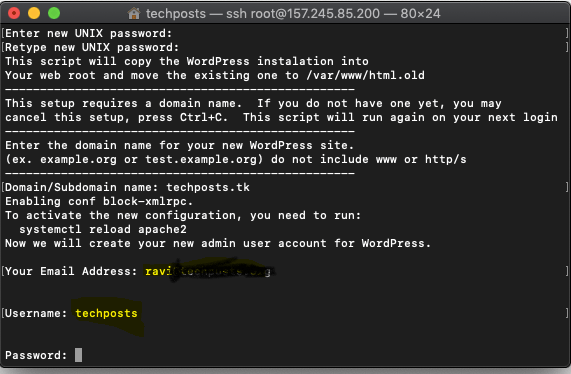
- Type Username for WordPress login and then enter the password
Remember this WordPress username and password. Otherwise, you won’t be able to access WordPress backend.
- Give a name to your blog and press ‘Enter‘

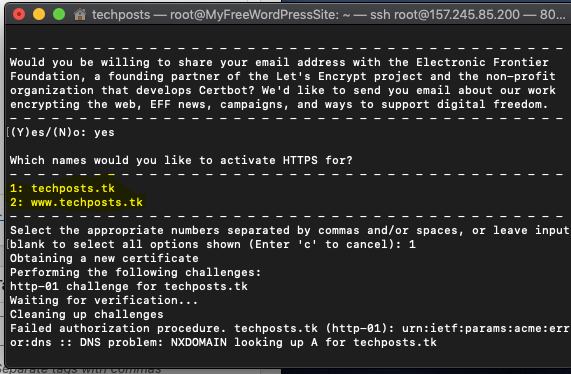
- Type ‘y’ and press Enter to configure and add SSL (https) certificate for your domain for free
- Enter your email ID once again to receive notification for SSL certificate renewal
- Press ‘a’ and hit ‘Enter’

- Type ‘yes’ and hit ‘Enter’
- Choose a name: with www or without www. Enter the choice number and press ‘Enter’
After it’s done,
Step 3: Map Domain to Server IP at DigitalOcean
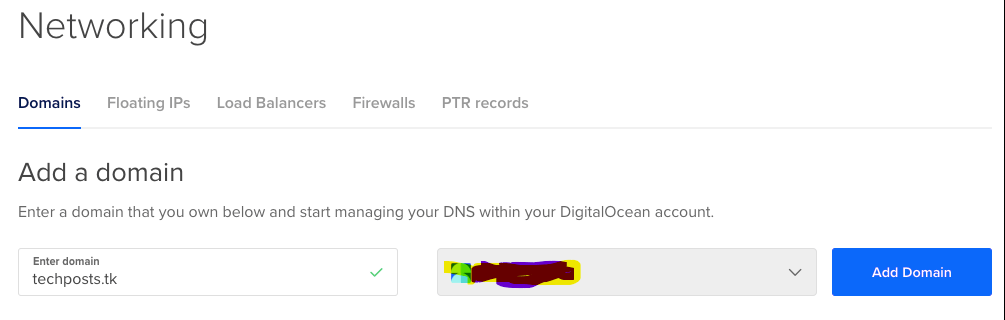
- Open your DigitalOcean account and click ‘Networking‘
- Enter your domain name in the field and click ‘Add Domain‘
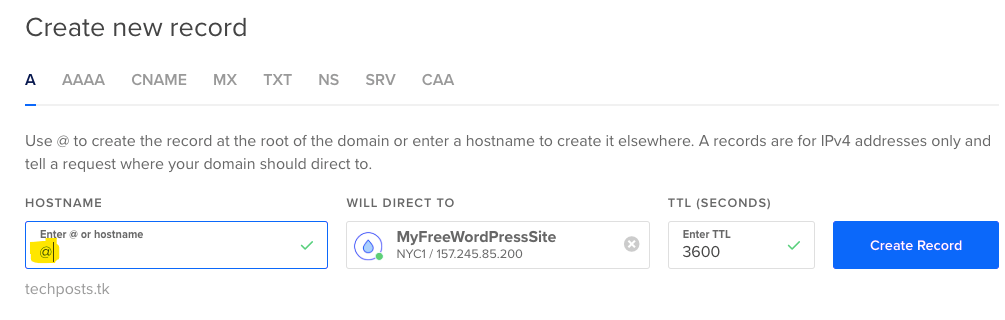
- Enter @ in the first field and choose your server from the second field
Step 4: Check Configuration
Type your domain name in the web browser and press ‘Enter’.
NOTE: DNS (Domain Name Server) propagation may take up to 24 hrs. after changing the name servers. If the site doesn’t open, try after a few hours
Step 5: Start Blogging on Your New WordPress Site
If your site web page loads, you are ready to post new blogs or turn it into a marketplace by installing themes and plugins
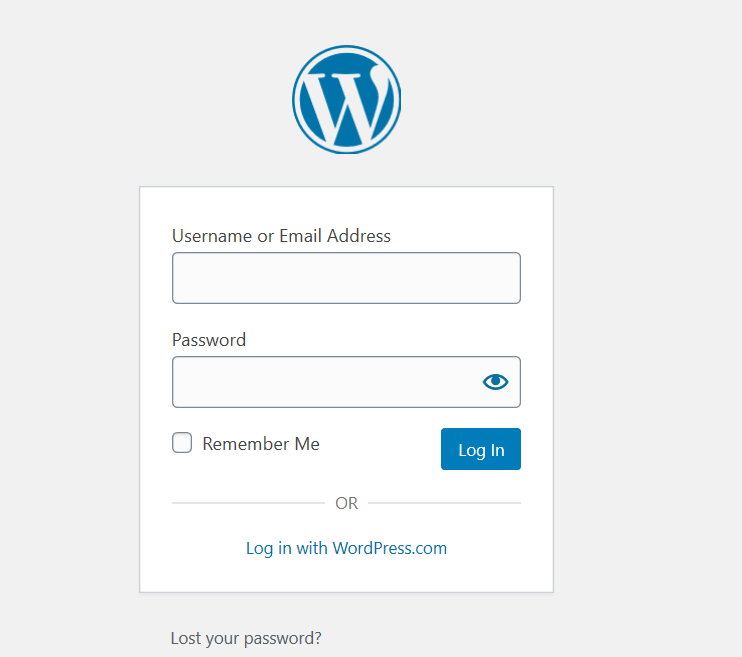
- To access the backend, go to YOURSITE.COM/wp-admin
- Enter your email and the password you entered during server setup and click ‘Login’
- Click Post>Add New to start sharing your stories, brand to the world.
Create social media fan pages and share your blog to get readers’ attention. If you want to build an eCommerce website, read about Woo Commerce.
Conclusion
Now that you have learned how to build a WordPress Website for free and that too just under 10 minutes, it time for you to start writing. Choose a niche and work on it. Get backlinks from authority sites by writing guest posts and make your site visible to gain rank and traffic.
Follow the best practices coz you may rank well quickly by doing a grey hat and black hat SEO techniques. However, survival is something isn’t guaranteed for such sites. If you want to seriously blog, then follow the best SEO practices and techniques. If you are not able to think what to write, use tools like Keyword Everywhere, Keyword Shitter (it literally shits keywords), search for keywords in your niche and create blogs.
If you find this guide helpful, consider sharing it. Also follow us on Twitter, Facebook, Reddit, YouTube, or wherever the hell you are on social media, we are freakin everywhere. Follow us to get instant updates on such guides.
Good luck!